

Even in case you’ve been utilizing Windows for many years, it’s so sprawling and complicated that there is likely to be actually useful, but extra obscure options that may nonetheless shock you. We’ve tracked down ten little-known Windows options that may simply enhance your effectivity, your consolation, or probably even your enjoyable whereas utilizing your PC.
All of them ought to work on each Windows 10 and 11 alike, and every solely takes a couple of seconds to check out. Here we go, in no explicit order:
If you’re seeking to go even additional down this rabbit gap, take a look at our roundup of 10 truly helpful Windows tools you might not know about, how to tune Windows for laser-focused productivity, and how to fix Windows 11’s worst annoyances. Meanwhile, in case you’re on Windows 11, an enormous new annual replace simply landed in your PC. Here are the 5 features you’ll want to check out first.
Mouse hover window activation
Michael Crider/IDG
Whenever I take advantage of a brand new PC, that is the very first characteristic I allow. Technically it’s a part of the accessibility instruments, however many customers may discover it helpful it doesn’t matter what their stage of mobility. This setting means that you can activate a window just by transferring your mouse cursor over it, as a substitute of requiring an additional click on earlier than interacting with this system. It’s a tiny change, however one which makes an enormous distinction, particularly on a laptop computer trackpad.
To change this setting, go to Control Panel, then click on the Ease of Access Center. Click “Make the mouse easier to use.” Under “Make it easier to manage windows,” choose “Activate a window by hovering over it with the mouse.” Click Okay to allow the setting.
Easy window association
Michael Crider/IDG
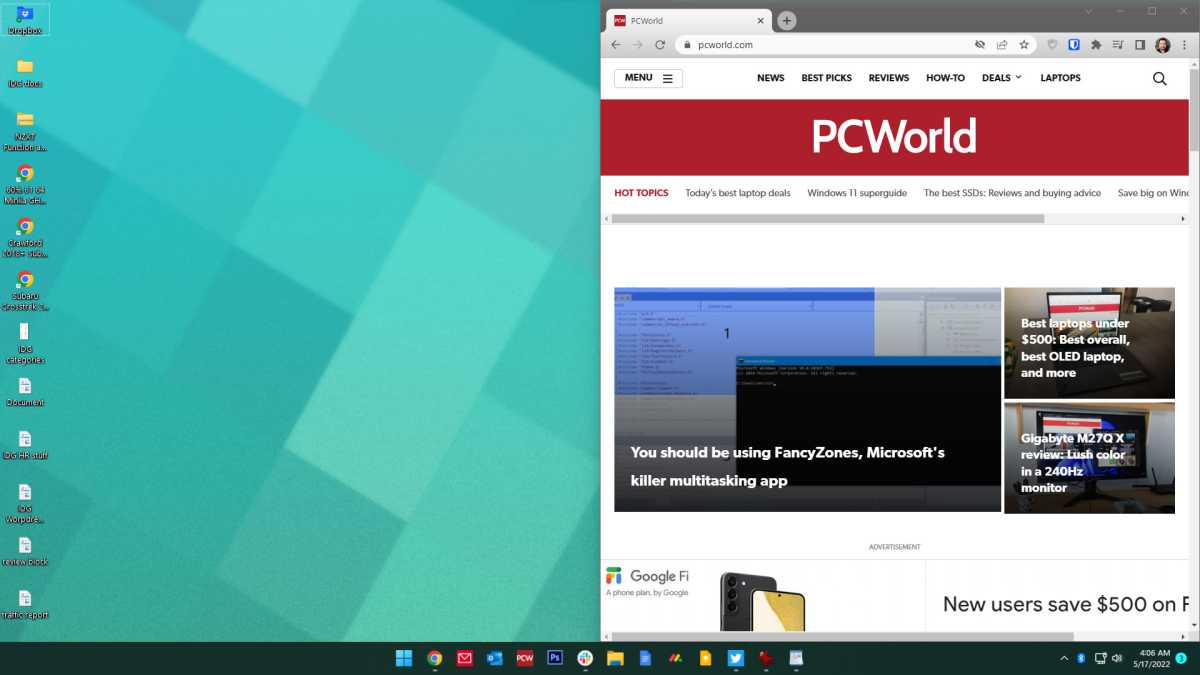
With newer variations of Windows, it’s simple to maneuver home windows (sorry) round your display screen. Hold down the Windows key in your keyboard, then press the arrow keys. Pressing left or proper will immediately transfer the window to the corresponding half of the display screen. Pressing up or down will alternate between halving the window within the higher or decrease portion of the display screen, maximizing it, or minimizing it to the toolbar.
These shortcuts even work throughout a number of displays. It’s a good way to rapidly organize your home windows throughout screens and displays with minimal effort.
Quick taskbar launching
Michael Crider/IDG
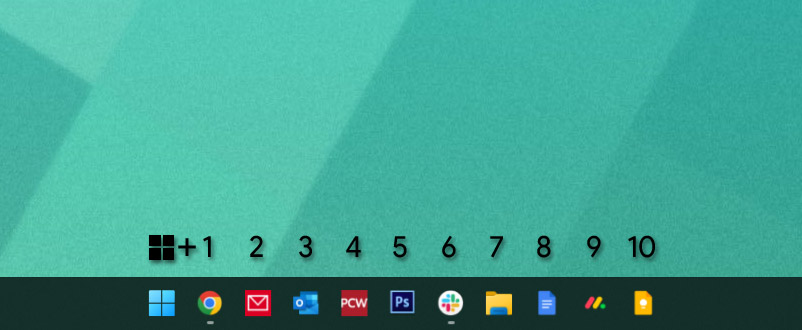
If you need to rapidly handle home windows, you most likely pin your most-used packages and instruments to the taskbar. If you need to get at them even quicker, merely maintain down the Windows button and press the quantity in your keyboard that corresponds to their spot on the taskbar. On mine, opening Chrome is Win + 1, opening Photoshop is Win + 5, et cetera.
Rearrange your system tray

Michael Crider/IDG
Speaking of the taskbar, the system tray (the little mini-icons on the proper facet) can usually get crowded in case you’re utilizing numerous software program. That’s doubly true in case you run numerous packages at startup. But if it’s cluttered, you don’t must maintain it that means. Click and drag any of the icons round to re-arrange them. You can put them within the drop-down menu to cover them (simply click on the arrow to point out them once more), or set them to the proper to make them completely seen.
Night mild
Michael Crider/IDG
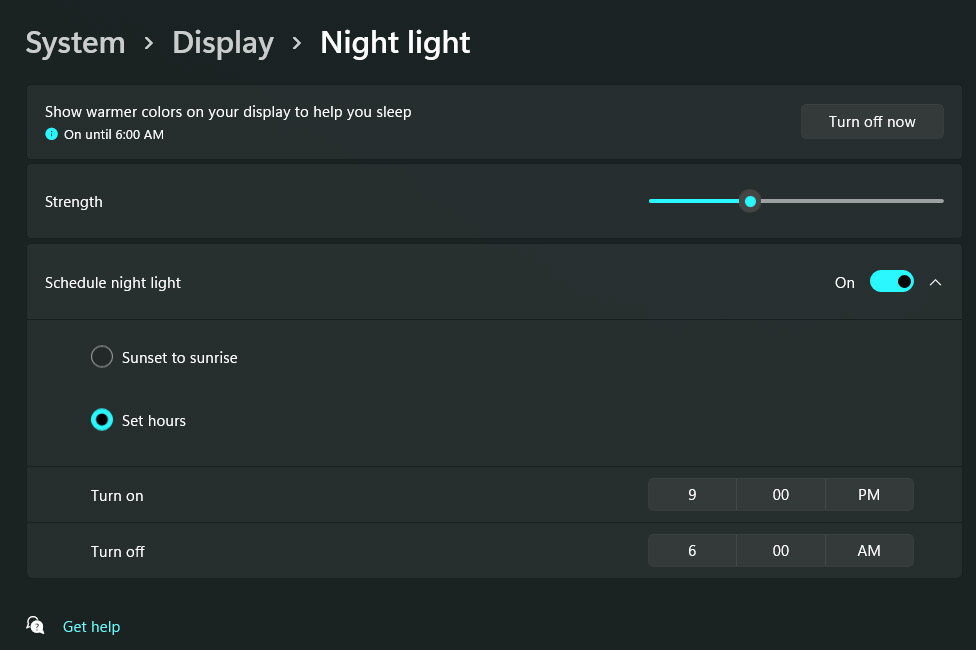
Those of us who’ve less-than-healthy computing habits have a tendency to make use of our PCs late into the night. You ought to most likely reduce it out, but when not, utilizing the built-in evening mild characteristic couldn’t harm. Simply search the Start menu for “Night light” to seek out the setting that can dim your laptop’s display screen and decrease its blue mild output. Once it’s arrange, you’ll be able to toggle this anytime within the fast settings menu (Win + A) or have it activate and off routinely at particular instances of the night and morning.
Instantly deliver up the Task Manager
Michael Crider/IDG
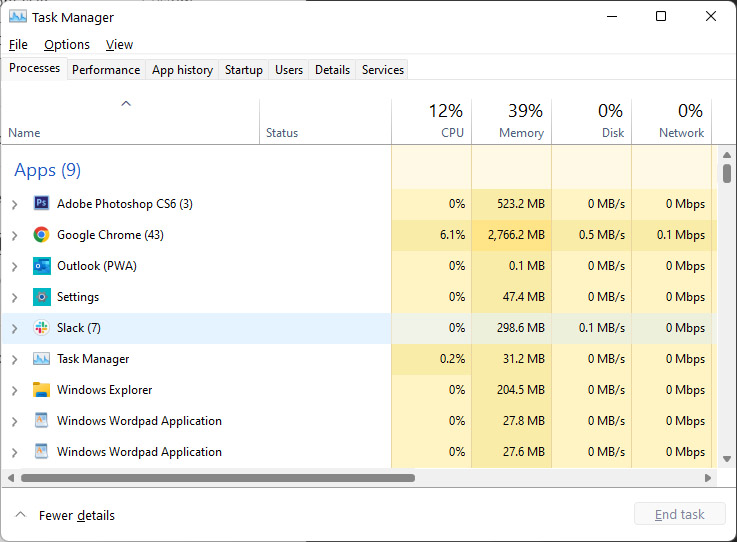
This is an outdated trick, however with the expanded features of the Task Manager in Windows 10 and 11, it’s grow to be extra helpful. From any display screen in any program, press Ctrl+Shift+Escape to open the Task Manager. From right here you’ll be able to manually shut packages, rapidly entry the Run command, or click on the Startup tab to trace down packages which are sneakily beginning with Windows.
Screenshot methods
Michael Crider/IDG
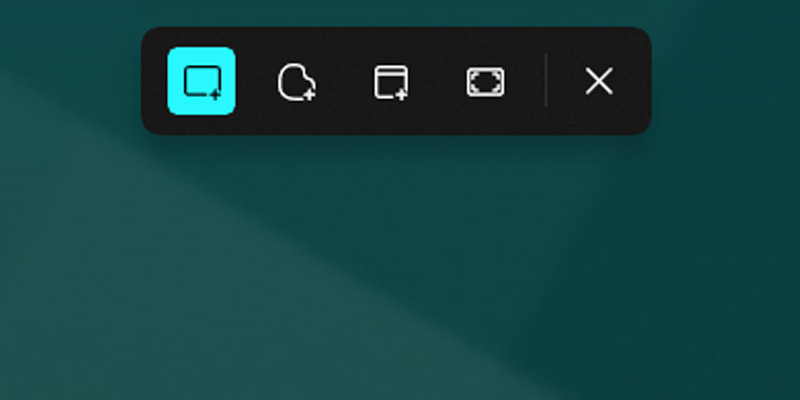
If you haven’t achieved so but, you really want to start out utilizing the official (however obscure) Windows Snipping Tool, which expands the working system’s quite fundamental screenshot instrument (tied to the Print Screen button) with all types of recent goodies. Press Win + Shift + S concurrently to see choices to immediately screenshot your total workspace, only one window, or a freeform choice drawn together with your mouse. Your screenshot is then copied and able to be pasted into an internet kind or picture editor.
In a rush? You can nonetheless entry the outdated screenshot performance (which saves a full picture file in your Pictures>Screenshots folder) by urgent Win + Print Screen. Alternately, you’ll be able to copy the total screenshot as a substitute with Ctrl + Print Screen, or copy a number of simply your at the moment energetic program with Alt + Print Screen.
Search by most lately put in packages
Michael Crider/IDG
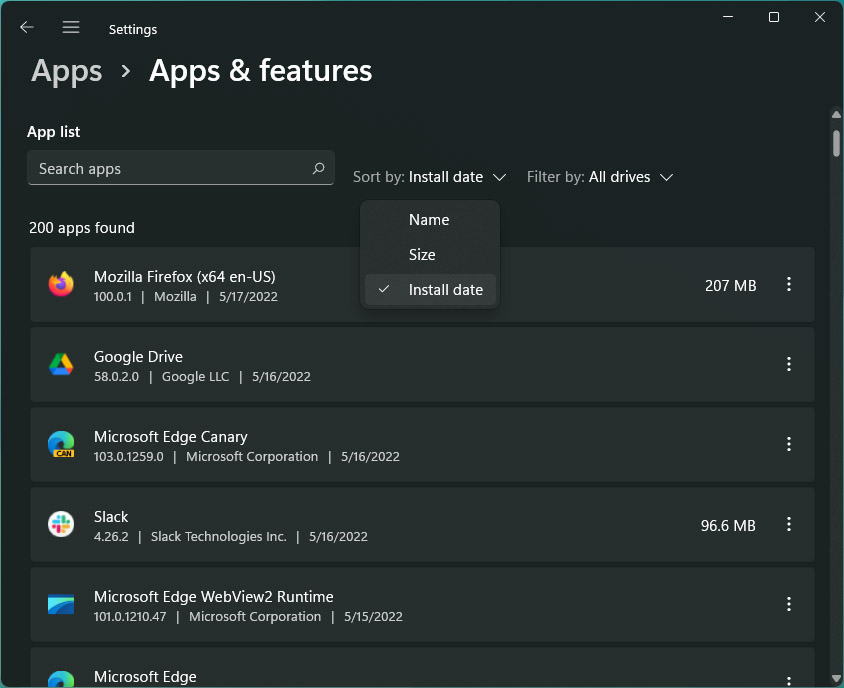
One of the smallest modifications in Windows that I’ve gotten essentially the most use out of is that this tweak to the way in which you search by packages for uninstallation. It makes it simple to seek out the newest program you put in, and eliminate it if you wish to. Press the Windows key, seek for “Add or remove programs,” and click on it to open the Settings menu. You’ll be introduced with a listing of each program put in in your laptop.
In earlier variations of Windows, you’d must hunt by this lengthy listing alphabetically. Now you’ll be able to seek for it, however what if it’s not listed below the identical title? Just click on “Name,” then “Install date.” The listing is now in reverse chronological order, displaying your most recently-installed packages. Click the three-dot menu on the proper to eliminate any entry. Super simple!
Quickly hook up with new screens
Michael Crider/IDG
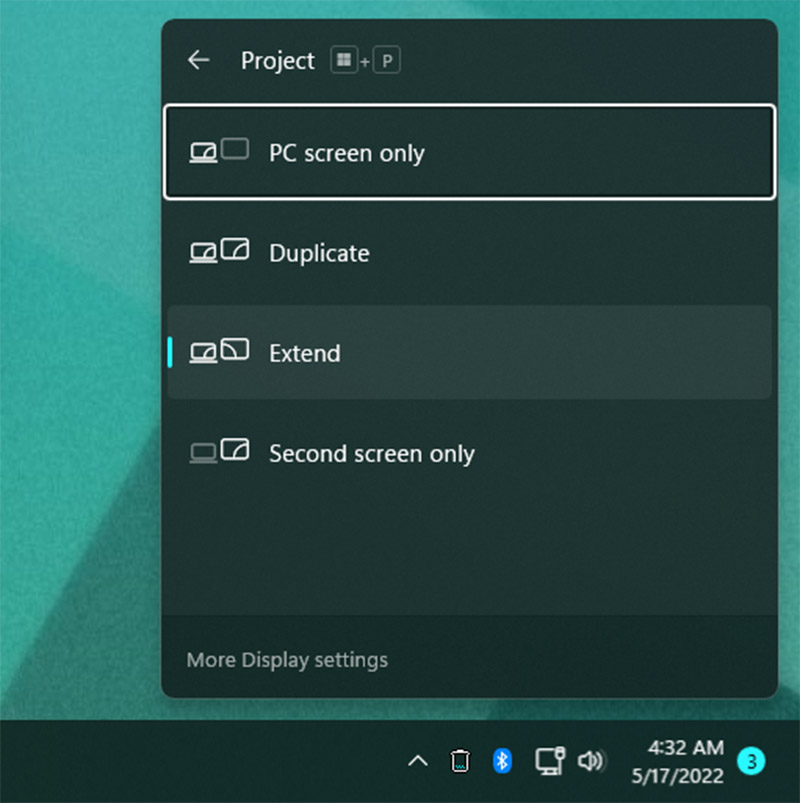
Most of the time Windows will routinely allow a brand new monitor or display screen if you plug it in. But if it doesn’t, there’s a fast method to regulate your show setup. Just press Win + P to open the “Project” menu. From this pop-out you’ll be able to choose Duplicate (mirror your main display screen to your secondary), Extend (use multiple display screen directly), or Second display screen solely (useful for utilizing only a monitor and never your laptop computer display screen).
This menu is nice in case you’re utilizing a multi-monitor setup and also you need to rapidly disable secondary screens, equivalent to for watching a film or enjoying a recreation, then allow them once more if you’re achieved with out diving into menus.
Adjust textual content and ingredient sizes
Michael Crider/IDG
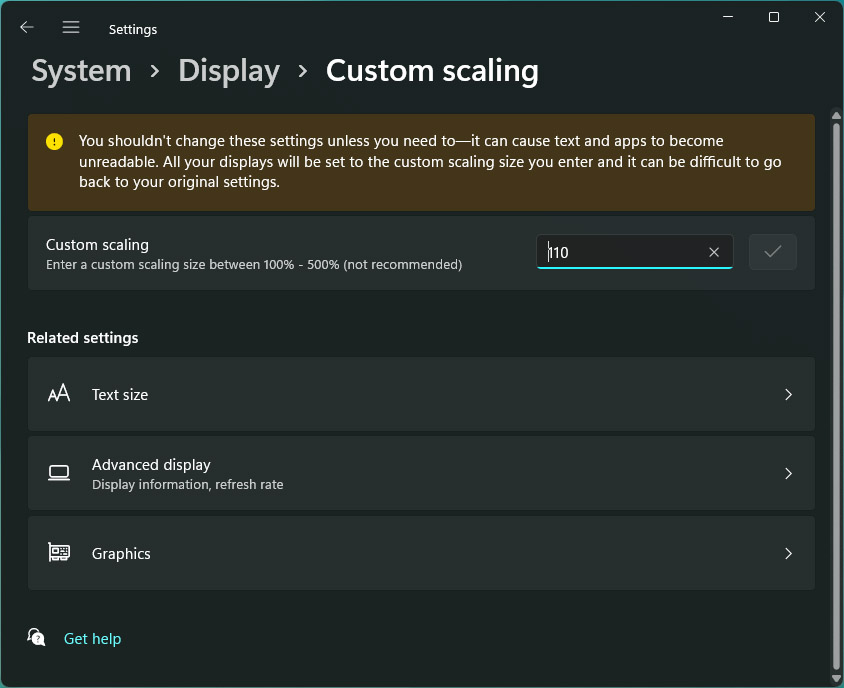
You most likely know which you could regulate the scale of what you see in Windows by altering your decision. But not like the times of CRTs, your laptop computer display screen or monitor has a really particular decision it’s meant to run at. Changing that worth isn’t an incredible thought; it may end up in a stretched or pixelated picture, and video received’t look its finest.
Instead of fixing the decision, go to Display Settings, scroll down a bit, and alter the Scale setting. This could make textual content and pictures look larger or smaller in your display screen with out altering the decision of the picture itself. Pre-set values are available in 25 p.c increments, however you’ll be able to set a customized worth in case you want (with a system reset). There’s additionally an choice that can regulate simply the textual content measurement.
Many packages include their very own scaling and textual content settings, particularly text-heavy apps like browsers and textual content editors. Tweak them to your liking to seek out essentially the most comfy mixture.
Quickly regulate icon sizes in Explorer
Michael Crider/IDG
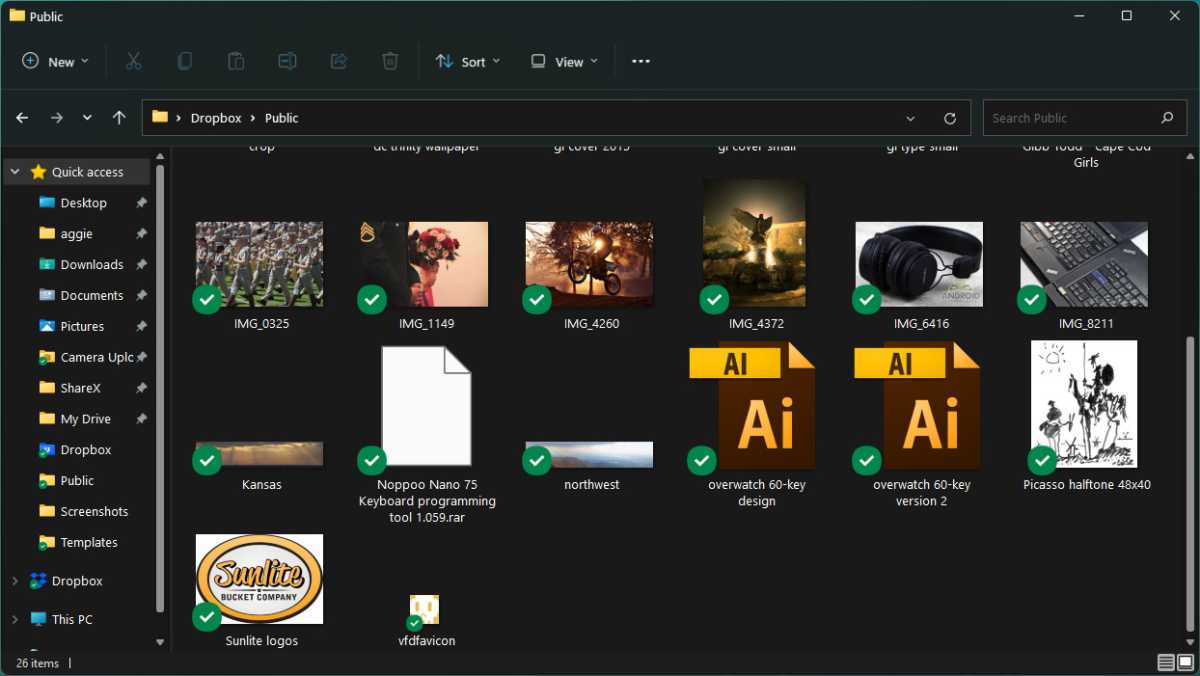
If it’s worthwhile to see icons higher in an Explorer window particularly, do this fast trick. Hold down the Ctrl button and scroll your mouse wheel up and down. Thumbnail photographs will get larger or smaller in response. Scroll far sufficient and the view will truly change from thumbnails to lists with mini-icons. This works even on the Windows desktop, with no Explorer window in use.
Explorer isn’t the one program to make use of the Ctrl+mouse wheel shortcut to alter the view. Browsers, electronic mail shoppers, picture editors, and textual content editors usually use it to zoom in or out or rapidly change textual content scaling. It’s a typical instrument value studying.
That nearly does it for this roundup of suggestions and methods! Once once more, in case you’re seeking to go even additional down this rabbit gap, take a look at our roundup of 10 truly helpful Windows tools you might not know about, how to tune Windows for laser-focused productivity, and how to fix Windows 11’s worst annoyances.