
Microsoft primarily provides Windows in two completely different editions: Home and Professional.
Windows 11 Home is pre-installed on many PCs, whereas the Pro version is usually put in on enterprise units. This is as a result of Windows 11 Pro may be built-in into an organization’s community infrastructure (Active Directory), whereas the Home version can’t.
However, this function will not be vital for personal customers who’re unlikely to function a Windows server of their house community.
Nevertheless, the Windows Pro version has some options which might be of curiosity to everybody.
If you wish to reap the benefits of this, you may carry out a Pro replace for a price. For particulars, see the field “Upgrade from Windows 11 Home to Pro.”
Home or Pro? Users of the Home version obtain many of the extra Pro features freed from cost. Additional instruments present what’s lacking within the cheaper Windows version.
IDG
But an improve from Windows Home will also be fully free: Almost all Pro features may be changed by free software program.
It is even attainable to unlock two Pro features within the Home Edition, which we describe in additional element on this article.
See additionally: Windows survival skills: 8 things every PC user should know how to do
The variations between Windows Home and Pro
There are literally just a few factors the place the 2 editions differ. Here are a very powerful and related for personal customers:
- Bitlocker encryption, which can be utilized to safe your complete drive or USB sticks, is reserved for the Pro version. Bitlocker is especially helpful for laptops in order that no one can entry your information if the system is misplaced. However, Microsoft has added an analogous perform to the Home version of Windows 11 24H2 with system encryption (level 3). This requires you to log in with a Microsoft account. Users who don’t want a Microsoft account or use Windows 10 can use different strategies (factors 4 and 5).
- Hyper-V is software program that can be utilized to virtualize working techniques. For instance, you may set up Linux or Windows in Hyper-V whereas Windows is operating and use it as a digital second system. We describe how Hyper-V may be activated within the Home version and what the choice Virtualbox affords in factors 6 and 7.
- The distant desktop permits distant entry to the desktop of one other Windows laptop by way of the community. The Home version solely affords distant help, the place a consumer should first invite a helper earlier than they will entry the opposite PC. Both strategies are solely appropriate to a restricted extent for spontaneous assist by way of the web. Remote entry solely works if the mandatory ports are open within the router firewall. This will not be vital for different distant help packages (see level 8).
- Group insurance policies supply centralized administration of consumer rights. They are primarily utilized in bigger firm networks during which features may be restricted or specified on all PCs by way of the central server. Local group insurance policies are a variant for computer systems that don’t belong to a Windows area. The editor for this may be activated within the Home version, or another device can be utilized (see field “Configuring Windows with group policies”).
Encryption with Windows on-board assets
With the Home version of Windows 10 and 11, you can’t encrypt drives with Bitlocker. However, it’s attainable to combine encrypted exterior onerous drives or USB sticks into the file system. Encryption should be carried out on one other PC on which the Pro or Enterprise version is put in.
If no different laptop is accessible, use a digital PC (level 6 or 7).
Security for exterior drives: Encrypt the drive with Bitlocker below Windows Pro. Although the Home Edition can’t create it, it might nonetheless combine it into the file system.
Microsoft
Go to “Settings” (Win-I), seek for Bitlocker and click on on “Manage Bitlocker.” Click on the specified drive after which on “Activate Bitlocker.”
Tick the field “Use password to unlock the drive” and enter a sufficiently safe password. After clicking on “Next,” save the restoration key in a file, for instance. Follow the additional directions of the wizard.
A drive encrypted on this means will also be used with the Home version. If you open it within the file supervisor by double-clicking on it, Windows will ask you for the password.
Device encryption of Windows 11 24H2
Microsoft has geared up Windows 11 24H2 Home with a brand new perform that can be utilized to encrypt the system drive. Bitlocker offers the idea, albeit with fewer choices than the Pro version. Windows login with a Microsoft account can also be required.
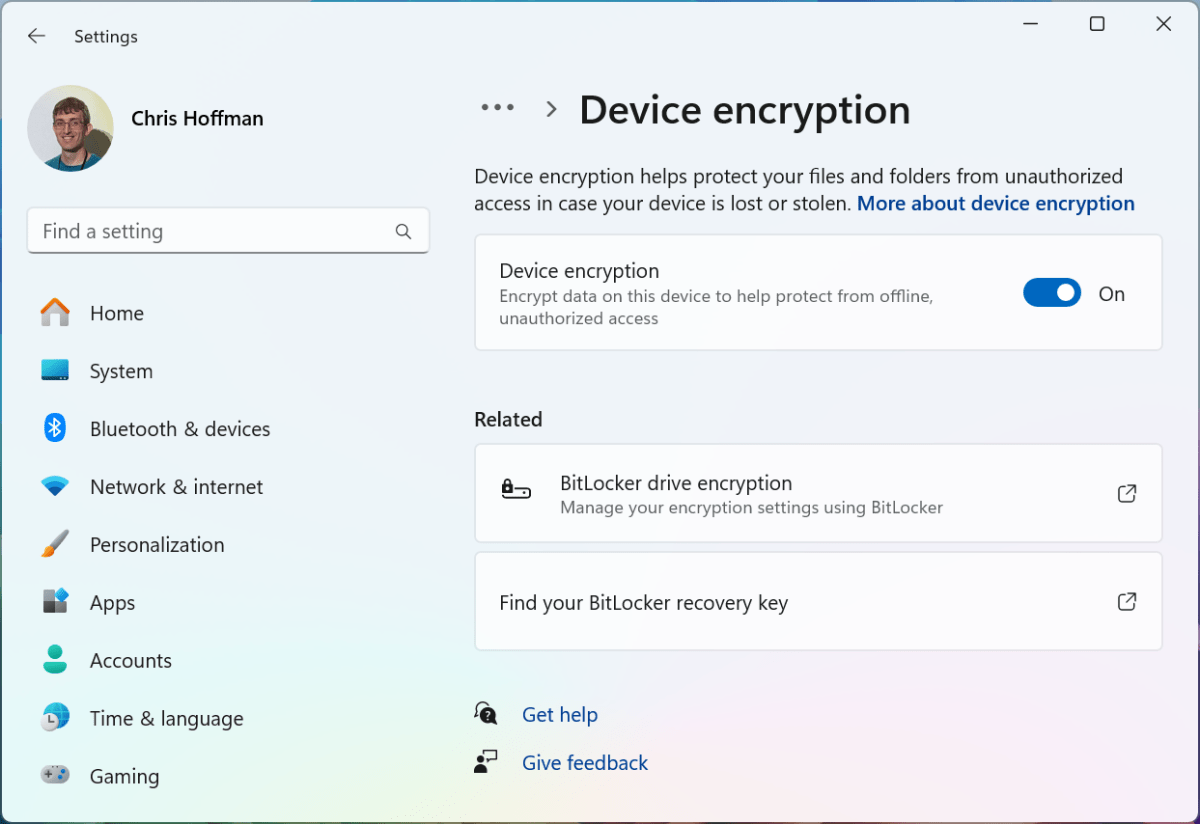
In Windows 11 24H2 Home: Activate “Device encryption” within the “Settings” if you’d like Windows to encrypt the system partition. A Microsoft account is required for this.
Chris Hoffman / IDG
If you might be utilizing model 24H2, you must test the choice within the “Settings” below “Privacy and security > Device encryption.”
If “Device encryption” will not be displayed, the system necessities for Windows 11 are most likely not met. Then test within the firmware settings of the PC whether or not TPM and Secure Boot are activated.
If you activate system encryption, you must save the related restoration key. You can decide the important thing by way of account.microsoft.com/devices/recoverykey after logging in along with your Microsoft account.
The restoration secret is required in an effort to entry your information by way of a rescue or secondary system within the occasion of Windows or {hardware} issues.
See additionally: How to make Microsoft Windows services work for you
Encrypt drives with Veracrypt
If you don’t wish to or can’t use Bitlocker or system encryption, Veracrypt is an virtually equal different. The device additionally has the benefit that it’s obtainable for Linux and Mac OS. You may use it to combine encrypted Windows drives below these techniques.
In phrases of safety, it’s troublesome to match Bitlocker and Veracrypt. With the open supply device Veracrypt, you may study the supply code and test the code high quality and implementation of the algorithms. This will not be attainable with Bitlocker.
Neither methodology can promise 100 p.c safety — finally, using any software program is a query of belief.
A study conducted by the Fraunhofer Institute for Secure Information Technology (SIT) in 2020 is entitled “VeraCrypt with minor flaws.” No critical vulnerabilities had been discovered.
Veracrypt will not be as nicely built-in into the system as Bitlocker. It is considerably cumbersome to make use of and you need to enter the password for decryption each time you restart Windows. For safety causes, the password must be greater than 20 characters lengthy and sufficiently complicated.
If that is an excessive amount of effort for you, you must take into account whether or not you really want to encrypt your complete onerous drive. Perhaps the answer offered in level 5 will suffice. Please additionally notice that Veracrypt solely requests the password on a restart. When reactivating after “Sleep,” solely the Windows password is requested by default.
If you wish to encrypt the system partition, proceed as follows:
Step 1: The use of Veracrypt is taken into account safe. Nevertheless, it’s advisable to create a whole backup of the Windows partition or at the very least the non-public recordsdata.
If, for instance, the ability fails throughout encryption, the recordsdata on the onerous drive will not be readable. Also have a USB stick prepared that’s formatted with the FAT32 file system.
About 5MB of free house is adequate and you may as well use the stick for different functions.
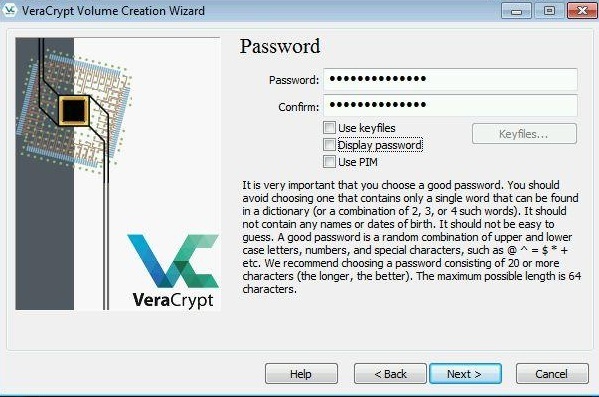
In Veracrypt you’ll have to create a sufficiently lengthy password for an encrypted drive for use each time you restart your laptop.
Veracrypt
Step 2: In Veracrypt, go to “System > Encrypt system partition/system drive.” Follow the easy-to-understand directions of the wizard. You can settle for the defaults virtually all over the place.
When getting into the password, please notice that the Veracrypt bootloader works with the U.S. keyboard structure. The program takes this under consideration and switches the keyboard structure when getting into the password. Tick the “Show password” field to see the precise password.
Step 3: The wizard prompts you to create a rescue information service. By default, Veracrypt saves the required file below the identify “VeraCrypt Rescue Disk.zip” in your “Documents” folder.
Unzip the file and replica the “EFI” folder it incorporates to your FAT32-formatted USB stick. After clicking on “Next,” the wizard will test whether or not the folder is current.
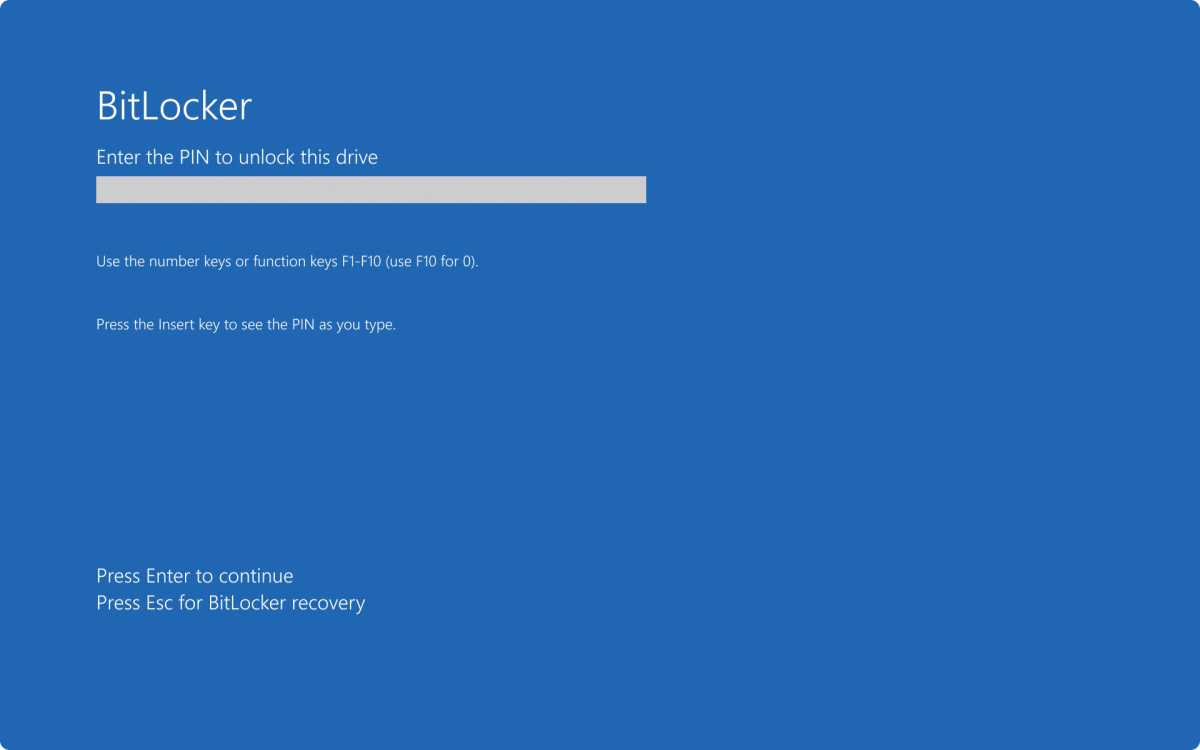
Step 4: In the “System encryption pre-test” step, click on on “Test.” Read the outline, which is greatest printed out. Click on “Yes” if you end up prompted to restart the PC. Type within the password and make sure with the Enter key.
If Veracrypt doesn’t settle for the password, for instance whether it is entered incorrectly, press the Esc key. Windows will then begin as ordinary from the beforehand unencrypted onerous drive and you’ll have to configure the encryption once more.
Otherwise, Windows will begin after you enter the password. After Windows logon, the “Pre-test completed” window seems mechanically, during which you click on on “Encrypt.” Veracrypt then begins the encryption course of, which can take a while. A window will inform you of the progress.
Step 5: Try booting from the rescue drive. You may have to alter the boot sequence within the firmware setup. The rescue system affords a easy menu that can be utilized to restore the Veracrypt boot loader, load another boot loader, or decrypt the system partition.
Upgrade from Windows 11 Home to Pro
The Home version may be transformed to a Pro version with out reinstallation. All you want is a brand new product key.
Microsoft presently expenses $99 for the improve within the official retailer. In the PCWorld shop, however, you can get the official upgrade for just $59.
If you may have bought a Pro key, go to “System” within the “Settings” below Windows 11, click on on “Activation” after which on “Update Windows Edition.” Click on “Change” after “Change product key” and enter the brand new product key.
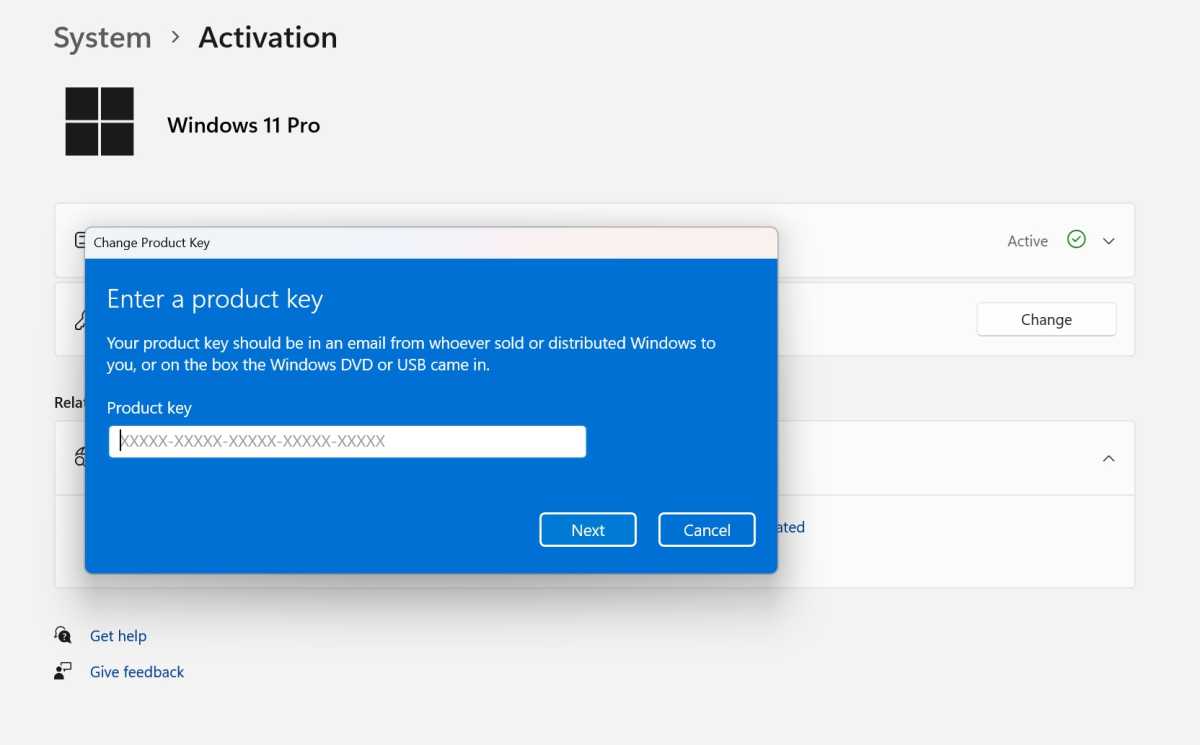
Foundry
Encrypted container with Veracrypt
If you encrypt your Windows partition, you not have to fret in regards to the safety of particular person recordsdata. On the opposite hand, it isn’t notably handy to should enter a protracted and sophisticated password when restarting the system.
For extra safety, solely encrypt the recordsdata which might be actually price defending. To do that, use Veracrypt to create an encrypted container file that holds the delicate recordsdata.
Secure container: Create an encrypted container file with Veracrypt. Store delicate and vital paperwork in it. The file may be saved on any drive.
Veracrypt
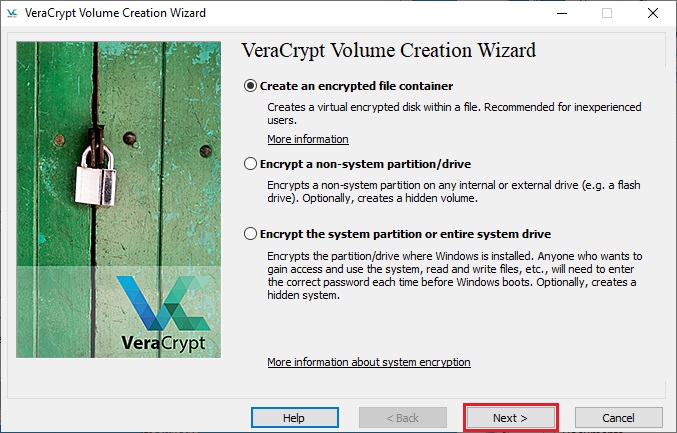
Step 1: In Veracrypt, go to “Volume > Create new volume.” Leave the primary possibility “Create encrypted container file” and click on on “Next” and once more on “Next.”
Step 2: Specify the storage location and file identify after clicking on “File.” Follow the additional directions of the wizard.
Step 3: In the “Volume password” window, enter a sufficiently complicated password with 20 characters or extra. If you tick the “Show password” field, you may test the entry.
Step 4 (optionally available): You may use a brief password or a PIN should you additionally create a key file. To do that, tick the field subsequent to “Use key file” after which click on on “Key files.”
Click on “Create key file(s)” and generate the entropy by transferring the mouse. Enter a reputation for the important thing file, click on on the “Create and save key file(s)” button and choose the storage location.
Save the file to a USB stick. The container can’t be unlocked with out the stick or the important thing file together with the password.
Close the window, click on on “Add files,” choose the important thing file you may have simply created, and click on on “OK.” Continue with the wizard.
Step 5: In the Veracrypt major window, click on on a free drive letter, go to “Volume > Select file” and specify the file created in Step 2. Then click on on “Volume > Mount volume” and enter the password.
If you created a key file in step 4, tick “Use key file,” click on on “Key files,” and specify the file by way of “Add files.”
Step 6: For quicker entry to the encrypted container, right-click on the (digital) drive within the Veracrypt major window and choose “Add to favorites” within the context menu.
Tick the field “Mount selected volume at login” and make sure with “OK.” Veracrypt then mechanically opens a window for getting into the password after the Windows logon.
If you might be utilizing a key file, you must specify this by way of “Settings > Default key files.” Otherwise, you’ll have to choose the file every time within the password entry window. You can specify the identical key file when creating additional information containers.
Virtual second PC with Virtualbox
Virtualbox is open supply software program and due to this fact obtainable freed from cost for all Windows editions. The vary of features corresponds roughly to Microsoft’s Hyper-V. Install Virtualbox and the Virtualbox extension bundle, which is required for some features, comparable to distant entry and encryption of digital onerous disks.
Click on the “New” button to begin a wizard for organising a digital machine in Virtualbox. You enter the ISO picture with the set up system and specify the working system and the dimensions of the RAM and digital onerous drive.
After finishing the wizard, click on on “Start” and set up the working system as ordinary.
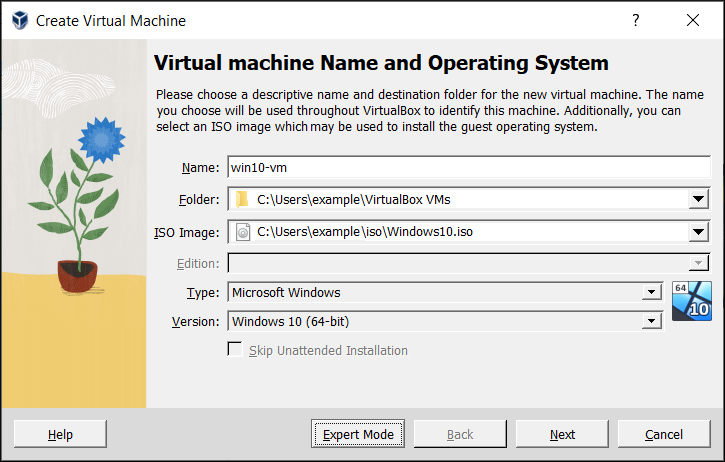
Configure VMs with Virtualbox: A wizard helps you with the set up of the system. You will want the ISO file of the Linux or Windows set up system, for instance.
Oracle
In the digital machine window, go to “Devices > Insert guest extensions” and set up the visitor extensions from the digital DVD drive. The optimized drivers guarantee higher graphics efficiency, for instance.
Remote entry or distant upkeep by way of the community
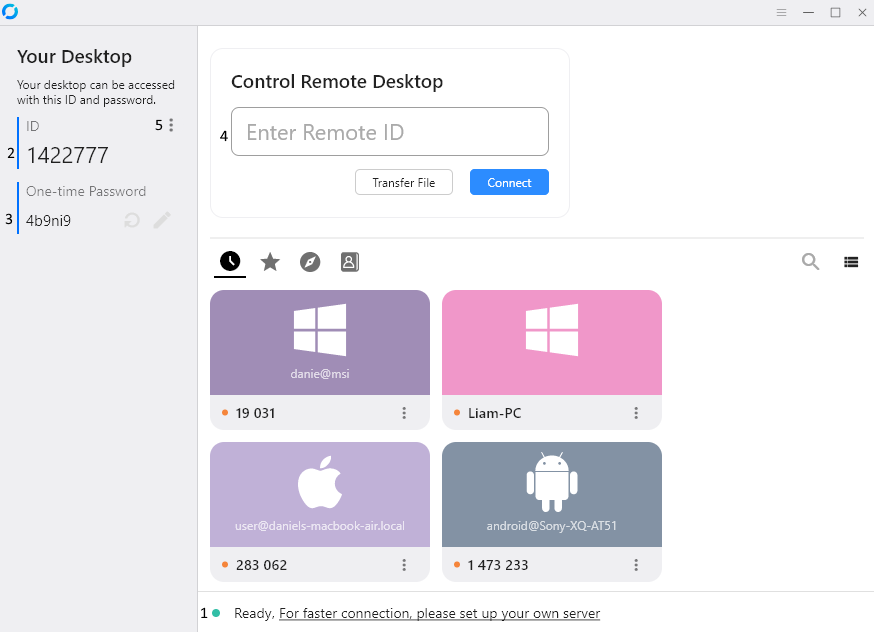
Remotely management one other PC: The free Rustdesk permits entry to a distant desktop. This works within the native community and likewise over the Internet with out additional configuration.
Rustdesk
You wouldn’t have to depend on the distant desktop connection of the Pro version for distant entry. There is loads of software program for this process. For instance, the open supply answer Rustdesk is freed from cost.
The program doesn’t require a firewall configuration. The connection is established in encrypted type by way of the supplier’s switching server.
The program works with out set up — the folks concerned solely want to begin it. The particular person searching for assist tells you the ID and password displayed. You then set up the connection, which the particular person on the opposite PC should verify.
Actions that require elevated rights should even be confirmed. For handy use, nevertheless, you must set up Rustdesk utilizing the button on the backside left of the window. This additionally permits unattended entry to a pc. You should set a password for this within the settings below “Security.”
Further studying: Every Windows operating system, ranked
This article initially appeared on our sister publication PC-WELT and was translated and localized from German.