
In some classes of pc software program, there are scant free choices and spending a couple of dollars on paid software program makes an enormous distinction. In different classes, paying for software program isn’t obligatory. Video modifying is one such instance. In truth, one program extensively utilized in Hollywood is free, and there are a number of different respectable packages for Windows customers—together with the completely incredible DaVinci Resolve. Windows even has a built-in program now that Microsoft is the proprietor of the easy video editor Clipchamp.
In addition to introducing you to among the finest free video modifying choices, we’ll level you to web sites the place you’ll be able to obtain free video clips, sound results, music, and extra to make use of in your movies.
This article was translated from Swedish to English, and initially appeared on pcforalla.se.
Microsoft Clipchamp: Built-in and easy
In 2021, Microsoft purchased the easy, web-based video editor Clipchamp and it’s now a built-in software in Windows 11. In its fundamental model, Clipchamp is free for everybody, however if you need extra options, you’ll want a subscription. Luckily, it’s included within the Microsoft 365 subscription, so in case you’re already subscribed to the Office packages, you’ll additionally get Clipchamp’s additional options.
Clipchamp has a easy interface with a timeline the place you’ll be able to place clips that you simply then trim and minimize to create a movie. Simply drag from the left or proper fringe of a clip within the timeline to trim. Move the time marker and click on the scissors icon to the left above the timeline to separate the clip into two elements which you could work on individually. To minimize off a chunk within the heart of a clip, divide it into three elements. Then choose the middle part and click on the the trash-can icon subsequent to the scissors icon, or press the backspace key. Then transfer the next half again to shut the hole.
You can separate audio and video for extra superior clips, and add transitions, textual content, nonetheless photographs, sound results, and music. If you’ve been utilizing Apple’s iMovie on the iPhone or iPad, for instance, you’ll rapidly adapt to Clipchamp.
One drawback you’ll encounter in case you seize video with an iPhone or newer Android telephone is that the recordsdata you import are most likely in HEVC format, which isn’t supported by Clipchamp. The program will convert these to H264 format on import, however it will probably take some time if the movies are giant and quite a few.
For a a lot deeper dive into its capabilities, take a look at our tutorial on how to use Clipchamp, Microsoft’s sleeper-hit video editor.
Davinci Resolve: The large
You don’t need to spend a single cent to edit video like a professional. Well, you’ll need to take a course or two to get nearly as good as a professional, however you should use the identical program as many execs—Davinci Resolve.
The program, from Blackmagic Design, is without doubt one of the 4 video modifying program used within the film and tv trade, however in contrast to Adobe Premiere Pro, Avid Media Composer, and Apple Final Cut Pro, it’s free for particular person customers. There’s a paid model too, but it surely doesn’t add a lot that the common dwelling consumer will miss.
Davinci Resolve has an interface just like Premiere, so in case you’ve tried that earlier than, it is likely to be somewhat simpler to get began. However, as a result of it’s knowledgeable program with every little thing wanted to edit video for tv, there’s a studying curve. Expect to need to maintain at it for some time and possibly watch the occasional information on YouTube earlier than you’re feeling utterly comfy with this system.
Video modifying on the whole is useful resource intensive, however Davinci Resolve is especially so. It requires no less than 16 gigabytes of RAM, an SSD for storage, and a graphics card or built-in graphics circuit with no less than 2 gigabytes of video reminiscence and assist for OpenCL 1.2 or CUDA 11.
When you first begin this system, you’ll be prompted to start out your first mission and can even select which set of keyboard shortcuts you wish to use—when you’ve got used Premiere, for instance, you could select the identical keyboard shortcuts it makes use of, however in any other case you’ll be able to select this system’s personal shortcuts.
Foundry
Importing and sorting
Davinci Resolve is a so-called nonlinear editor, which implies that any modifications you make won’t have an effect on the unique recordsdata. When you export a completed movie, this system copies the chosen elements from them and places them along with the assorted results and different modifications you’ve gotten made. Therefore, you’ll be able to kind your authentic recordsdata as you want, however remember that you simply can not delete or transfer them, as this system wants entry to them with a purpose to create a last movie. For instance, when you’ve got the recordsdata on an exterior SSD and don’t have it linked whenever you attempt to edit, this system will show a big “Media Offline” warning.
To add video recordsdata as clips to make use of in your initiatives, begin by opening the Media tab. Then you’ll be able to merely drag the recordsdata from Explorer into this system, which can chew on them for some time because the recordsdata load; they then find yourself within the Media Storage. Select a file to view the clip within the preview field on the high proper. Here you’ll be able to play the clip and in addition bounce round in it by way of the timeline beneath.
Above the Media Storage space you’ll discover Media Pool, which can be a grid of video clips. The distinction between the 2 is that the Media Pool reveals the recordsdata you’ve gotten added to the open mission. On the left is a panel the place you’ll be able to kind and set up all of the clips—the Media Pool can be accessible in Davinci Resolve’s different work tabs (Cut, Edit, Fusion, Color, and Fairlight). You can create bins to gather several types of clips—for instance, for various scenes or totally different areas. You can even differentiate utilizing color-coding.

Foundry
Cut the movie
Go to the Cut tab, the place you’ll discover the simpler of two methods to place a movie collectively. The interface right here is split into three essential sections: the Timeline on the backside the place you place clips and do the precise modifying, the Media Pool on the high left, from which you drag clips to be included within the Timeline, and the Preview on the high proper.
Drag a clip from the Media Pool to the timeline so as to add it to your movie. The easiest edit you may make is to trim the start and finish. Hold your pointer to the sting of the clip in order that it reveals a small triangle, sq. brackets, and the start of a chunk of movie. Click and drag sideways to trim.
To divide clips into items to be able to work on every half individually, transfer the purple time marker within the timeline and click on the leftmost scissor button above the timeline.
You can even add solely chosen elements of a clip within the Media Pool to the timeline. Move the timestamp to the place you wish to add the brand new clip. Double-click the clip to open it within the preview. Locate the purpose within the clip you wish to begin at and press the i key. Then discover the purpose within the clip you wish to finish at and press the o key. Then press F12 so as to add the chosen a part of the clip to the timeline.
To add transitions between clips, you need to trim the clips no less than barely on each side of the transition. Then place the timestamp within the heart of the clips. Click one of many transition buttons within the heart above the timeline: Dissolve or Smooth Cut. If you’ve gotten trimmed the clips sufficiently beforehand, the transition now seems within the timeline and you’ll play the preview to see the transition.
Now click on on Inspector on the very high proper. This reveals the settings for the transition, equivalent to how lengthy it ought to be, and it’s also possible to change the kind of transition.
Other tabs
The Edit tab is a extra superior kind of modifying with a lot finer management, but in addition extra fiddling to get the movie proper, so I like to recommend beginning with the Cut tab till you’re feeling it’s not sufficient.
Fusion is Davinci Resolve’s device for constructing and dealing with particular results, and never one thing you need to begin with straight away.
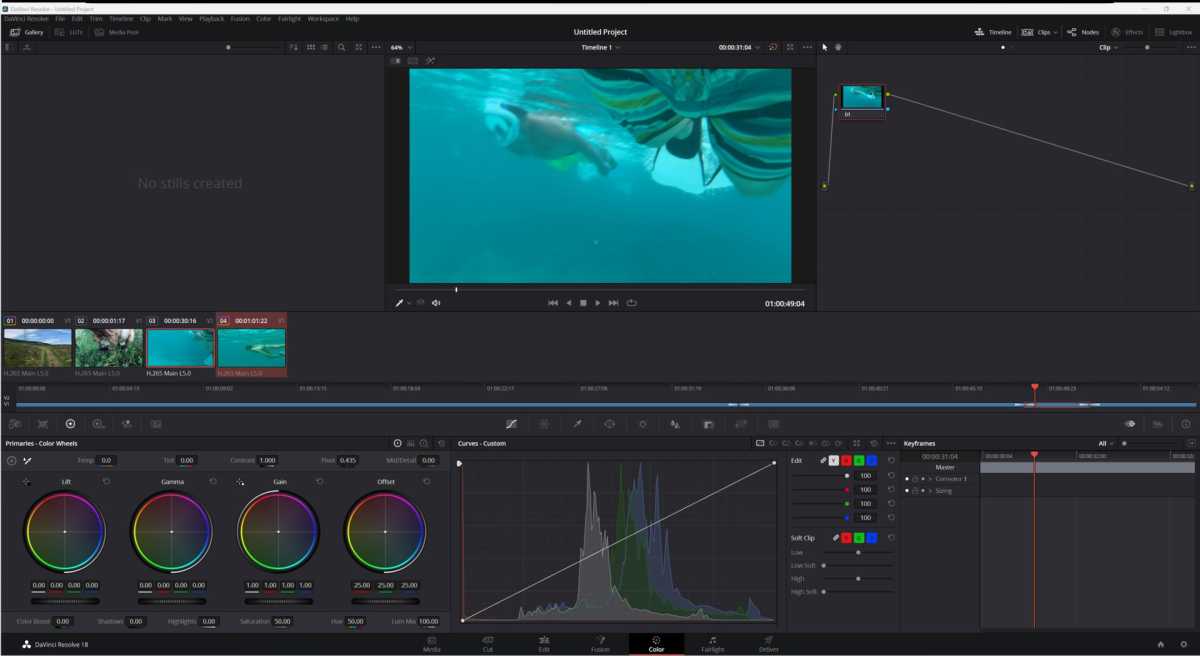
Foundry
Color is all about adjusting publicity and colours both for impact or to make totally different clips mix collectively higher. It’s one thing you’ll begin utilizing fairly quickly in case you’re placing collectively extra formidable movies, equivalent to the identical scene shot with a number of cameras. The Color tab lets you make these totally different angles present the identical colours.
Two issues you’ll be able to strive within the Color tab are Auto Color, which tries to optimize the colours in a number of chosen clips, and computerized color-matching between clips. Select the clip you assume has the correct colours after which Ctrl-click on the clip you wish to have the identical colours. Right-click on the primary one and choose Shot Match to this Clip.
Fairlight is all about audio modifying and results. For instance, you’ll be able to take away or no less than scale back the noise from a windy recording.
Foundry
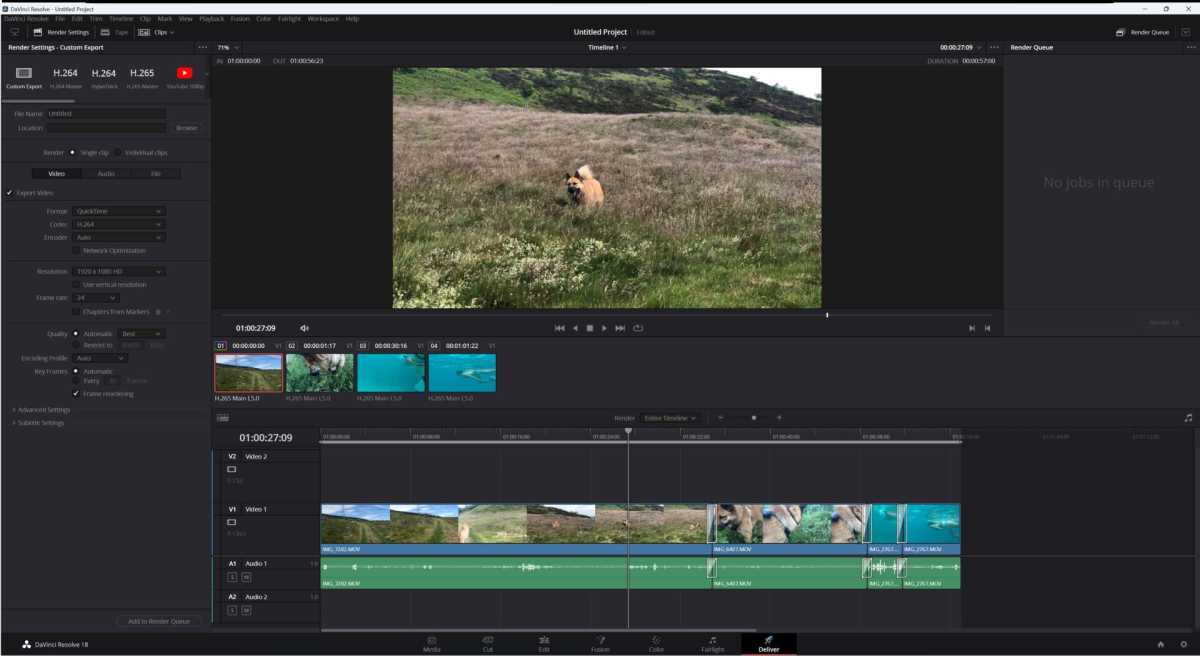
Deliver is the tab you utilize to export a completed movie in an acceptable format, and naturally it can save you totally different variations for various functions. Here you’ll be able to set the decision, file format, and extra earlier than you begin the export (which might take some time).
Foundry
Lightworks: An expert program with a very good free model
If Davinci Resolve doesn’t enchantment to you, you’ll be able to strive one other program used professionally, however with a special method to free customers. Lightworks is a long-standing program that was used within the 1990s in Hollywood movies equivalent to Pulp Fiction and Braveheart. Thelma Schoonmaker, who has been modifying Martin Scorcese movies for 50 years, is one in all its most well-known customers. The program has continued to evolve over time, with totally different homeowners.
Since 2020, it’s owned by the brand new firm LWKS, began by two of the builders, who’ve chosen to supply the fundamental model of Lightworks utterly freed from cost. Unlike different “demo” variations of paid packages, virtually nothing is lacking. The solely main limitation for dwelling customers is that completed movies can solely be exported at 720p decision and never 1080p or 4K.
Like Davinci Resolve, Lightworks has a reasonably steep studying curve. However, the interface has a transparent concentrate on creativity, so in case you roll up your sleeves and get began, it shouldn’t take lengthy to get respectable outcomes. The program might be managed virtually totally with the keyboard, so concentrate on studying all of the shortcuts.
Foundry
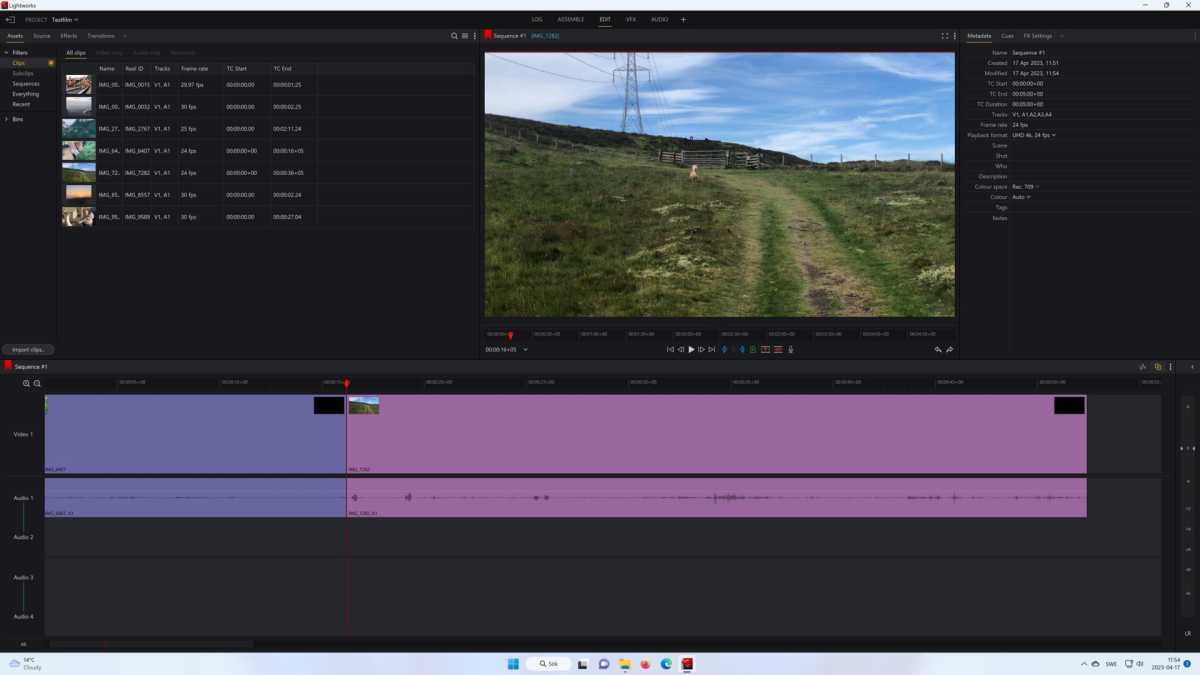
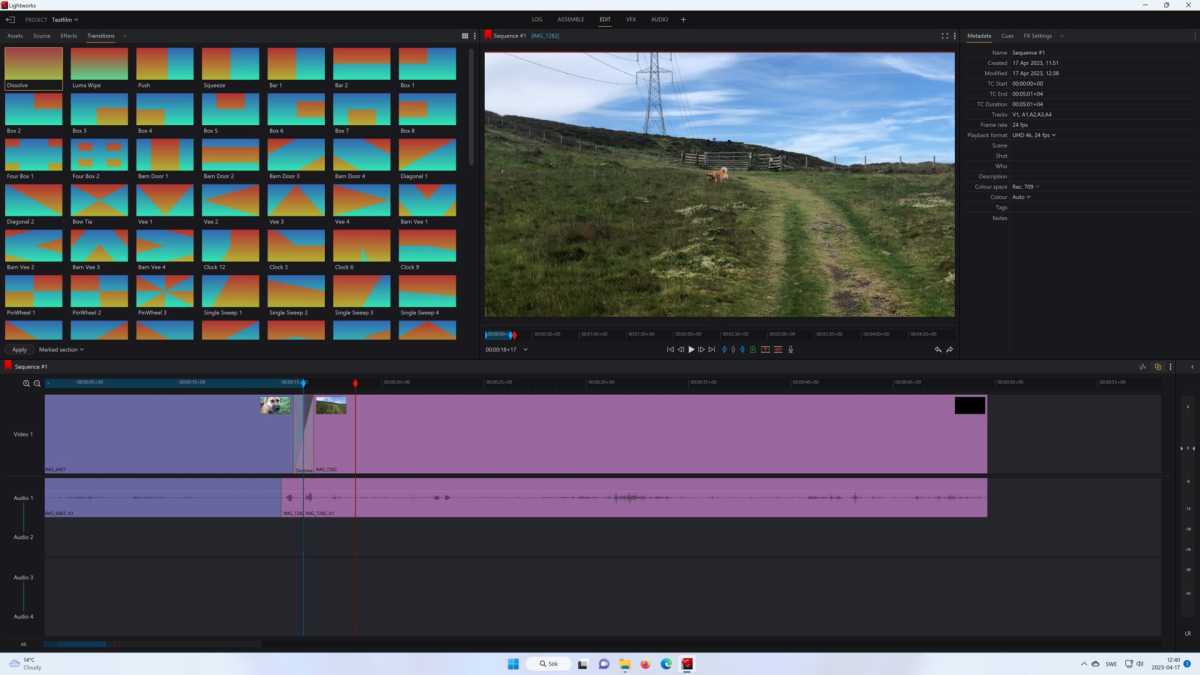
You begin by making a mission and including clips by way of the Import clips button. The interface is split into three elements: Sources (clips, results, transitions) on the high left, Preview and Info on the high proper, and Timeline alongside all the backside of the window. Once you’ve gotten some clips, you’ll be able to drag one to the timeline so as to add it to the movie. Here’s methods to make easy cuts:
- Move the purple time marker to the correct place within the clip.
- Press the C key or the icon with two purple arrows going through one another through the preview to separate the clip.
- Now you’ll be able to edit every half of the clip individually.
You can trim initially or the top of a clip by both grabbing the sting and dragging with the mouse or shifting the time marker with the A and S keys, urgent the W key to modify to trim mode after which press the comma or level to trim left or proper. Press the tab if you find yourself accomplished.
If you’ve gotten created a niche within the timeline by trimming within the heart, you’ll be able to routinely transfer the elements collectively by right-clicking within the hole and choosing Close hole.
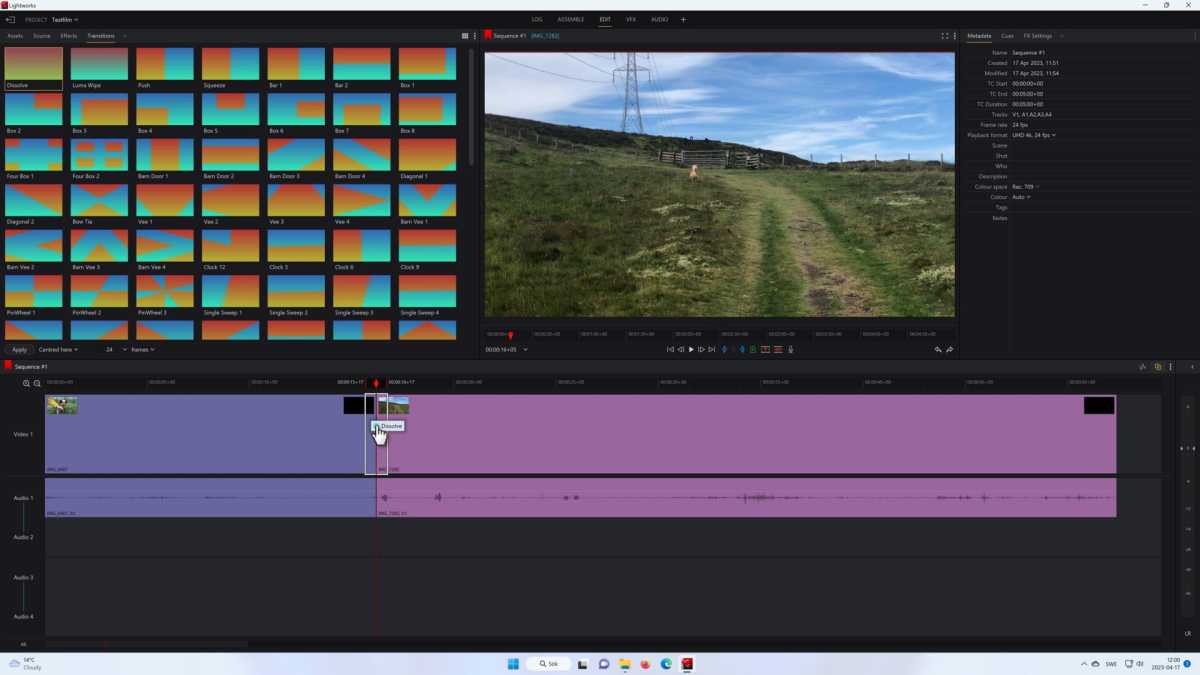
Add easy transitions by choosing the tab Transitions on the high left and drag and drop a transition the place you need it within the timeline and this system will do the remaining.
Foundry
To create an overlap between sound and picture (known as a J or L clip), you’ll be able to quickly mute both the video or audio observe and trim the opposite. Trim ahead in a single and backward within the different by an equal variety of frames, then transfer them again along with each lively. Lightworks reveals with somewhat purple icon what number of frames out of sync the tracks are so you’ll be able to simply repair it in case you made a mistake.
Free assets
Here are some websites with a superb vary of free assets for video modifying:
- Pixabay – music, sound results, and video.
- Videvo – video, movement graphics, music, sound results, and templates for Davinci Resolve.
- Freesound – Creative Commons licensed sounds of all types.
- Mixkit – video, music, and templates for Davinci Resolve.
- Envato Elements – Davinci Resolve templates.