

For a short time, PC constructing was gloriously reasonably priced. The price of graphics playing cards and RAM lastly dropped after 2018’s darkish instances, AMD saved cramming extra cores into its CPU lineup with out growing costs, and SSDs may very well be had for a music.
Nowadays constructing a fundamental x86 PC is fairly costly. Overwhelming demand, tighter provide, and tariffs imply that, in comparison with final 12 months, you’ll spend $10 extra right here and $15 extra there throughout the board—whilst a lot as $40 extra on an influence provide. It provides as much as a steep improve for many who solely browse the net, watch streaming movies, edit paperwork, and/or code.
Fortunately, you possibly can sidestep that monetary outlay with another: the standard however mighty Raspberry Pi 4. This fourth-generation model of the favored single-card laptop begins at simply $35 and packs sufficient punch to simply deal with on a regular basis duties. Moreover, its simplicity means constructing is extremely quick. We put collectively a Linux-based desktop system for simply over $100 and in about an hour, together with software program installs.
Parts listing
Current avenue costs listed in parenthesis.
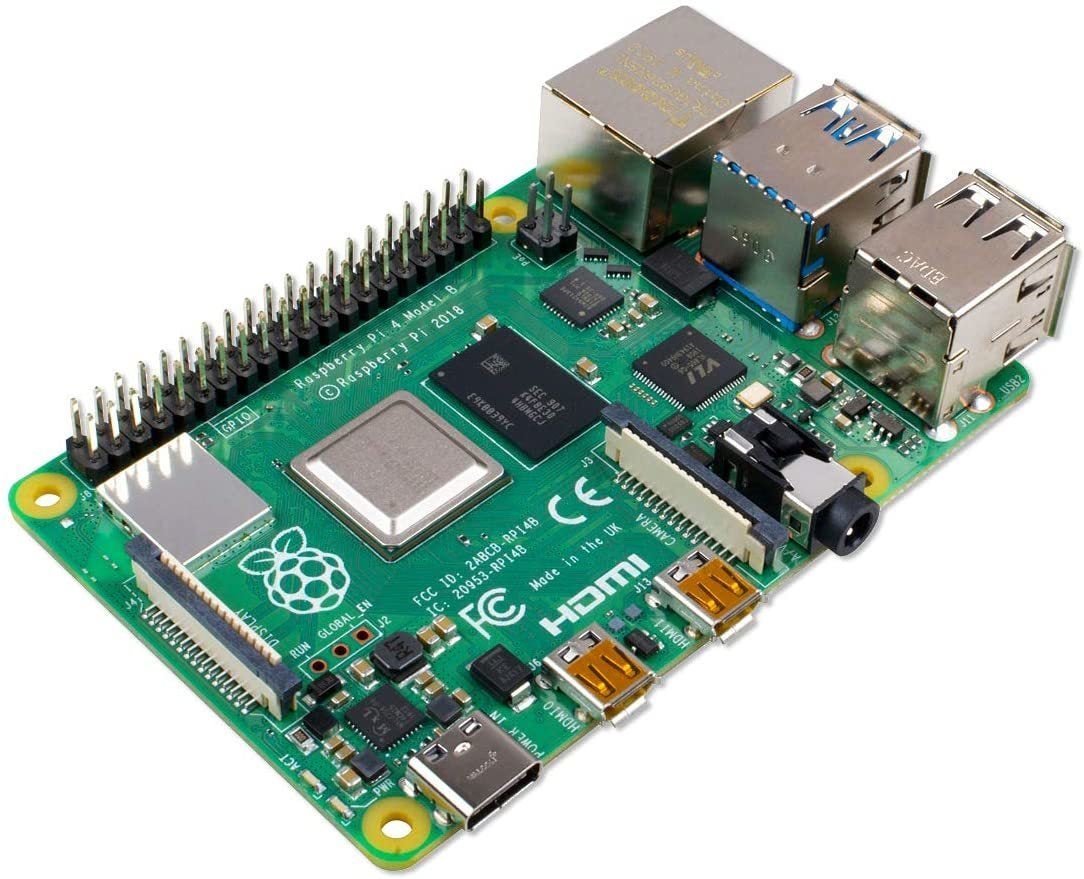
Raspberry Pi 4 (Model B)
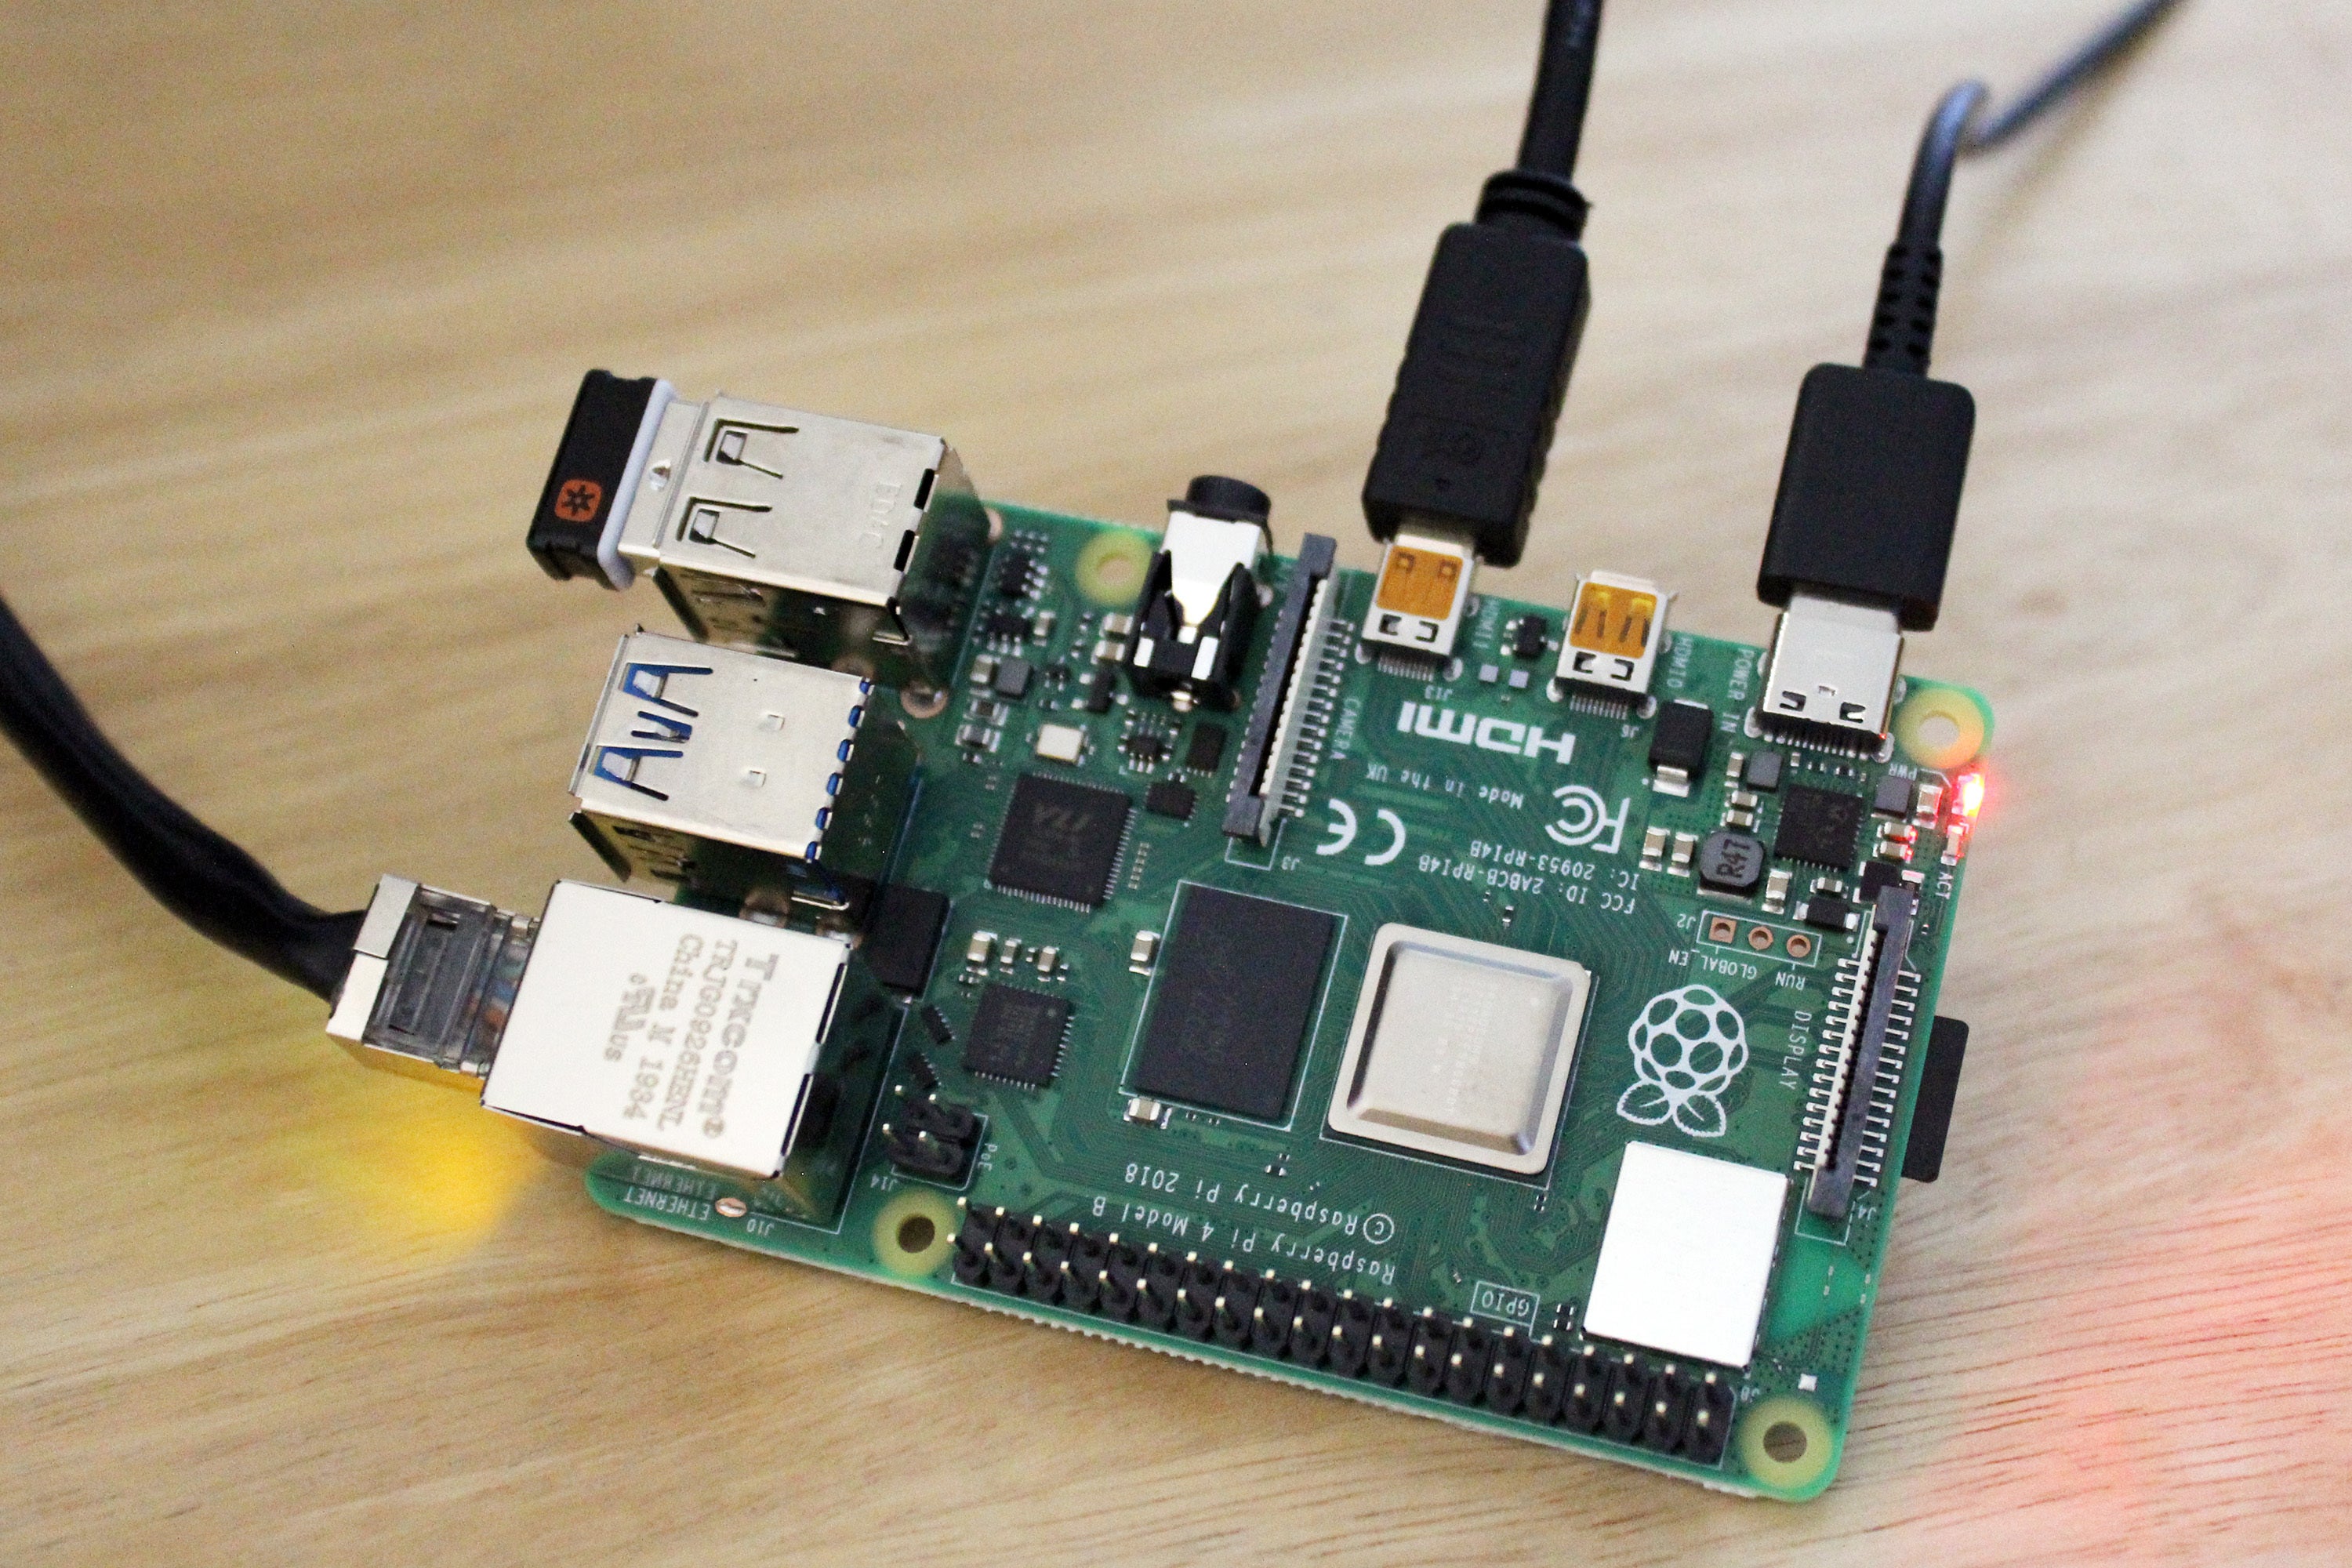
The Raspberry Pi 4 board sports activities a quad-core 1.5GHz Cortex-A72 processor; 2GB, 4GB, or 8GB LPDDR4 RAM; dual-band Wi-Fi; Bluetooth 5.0; and gigabit ethernet, 2x micro-HDMI, 2x USB 3.0, 2x USB 2.0 ports, together with a 3.5mm analog jack.
The Raspberry Pi 4 has practically all the weather you want for a PC constructed proper in. The processor, graphics, RAM, Wi-Fi, Bluetooth, USB ports, ethernet, and HDMI are a part of the board; you solely want to supply energy, storage, and (ideally) a case.
Three variants of the Raspberry Pi 4 exist—2GB RAM, 4GB RAM, and 8GB RAM. The different specs stay the identical, just like the quad-core 1.5GHz ARM CPU and variety of ports. We selected the $55 4GB model for this venture, because it’s steadiness between worth and efficiency. The $35 2GB choice works as effectively, however it’ll scale back the variety of home windows or browser tabs you possibly can have open and the construct’s means to satisfy higher efficiency calls for down the highway.
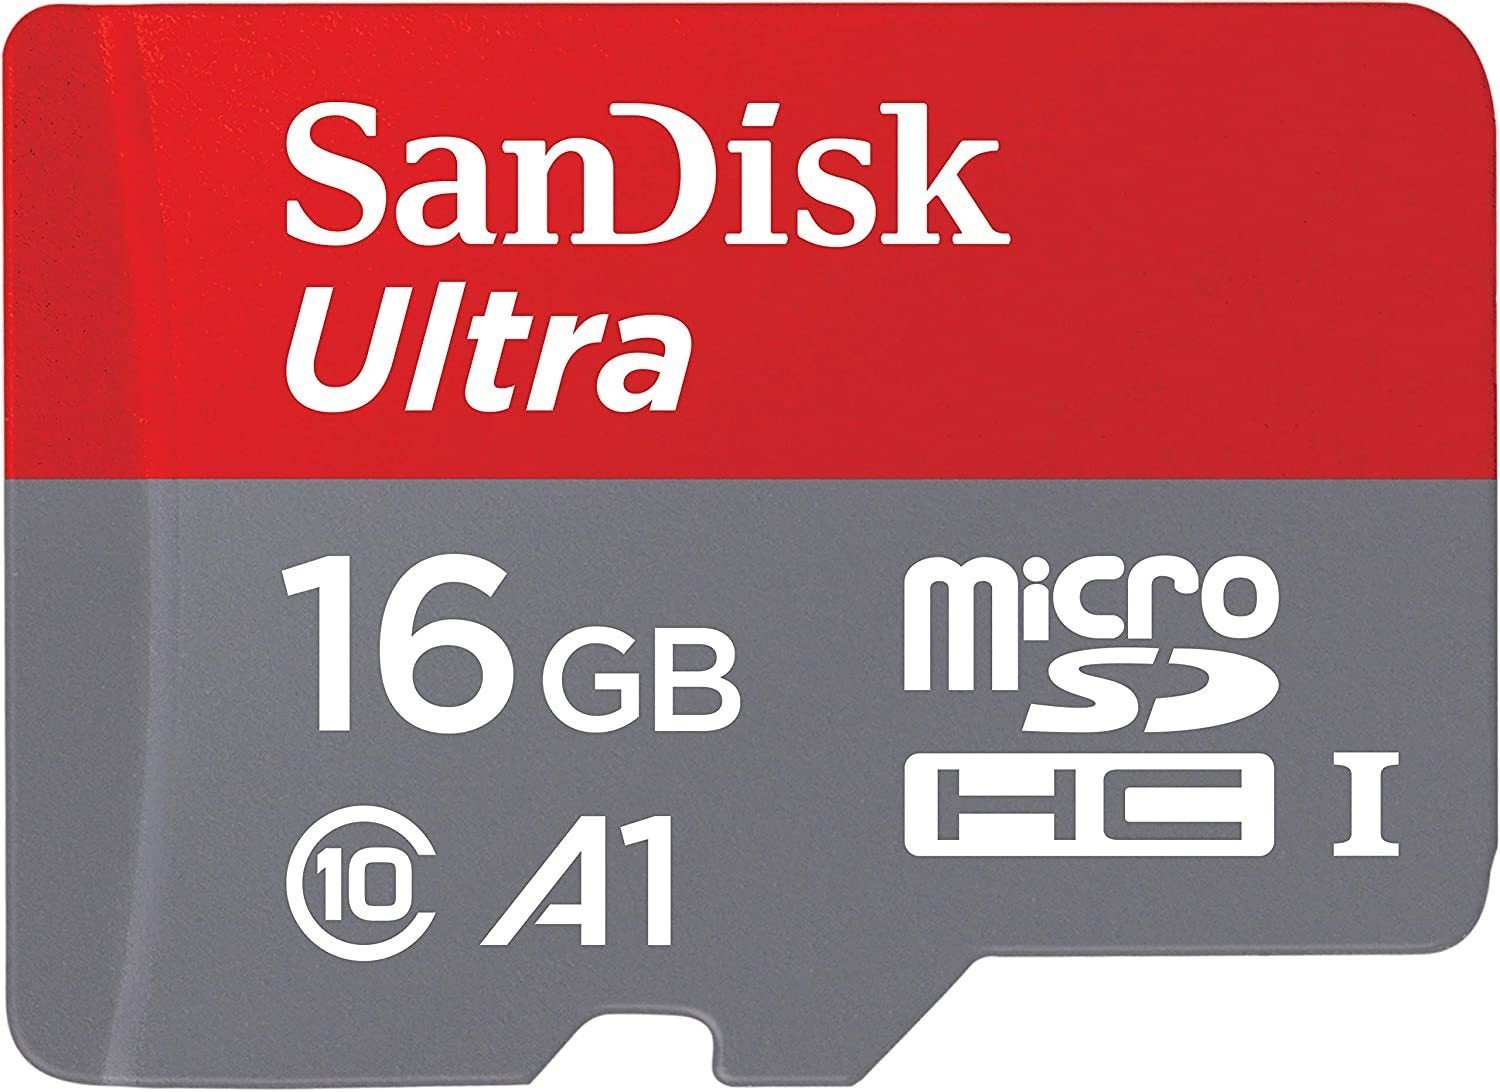
MicroSD card (32GB)
 Amazon
Our advice of a 16GB microSD card assumes you’re employed on each cloud-based and native paperwork. If you’ll skew towards the latter and save many giant information to the system, take into account a 32GB or bigger card as wanted.
Purchase an ordinary clean microSD card when you’ve got entry to an present Windows, Mac, or Linux laptop and don’t thoughts installing Raspberry Pi OS (beforehand referred to as Raspbian) your self. Otherwise, purchase one which has NOOBS (“New Out of the Box Software,” a Raspberry Pi-specific OS installer) preinstalled on the microSD card
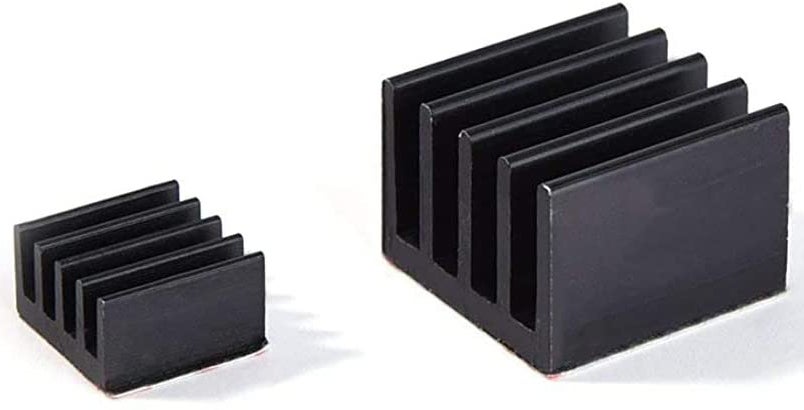
Heat sinks
 LoveRPi / Amazon
Heat sinks assist dissipate warmth from the Raspberry Pi 4’s board and can help you keep away from efficiency points associated to overheating on hotter days. You don’t even have to fret about messy thermal paste, because of adhesive thermal pads. Just peel and stick.
You can select to purchase these a la carte or as a part of an total package—go together with the choice that finally ends up least expensive for you given the provides you already personal (i.e., a spare 5V 3A smartphone charger).
Power provide
 CanaKit / Amazon
The Raspberry Pi 4 accepts any USB-C energy provide that outputs 5 volts at 3 amps (5V 3A). That contains any smartphone chargers that meet these specs. If it is advisable to buy an influence provide, we propose shopping for it in a bundle or package that additionally contains warmth sinks and a case, to economize—you in all probability received’t have already got the latter two gadgets already available.
Note: To flip off the Raspberry Pi 4, it’s important to unplug it from the outlet. For comfort’s sake, it’s possible you’ll want to buy an influence provide with an on/off button or add on a $6 outlet power switch to 1 you already personal.
Case
 Raspberry Pi Foundation
Strictly talking, a case is non-obligatory for a Raspberry Pi, however utilizing one will shield your board from mud, pet hair, and different hazards.
Myriad choices exist, starting from easy $10 fashions with followers to fancy $25-plus enclosures fabricated from laser-cut wooden. We like instances that include a fan—as a result of Raspberry Pi boards lack lively cooling, including a case restricts airflow. That fan plus adhesive heat sinks on the RPi itself will shield in opposition to efficiency points on hotter days.
Operating system
Based on the Debian distro of Linux, Raspberry Pi OS is a model of Debian 10 (“Buster”) optimized for the Raspberry Pi. Though you possibly can set up different working programs onto your Raspberry Pi 4, we’ve to stay to Raspberry Pi OS for this construct to completely work as a fundamental productiveness PC.
During setup, you’ll set up the complete model of Raspberry Pi OS, which drops much more widespread free desktop functions onto your system than the usual model of the OS does. Chief amongst them is LibreOffice, an open-source software program different to Microsoft Office. If you’re in a rush and also you don’t plan to edit any .docx, .xlsx, or different Office paperwork on the Raspberry Pi itself, it can save you a while and set up the usual model of Raspberry Pi OS as an alternative. (You can all the time set up LibreOffice later.)
Note: Until just lately, Raspberry Pi OS was referred to as Raspbian—so should you’re new to this working system and are in search of guides or troubleshooting help, you need to use the 2 phrases pretty interchangeably in search queries.
Keyboard and mouse
These choices are extraordinarily fundamental, however they get the job completed. You might be able to choose up these totally free by means of Craigslist, your native Freecycle group, or the /r/hardwareswap subreddit—typically individuals substitute prebuilt computer systems’ included keyboards and mice with costlier gear.
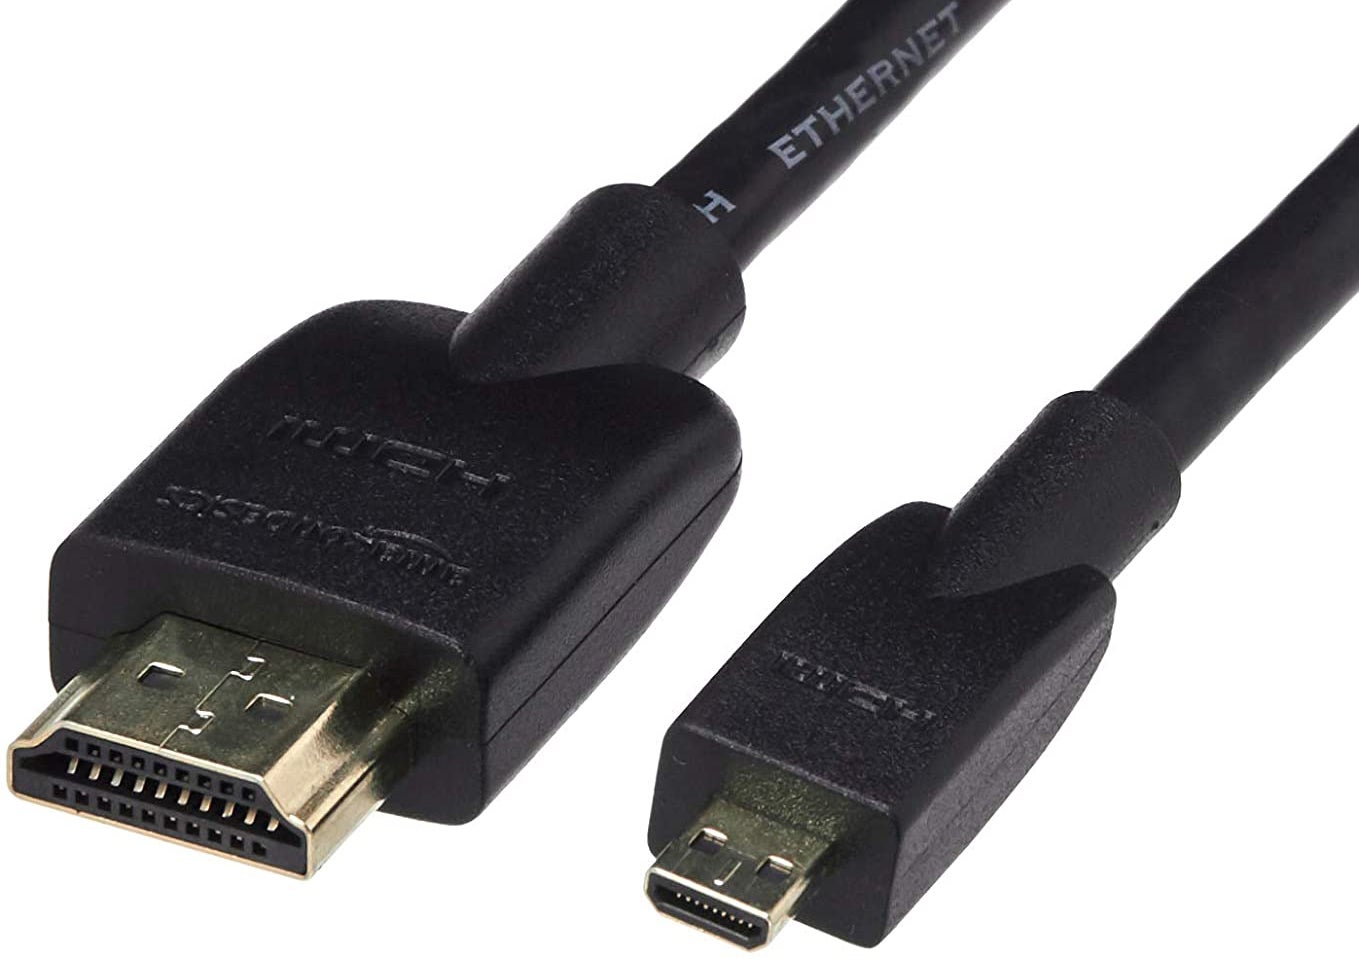
Micro-HDMI cable (or adapter)
 Amazon
To accommodate the Raspberry Pi 4’s new assist for dual-monitor output, the only HDMI port on the Raspberry Pi 3 acquired scrapped in favor of two micro-HDMI ports. Accordingly, you’ll want to purchase a micro-HDMI to HDMI cable, or an adapter for the standard HDMI cable you already personal.
Be conscious that almost all adapters are too extensive to suit side-by-side, so should you plan to make use of two screens concurrently together with your Raspberry Pi PC, you’ll want to purchase two of the specialty cables.
Monitor
Even on this time of COVID-19, you will discover the occasional free monitor out there by means of websites like Craigslist, Freecycle, native swap websites, and the /r/hardwareswap subreddit.
If it’s important to purchase a monitor, your best low cost choice is a gently used one from pal or member of the family. The next-best choices are trusted corporations promoting through eBay with free transport (e.g., HP, Acer, Best Buy, and so on), or discovering an incredible sale by means of Newegg’s e-newsletter, the /r/buildapcsales subreddit, and/or Slickdeals.net.
A 23-inch IPS 1080p monitor ought to run between $75 to $90 on sale today. We’ve additionally seen 21-inch VA 1080p screens as little as $65 on sale inside the previous few weeks.
Setup
Operating system / {hardware}
OS set up time: Up to 45 min
Hardware meeting: 5 to 10 min
Initial setup wizard: 10 to 20 min
Assembling a Raspberry Pi system goes very quick—it’s the working system set up that consumes a lot of the setup time. Fortunately, you don’t have to babysit the method and may do different issues whilst you look ahead to the set up to complete.
 Alaina Yee / IDG
You can run the Raspberry Pi 4 with out case, however we advocate utilizing one to guard it from mud, pet hair, and different hazards.
- If beginning with a clean microSD card, use the Raspberry Pi Imager utility to put in the complete model* of Raspberry Pi OS onto the cardboard. You’ll want a Windows, Mac, or Linux PC plus an SD card reader to perform this. (You can even do that on a Chrome OS machine by following these instructions.)
- If beginning with a microSD card with NOOBS preinstalled, go on to Step 3. You’ll set up the working system after powering on the Raspberry Pi 4.
- Insert your microSD card into the Raspberry Pi 4. The slot is on the underside of the board.
- Attach the warmth sinks to the Raspberry Pi 4.
- Install the Raspberry Pi 4 in its case.
- If relevant, keep in mind to attach the case’s fan to the Raspberry Pi 4’s general-purpose enter/output (GPIO) pins. Usually, the case will include directions on which GPIO pins to make use of.
- Turn in your monitor.
- Plug in cables for show output, USB units, audio, and, should you desire a wired connection, ethernet.
- Finally, plug within the energy provide. (If yours has an on/off change, don’t neglect to flip it on.)
- For microSD playing cards with Raspberry Pi OS already put in, 4 Raspberry Pi logos will seem on-screen because the machine begins besides.
- For microSD playing cards with NOOBS preinstalled, you’ll now start the set up course of for the complete model* of Raspberry Pi OS.
- Complete the preliminary setup wizard’s steps: Changing the default password, connecting to the Wi-Fi community, and so on.
*Alternative OS set up: You can as an alternative select the usual model of Raspberry Pi OS should you don’t instantly plan to edit any .docx, .xlsx, or different Office paperwork on the Raspberry Pi 4 itself. (It makes for a faster OS set up.)
To set up LibreOffice later, open a terminal window and replace your system and its bundle repository by getting into sudo apt replace, then when that’s full, sudo apt improve. After, enter sudo apt set up libreoffice.
Additional required software program set up
Streaming media assist
Installation time: <1 min*
Out of the field, Raspberry Pi OS helps solely choose streaming video and audio companies—primarily free websites with unlicensed content material. (Think YouTube and Twitch.) Big, widespread platforms like Netflix, Hulu, Amazon Prime Video, and Spotify don’t work.
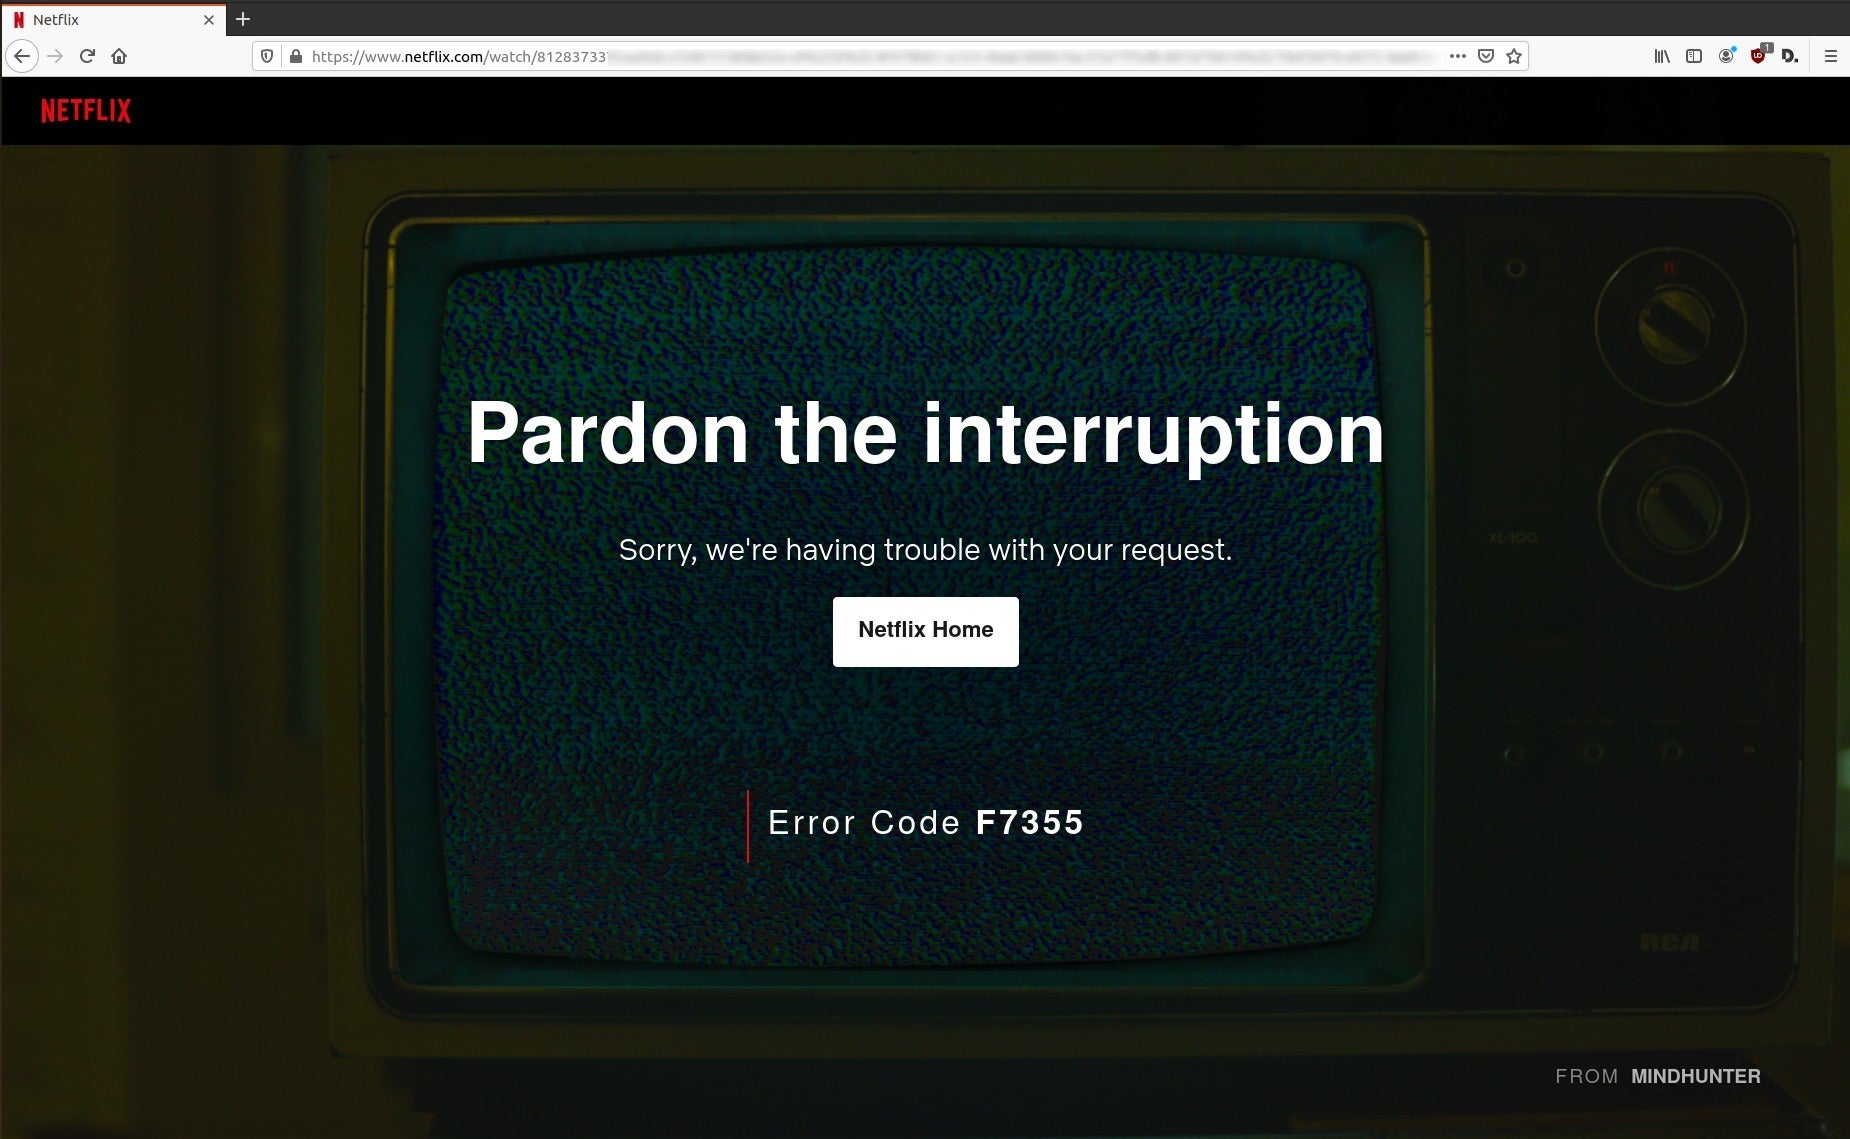 PCWorld
Why? Those companies shield their licensed content material with DRM, and the plug-in that decrypts it isn’t out there for Raspberry Pi OS’s default browser. On high of that, ARM-friendly variants of desktop software program that helps playback on these websites (together with browsers with that oh-so-necessary Widevine Content Decryption Module built-in) don’t exist.
Fortunately, there’s a workaround—a Raspberry Pi group member named ventz found they might extract the Chromebook model of the Widevine CDM plug-in, then mix it with a user-agent switcher extension in Raspberry Pi OS’s Chromium browser.
You can discover detailed directions and background details about this resolution in their blog post, however they’ve since created an easy, one-line command to implement it:
- Open a Terminal window.
- Paste within the following textual content, then hit Enter:
curl -fsSL https://pi.vpetkov.web -o ventz-media-pish ventz-media-pi - Reboot.
 PCWorld
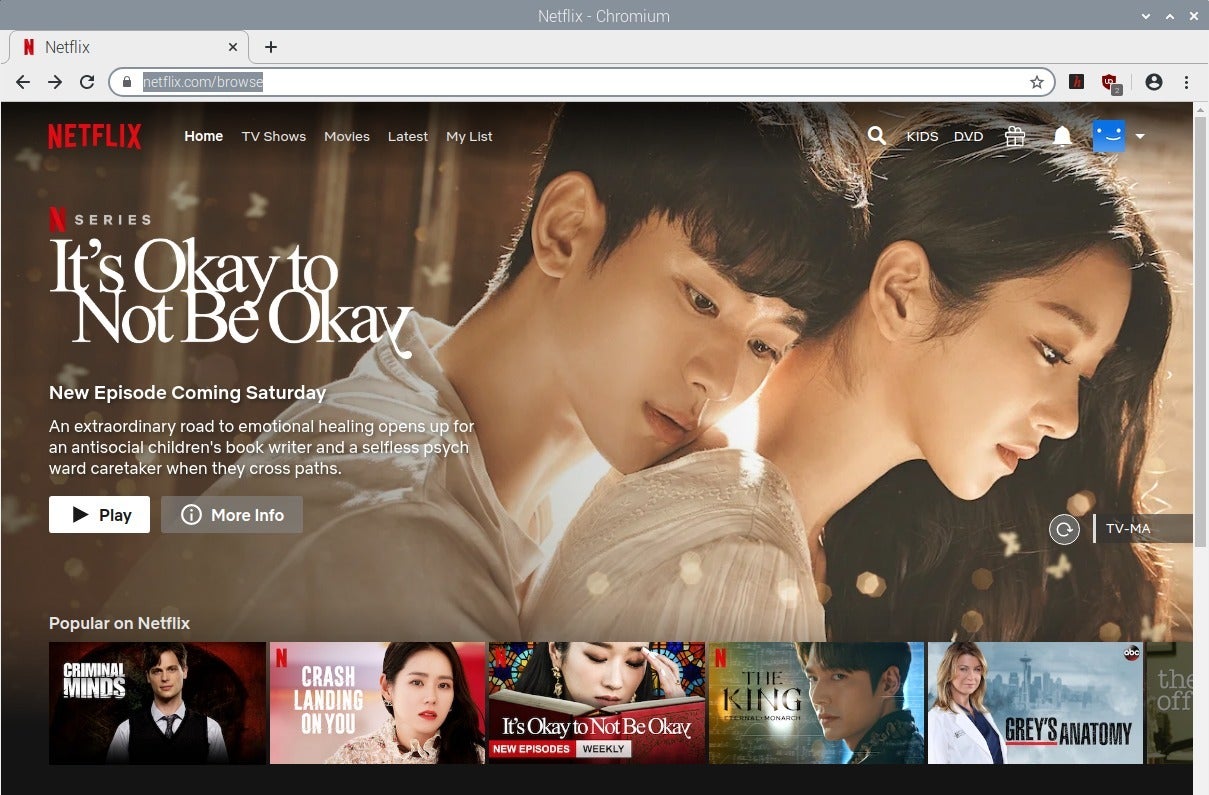
After implementing this workaround, you’ll have two decisions for a browser.
In the Application Menu (discovered by means of the Taskbar in your desktop display screen), it’s best to now see a brand new choice for Chromium beneath Internet: “Chromium (Media Edition).” Load this model everytime you want to stream from Netflix, Hulu, Spotify, or different Widevine-reliant companies.
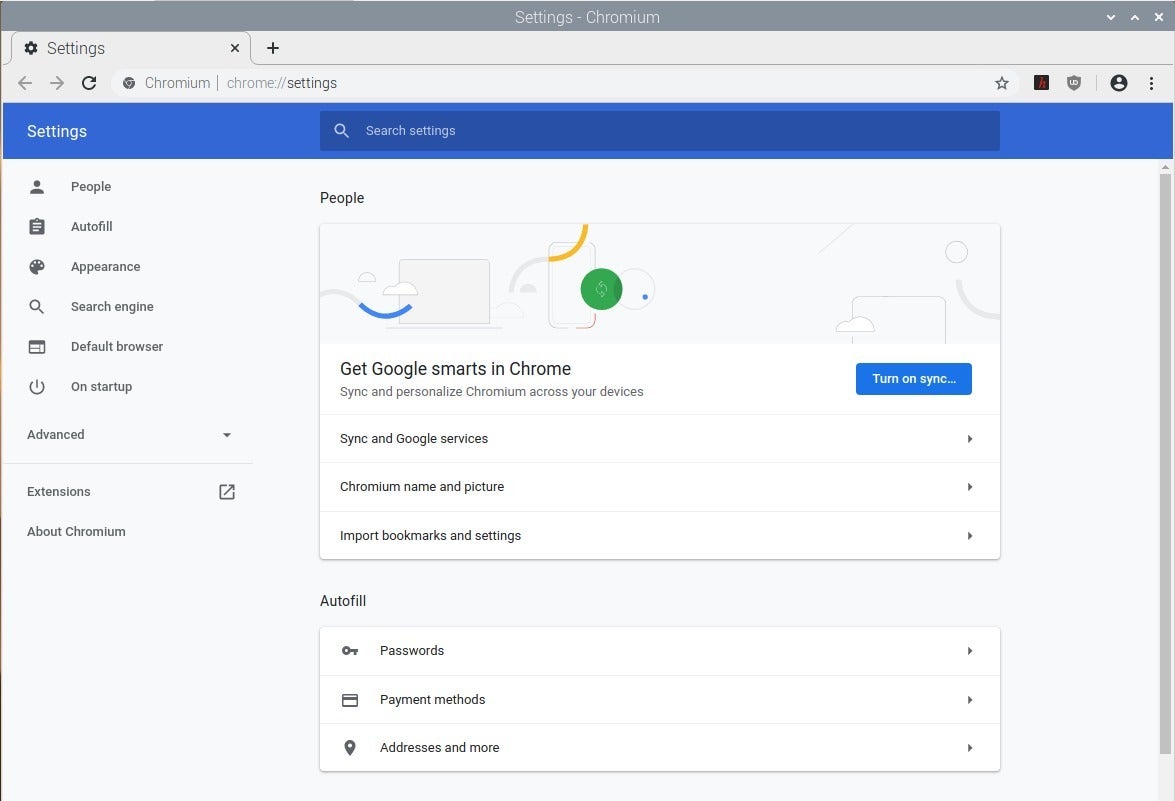
(If you want to make any changes to your browser settings sooner or later, accomplish that by launching the common “Chromium” shortcut, not the “Media Edition” one.)
*A word on safety:
Using the one-line command repair does require belief in an web stranger—which you will not want to give if this PC shall be used for delicate private enterprise (e.g., banking). If so, you possibly can as an alternative strive one in all these three different choices for media streaming:
- Buy a second microSD card, set up Raspberry Pi OS, and go away it as is outdoors of regularly installing OS updates. Swap on this card each time it’s important to cope with delicate knowledge.
- Buy a separate streaming media machine to plug into your monitor or TV, like a Roku Premiere or Fire TV Stick. You can often discover these for about $25 to $30 on sale.
- Re-create ventz’s resolution from scratch your self. One self-described “paranoid/inquisitive” Raspberry Pi group member has already completed so efficiently; these skilled with Linux (or prepared to study on the fly) ought to be capable to do the identical.
User expertise
Overall, this little laptop is pretty snappy for such price range {hardware}. You will discover pauses because the system hundreds a brand new utility or browser tab, and infrequently mild display screen tearing whereas streaming video. But when you’re off and operating, the fundamentals run easily.
For extra particular particulars, we’ve damaged out the expertise in frequent duties beneath.
Tip: Using audio system with the 3.5mm jack? Raspberry Pi OS defaults to HDMI for audio output, so that you’ll want to modify to Analog after which reboot to get sound.
Web searching
 PCWorld
Raspberry Pi OS’s Chromium browser is basically Chrome, however the open-source model.
Based on comparable code to Chrome, Raspberry Pi OS’s default browser is just about an identical to Google’s model. Chromium helps the identical set of plugins and extensions, and has the identical structure for settings and bookmarks. In a nod to privateness and efficiency, it comes preinstalled with uBlock Origin, an ad-block extension, and H264ify, an extension that forces YouTube to stream probably much less strenuous variations of movies. DuckDuckGo can also be the default search engine.
Loading webpages typically have a second or two of delay, however in any other case the expertise is not any totally different than on different units. Adobe Flash works as anticipated, as do video convention websites like Google Meet and Zoom. (Raspberry Pi OS robotically acknowledged our Logitech C920 webcam; no further driver set up was needed.)
Streaming video/audio
 PCWorld
Loading a TV present or film can take slightly longer than on quicker units, however the video playback is easy.
All streaming of video and audio needs to be completed by means of an internet browser—and solely works for the big-name paid companies after making use of the workaround outlined above.
For essentially the most half, video playback is easy at 1080p. You might discover refined hitches in segments with quick motion, however they stood out solely when watching dance movies, a style the place the barest lack of sync between video and audio tracks turns into obviously apparent. Outside of occasional mild display screen tearing, watching films and TV reveals felt equal to different units.
One notable distinction between the Raspberry Pi 4 and different units is the delay when getting into and exiting fullscreen mode in movies. It takes a number of seconds earlier than the system will truly make the change. Playback stays regular by means of the transition.
Desktop packages
 PCWorld
LibreOffice is surprisingly snappy. GIMP, in distinction, requires slightly extra endurance—even executing instructions throughout the program may cause system drag.
Compared to x86-based Windows, Mac, and Linux PCs, few desktop functions can be found for Raspberry Pi OS. The choices increase slightly for these accustomed to compiling packages, however nonetheless not by a lot. Given that this PC construct isn’t meant to cowl greater than the fundamentals, you possibly can set up GIMP (a picture editor) on a full model of Raspberry Pi OS, or each LibreOffice and GIMP on an ordinary model, and go away it at that. Your bases shall be coated.
Within these desktop apps, you’ll discover pauses because the system opens this system or a file, and generally even when executing a command. It’s undoubtedly slower than on a pricier machine, however for a price range machine that prices $100 in complete, we discover it an appropriate expertise. Note that we didn’t check utilizing very giant spreadsheet information—our guess is that these will drag on this machine.
Final ideas
At $100, this construct’s solely draw back is that you just lack room to develop. For some people, it could additionally not be as interesting as a Chromebook with a built-in display screen and webcam, or an older, used x86-based system. But as we all the time say, the fantastic thing about the PC is the liberty of selection—and this venture may be best as the primary laptop for a younger youngster, a relative who dislikes the small screens and better costs of tablets and Chromebooks, or a secondary laptop for company to make use of.