
Good information, everybody: My bar mitzvah movies from the mid-1990s at the moment are digitized for the ages.
While I’ve no intention of really watching them — oy, the embarrassment — I not too long ago acquired the unique tapes from my dad and mom and felt like they had been price preserving in a extra enduring kind than VHS. I used to be in a position to do it for reasonable because of my USB seize card, which I initially purchased to take screenshots of streaming units for my TechHive column on cord cutting however which continues to have all types of different neat makes use of.
Below, I’ll stroll by way of the way to digitize your individual VHS tapes or camcorder footage utilizing the identical strategies, plus a number of additional methods which may make a USB seize card price contemplating.
This column first appeared in Advisorator, Jared’s weekly tech recommendation publication. Sign up to get free tech ideas each Tuesday.
The {hardware}
The USB seize card is a thumb-sized machine with an HDMI enter on one facet and a USB plug on the opposite. Connect the seize card to your laptop’s USB port, then hook up any machine with HDMI output, and you may report that machine’s video utilizing a free program referred to as OBS (extra on that shortly).
Jared Newman / Foundry
Jared Newman / Foundry
Jared Newman / Foundry
Amazon is full of seize playing cards from no-name manufacturers for beneath $20. While the actual one I bought is now not accessible, this one appears to be like fairly comparable, in a position to seize video at 1080p as much as 30 frames per second, or 720p at 60 frames per second. It makes use of a USB-C connector, but additionally has a USB-A adapter. (Alternatively, this one works the opposite approach round.)
You’ll additionally want a VHS participant. If you don’t have one amassing mud in a closet — or don’t know anybody else who does — think about on the lookout for one at a thrift retailer resembling Goodwill, looking out on Facebook Marketplace, or buying on eBay.
Of course, most VHS gamers don’t have HDMI output — together with the one I pilfered from my father-in-law’s home for this undertaking — so that you additionally want a composite-to-HDMI adapter. I grabbed one on Amazon for $10.
The setup, in the long run, appears to be like like this:
VHS Player → Composite video out → Composite adapter → HDMI out → USB Capture Card → PC.
I’m utilizing a Windows desktop, however this setup ought to work simply as properly with a Mac or Linux machine, or a Chromebook capable of running Linux apps.
The software program
Jared Newman / Foundry
Jared Newman / Foundry
Jared Newman / Foundry
The different half of the equation is a free program referred to as Open Broadcaster Software Studio, or OBS. It’s usually used to stream online game console footage on websites like Twitch and YouTube, however you may as well use it to report from just about any HDMI video supply.
Once you’ve put in OBS and connected the USB seize card, you may report video with a handful of steps:
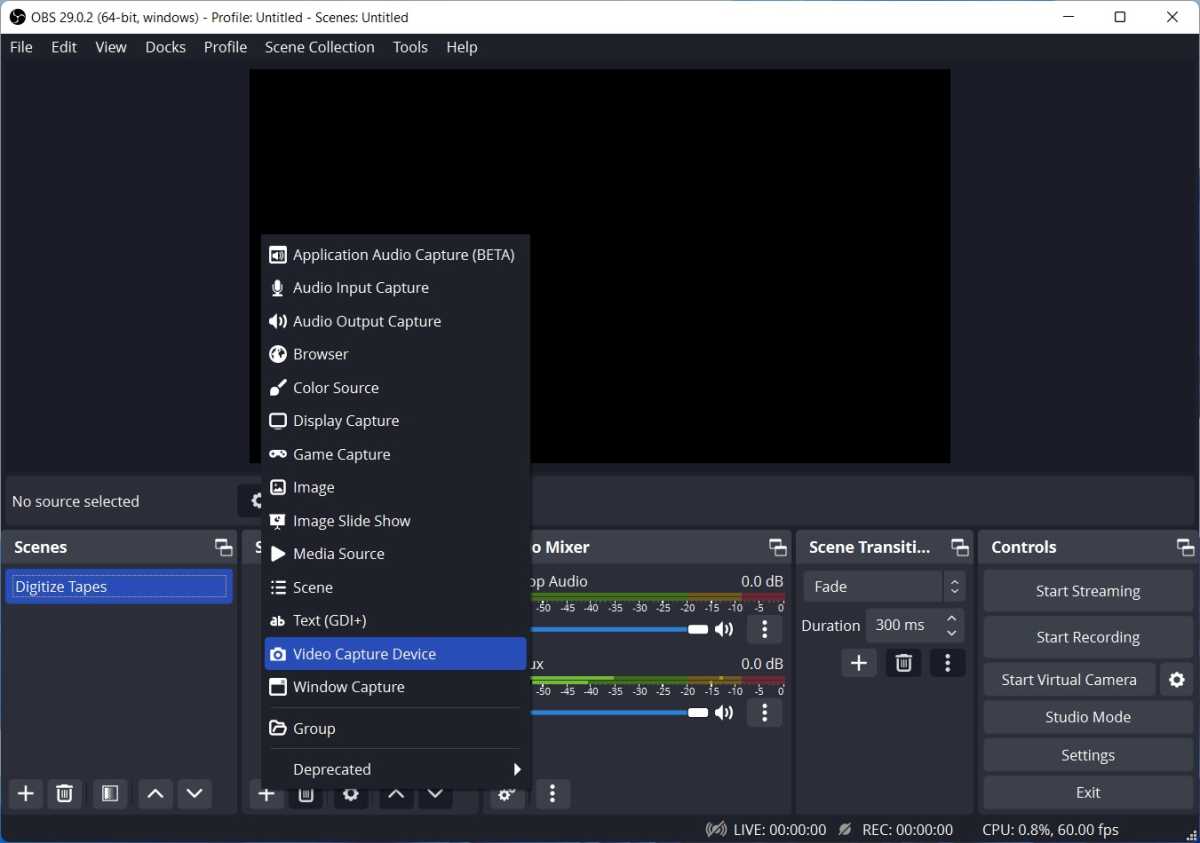
- Under “Sources,” hit +, then choose “Video Capture Device.”
- Give the supply a reputation, like “Capture Card,” and hit “OK.”
- Select “USB 3.0 capture” — that’s your seize card — beneath the Device heading.
Jared Newman / Foundry
Jared Newman / Foundry
Jared Newman / Foundry
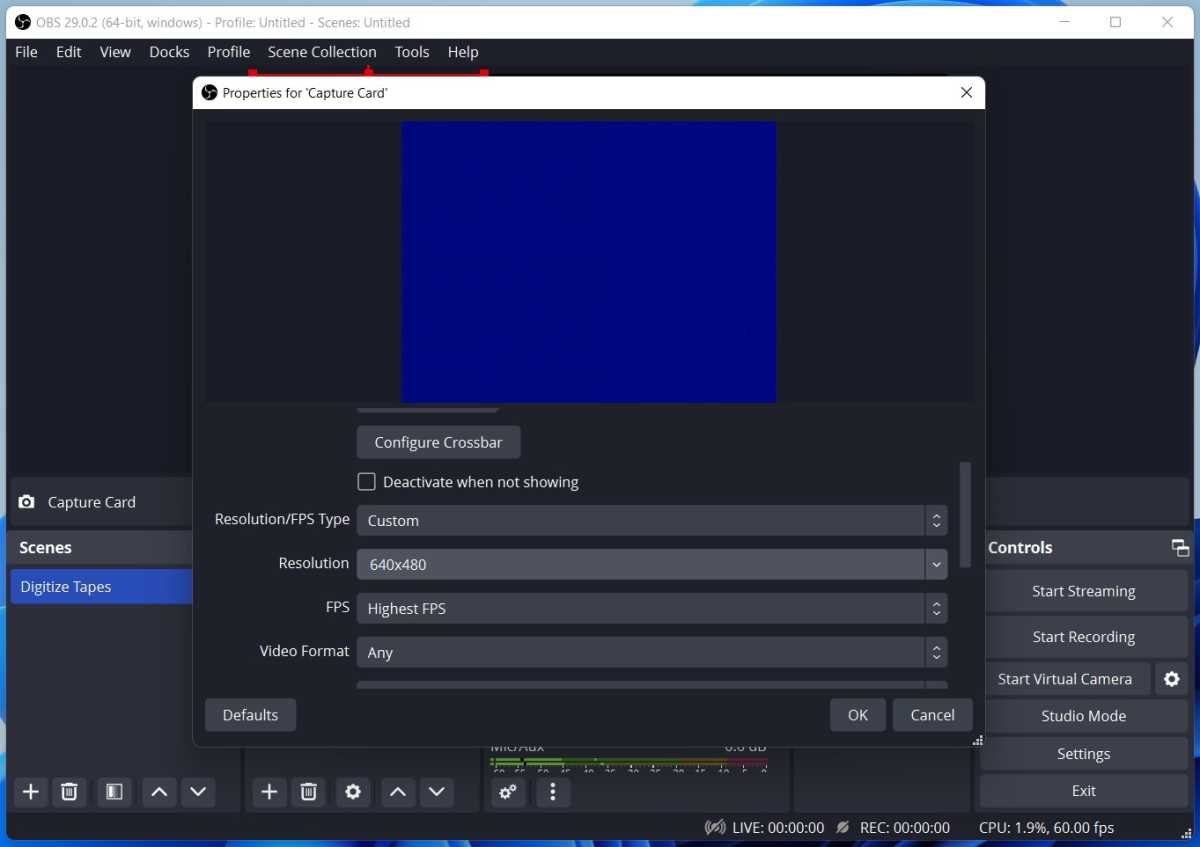
- To protect the VHS side ratio, change “Resolution/FPS Type” to “Custom” and set the Resolution to 640×480, then hit “OK.”
- Under “Audio Mixer,” be sure that the “Desktop Audio” and “Mic/Aux” sliders are set to zero or muted.
- If you wish to preview the tape participant audio earlier than recording, hit ⋮ beneath “Capture Card” within the Audio Mixer part, choose “Advanced Audio Properties,” and set Audio Monitoring to “Monitoring and Output” for the Capture Card.
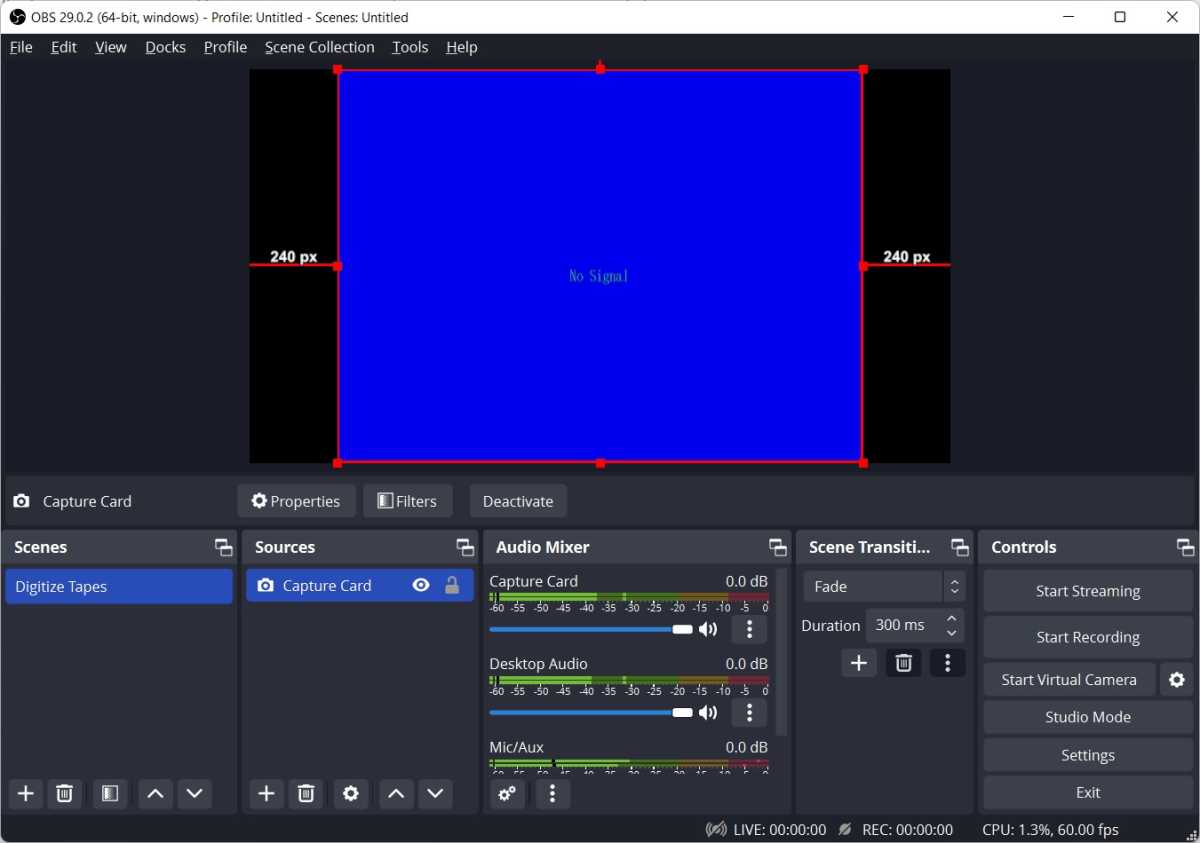
At this level, OBS ought to show your video if you hit play on the VHS participant, however solely in a small nook of the preview window. To repair this, drag the nook of the video so it fills the display screen, then transfer the video into the middle of the preview window.
Jared Newman / Foundry
Jared Newman / Foundry
Jared Newman / Foundry
Now, you may hit play in your VHS participant, and hit “Start Recording” in OBS. Wait till the video has completed and hit “Stop Recording,” and OBS will produce a video file within the MKV format, showing in your laptop’s video folder by default. You can then trim it down with any video enhancing software program (I used the free Solveig AV1 Trimmer for Windows) or use a program like DVD Styler to burn the video to DVD.
More OBS and seize card methods
A seize card and OBS aren’t the one methods to digitize a VHS. You may buy merchandise like Vidbox or Roxio VHS to DVD for this particular function, or pay a professional to transform tapes in bulk.
But if you have already got a VHS participant, shopping for the required adapters will solely value you about $30, roughly half the value of these different options. And within the long-run, the cobbled-together answer is a worthier funding. Once you get the dangle of OBS, it turns into a option to report just about something. Some examples:
- Record from streaming units: Plug a Roku or Fire TV Stick into your seize card, and you may report video from streaming sources resembling Netflix or Disney+. You may right-click the preview window and choose “Screenshot (Source)” to seize a nonetheless picture. This is how I illustrate most of my streaming device reviews over at TechHive.
- Record your desktop: Hit the + button beneath “Sources” in OBS and choose Display Capture (to report your total display screen) or Window Capture (to report only one utility). Note that this received’t work with DRM video sources resembling Netflix.
- Record your self: Add your webcam as a supply from the Video Capture Device menu to incorporate video of your self. You can then overlay it onto different video sources to report your self offering colour commentary.
Note that you should utilize OBS’s “Scenes” menu to toggle between completely different setups, every with its personal structure and seize machine. That approach, you may have a scene for digitizing VHS tapes, one other for recording from streaming gamers, and one other that overlays your webcam, all with out having to arrange every thing from scratch every time.
OBS can take a while to be taught — I’m nonetheless discovering a lot of its intricacies myself — however there’s a reason Twitch and YouTube streamers swear by it: With a little bit follow, the potential use circumstances are virtually limitless.
This column first appeared in Advisorator, Jared’s weekly tech recommendation publication. Sign up to get free tech ideas each Tuesday.