
Pairing AirPods or AirPods Pro with a PC might not be as totally easy as with an iOS gadget, but it surely’s solely marginally more durable. You simply join the earbuds by way of Bluetooth—an easy, quick course of in each Windows 10 and Windows 11. Just comply with our steps under and also you’ll be off and operating.
Do observe, nevertheless, that as an Apple product, AirPods and AirPod Pros lose some performance in Windows. They work effectively for listening to audio, however fall fairly wanting microphone high quality you’d get on iOS or macOS. So whereas Apple’s earbuds can deal with Zoom calls in a pinch, we’d keep away from them as your major Windows headset.
How to pair AirPods or AirPods Pro with Windows 10
First, be certain your AirPods are absolutely charged with each earbuds within the case, and the lid is shut. Also affirm your Windows 10 PC is able to operating Bluetooth gadgets. (The overwhelming majority of contemporary laptops have Bluetooth in-built, as do prebuilt desktop PCs from distributors like Dell and HP.) If your system lacks help, you should purchase an affordable dongle like this TP-Link oneRemove non-product link so as to add that characteristic.
- Open the Settings app in Windows 10. You can discover it by typing settings within the Windows 10 search bar and deciding on the app as soon as it seems. Its icon appears like a cog. Alternatively, you may press the Windows key + I on the similar time.
- In the Settings menu, select Devices.
- The Bluetooth & different gadgets web page will pop up. First, be sure that Bluetooth is turned on by checking the toggle close to the highest of the web page. If it isn’t, flip it on.
- Select Add Bluetooth or different gadget.
- The Add a tool menu will pop up, asking you which of them sort of gadget you’d prefer to pair with. Select Bluetooth.
- Grab your AirPods or AirPods Pro and open the lid.
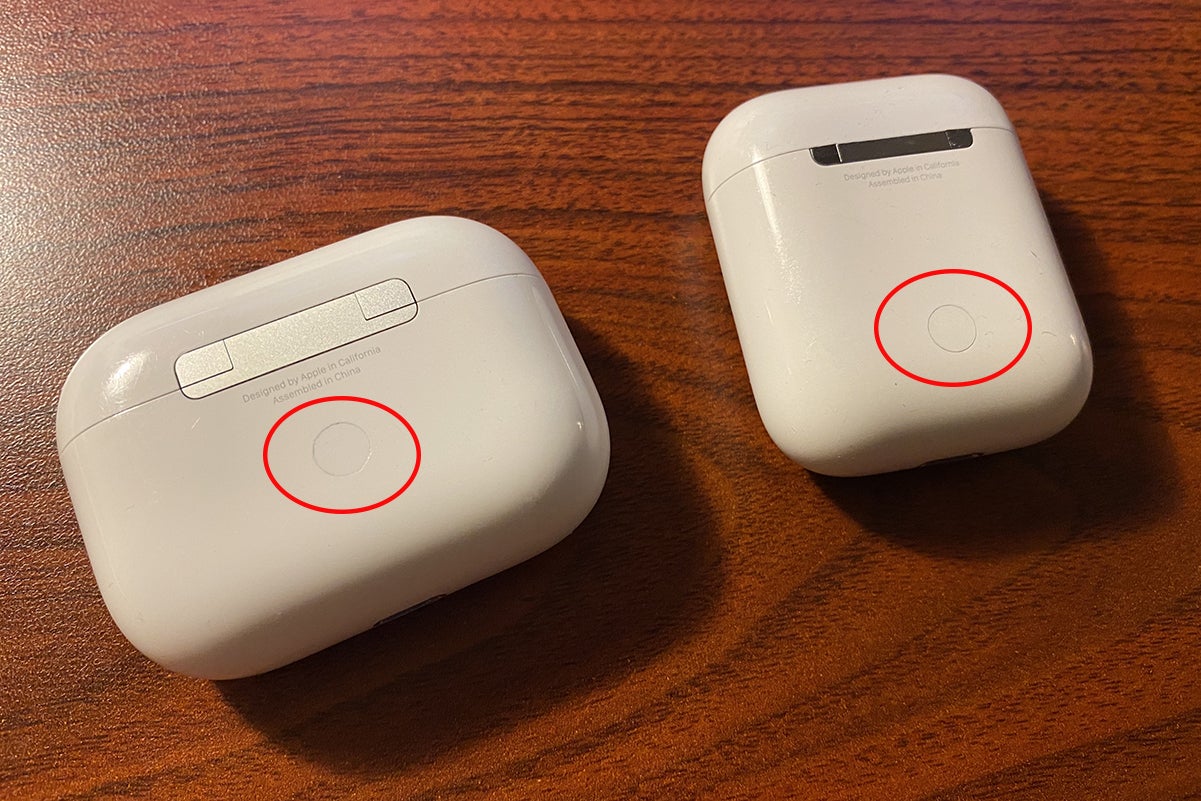
- Hold down the round button on the again of your AirPods for round three to eight seconds. The charging mild in your AirPods will finally begin pulsing white. When this occurs, carry your finger and look again on the Add a tool menu.
- Be affected person. It would possibly take a few seconds for the AirPods to seem. When they do, they’ll doubtless seem as “Headphones” at first after which Windows 10 will load them as “AirPods Pro” (or no matter title you gave them on iOS, in case you have an iPhone or iPad you beforehand used them with). Select them.
- You’ll get a notification saying, “Your device is ready to go!”
Your AirPods ought to instantly turn into your default listening gadget. When you place them again into your case, Windows 10 will mechanically revert to the final audio gadget you used.
How to pair AirPods or AirPods Pro with Windows 11
Before pairing, your AirPods ought to be absolutely charged, with each earbuds within the case and the lid shut. Also confirm that your Windows 11 pc helps Bluetooth connections. Most laptops have Bluetooth in-built, as do desktop PCs bought by means of corporations like Dell or HP. If your PC can’t run Bluetooth gadgets, you should purchase an affordable dongle (like this TP-Link model) so as to add the characteristic.
- Open the Settings app in Windows 11. You entry it by clicking on the Start menu, then clicking on the gray cog icon labled Settings. You can even carry it up by typing settings into the search bar, or urgent Windows + I in your keyboard.
- In the Settings menu, select Bluetooth & gadgets.
- Confirm that the toggle for Bluetooth is turned on. If it’s not, click on on it.
- At the highest of the display screen, click on on the massive button that claims Add gadget.
- When the Add a tool menu seems, select Bluetooth from among the many choices.
- Now open the lid in your AirPods or AirPods Pro. If that is your first time ever pairing the gadget, you may skip to Step 8.
- Otherwise, maintain down the round button on the again of your AirPods. The charging mild in your AirPods will finally begin pulsing white after a number of seconds. (It can take so long as 10 seconds, although.) When this occurs, carry your finger and take a look at the Add a tool menu.
- Be affected person, as it might take a number of seconds for the AirPods to seem. They’ll doubtless seem as “Headphones” at first after which Windows 11 will load them as “AirPods” or “AirPods Pro” (or no matter you’ve renamed them to, should you’ve beforehand used them with an iPhone or iPad). Select them.
- A brand new window will seem that claims “Your device is ready to go!”
Your AirPods ought to now be your energetic listening gadget. You’ll see it as a brand new button on the high of the Bluetooth & gadgets display screen; its standing ought to be marked with a inexperienced dot and listed as Connected voice, music. You can put them again into the case to mechanically disconnect them. Windows 11 will then mechanically change to the final audio gadget you used.
How to reconnect or disconnect AirPods along with your PC (Windows 10)
Your AirPods ought to mechanically begin working along with your PC as soon as you place them again in your ears. If they don’t, you may join them manually.
- Open the Settings app in Windows 10.
- Select Devices.
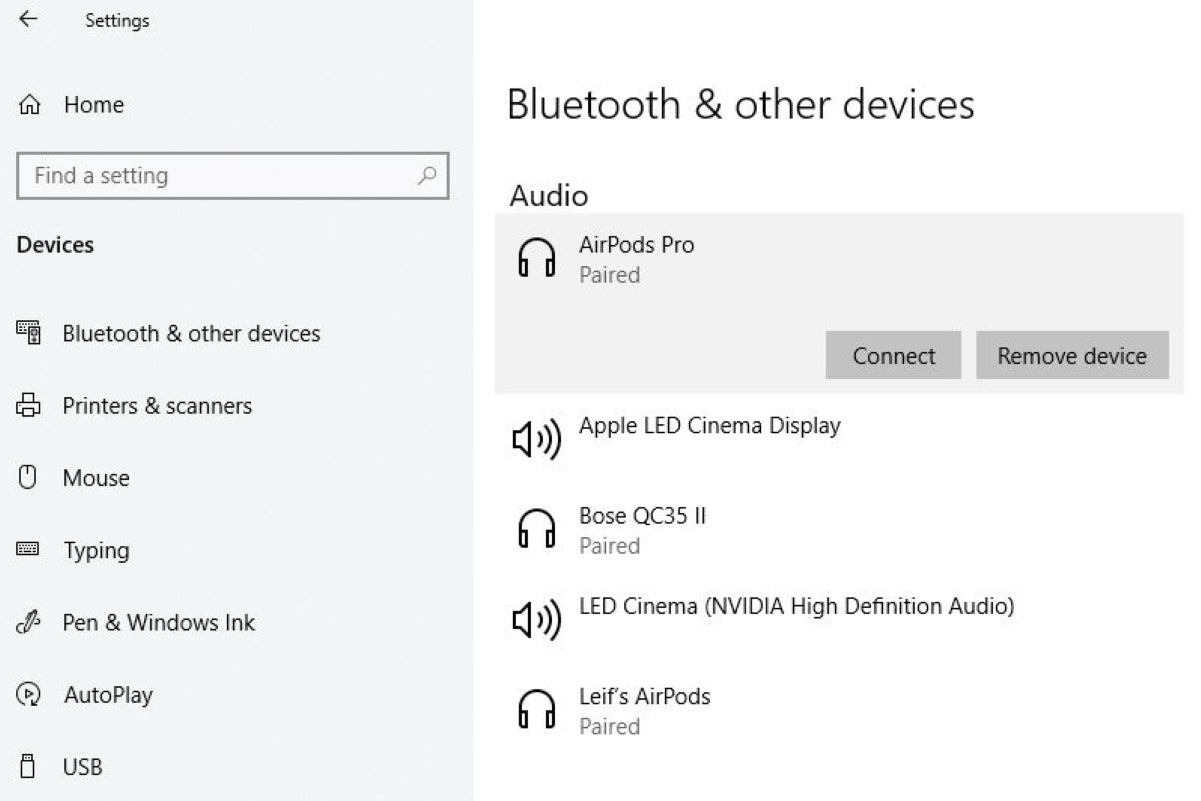
- Scroll all the way down to the Audio part and choose your AirPods.
- In the immediate that pops up, press Connect. Your AirPods ought to now work.
You can even use these similar steps to disconnect your AirPods out of your PC if you wish to use them with an iPhone, iPad, or Mac you’ve beforehand paired them with. Just take into account that you’ll now have to manually join your AirPods by means of the Bluetooth menus on these gadgets whereas your AirPods are nonetheless paired along with your Windows PC.
Keep in thoughts that you simply may need to scroll down a bit with the intention to see the Audio part.
How to reconnect or disconnect AirPods along with your PC (Windows 11)
Your AirPods ought to mechanically reconnect to your Windows 11 PC after you pull them out of your case. If they don’t, you may join them manually.
- Open the Settings app in Windows 11.
- Choose Bluetooth & gadgets.
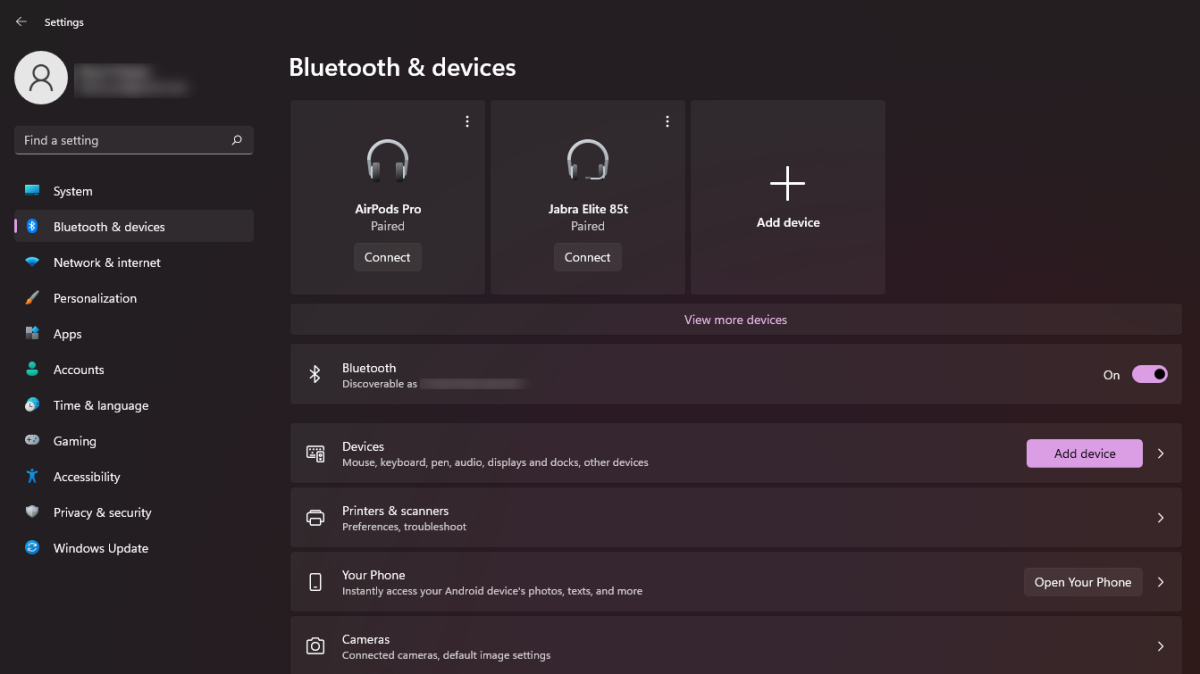
- At the highest of the display screen, you must see a big button in your AirPods (e.g., “AirPods Pro”).
- Click the Connect button.
- If you don’t see your AirPods among the many buttons on this display screen, click on on View extra gadgets simply beneath them. Then scroll all the way down to Audio.
- On the AirPods entry, click on on the vertical set of three dots.
- In the pop-up window that seems, select Connect.
Your AirPods ought to now work. To disconnect them out of your PC, use these similar steps. If you need to use your AirPods with a beforehand paired gadget, you might want to hook up with it manually by means of its Bluetooth menu if computerized connection fails.
PCWorld
How to unpair your AirPods out of your Windows 10 PC
Permanently unpairing your AirPods entails an analogous collection of steps as reconnecting them, however with a single distinction.
- Open the Settings app.
- Press Devices.
- Scroll all the way down to the Audio part and choose your AirPods.
- In the immediate that pops up, press Remove gadget.
How to unpair your AirPods out of your Windows 11 PC
To take away your AirPods as a tool, you’ll take comparable steps as when reconnecting them.
- Open the Settings app.
- Select Bluetooth & gadgets.
- Locate the massive button in your AirPods (e.g., “AirPods Pro”).
- Click on the vertical line of three dots on the upper-right nook of the button.
- In the small pop-up window that seems, select Remove gadget.
- If you may’t discover your AirPods among the many buttons on this display screen, click on View extra gadgets simply beneath them. Then scroll all the way down to Audio.
- On the AirPods entry, click on on the vertical set of three dots.
- Choose Remove gadget.