
Do you, like me, have paper paperwork which have lengthy since been scanned and processed, information or music cassettes that you simply wish to take heed to in your cell phone, and picture prints which might be deliberate for a digital picture e book?
Then you’ll recognize the two-step directions on this article, with which you’ll convert analog media to digital after which course of them additional.
Scan paperwork and have textual content acknowledged
Important insurance coverage papers, contracts, invoices, or just the page-long letter out of your favourite aunt — there are various paper paperwork that you simply need to scan so as to protect them.
If it’s even a textual content that you simply need to search and edit, you possibly can run OCR software program over it after scanning, which acknowledges the textual content in an effort to search it and, if essential, edit it with an ordinary phrase processor.
Step 1: Scan paperwork
With the freeware Not Another PDF Scanner 2 (Naps 2), you’ve loads of choices for enhancing and saving the scan after scanning a doc. The instrument can also be very straightforward to make use of.
IDG
To digitize a paper doc, you want a scanner and the corresponding software program. The scanner can both be a mixture printer with a scan perform or a standalone machine that may solely scan.
If you could scan plenty of paperwork, you can too go for a devoted doc scanner from Ricoh’s Scansnap family, for instance. Depending on the mannequin, these gadgets price from round $350, are designed for top throughput, and are additionally able to duplex scanning.
If, however, you don’t have the area for a mixture printer and solely must scan particular person pages of textual content sometimes, a cellular scanner such because the Brother DS-640 for round $100 is appropriate.
However, a scanner alone doesn’t make a scan. You additionally at all times want scanning software program or the scanner driver. This is normally provided with the machine and gives roughly settings with which you’ll affect the scan end result, together with the decision, the output listing, and choices for duplex scanning, if a tool helps this.
If the motive force choices aren’t enough, you can too use third-party software program. We advocate the open supply program Not Another PDF Scanner 2, or Naps 2 for brief.
The instrument works with the gadgets of all main producers and gives an OCR (Optical Character Recognition) perform as a particular characteristic — i.e. it might acknowledge scanned textual content. But extra on this in step 2.
To use Naps 2, first create a profile on your scanner or mixture printer. To do that, click on on Profiles > New > Select machine after which on the product identify, then click on twice on “OK” and “Done.”
Scan the specified doc and double-click on the preview. You now have the choice of rotating the scan, cropping it, adjusting the brightness, distinction, hue, and colour saturation utilizing the slider, changing it to black and white, and sharpening it.
Once the corrections are full, save the scan as a PDF or picture, whereby BMP, GIF, JPG, PNG, TIF, EMF, and Exif can be found for choice and you can too make additional settings.
Step 2: Recognize textual content
As already talked about, Naps 2 gives you the choice of working textual content recognition on the scanned doc after every scan. In the “Optical text recognition” menu merchandise, choose the language of the doc, the OCR mode (Fast, Best, or Legacy), whether or not the acknowledged textual content is searchable, and whether or not the OCR needs to be activated routinely after every scan.
German and English are already pre-installed for the doc language, different languages might be added freed from cost by way of a obtain hyperlink.
Attention: Naps 2 can not output and save the scanned textual content as a textual content file! If you need to edit the textual content, save the scanned doc as a PDF, open it in a PDF viewer, after which copy the textual content right into a phrase processor utilizing “Select all” and “Paste.”
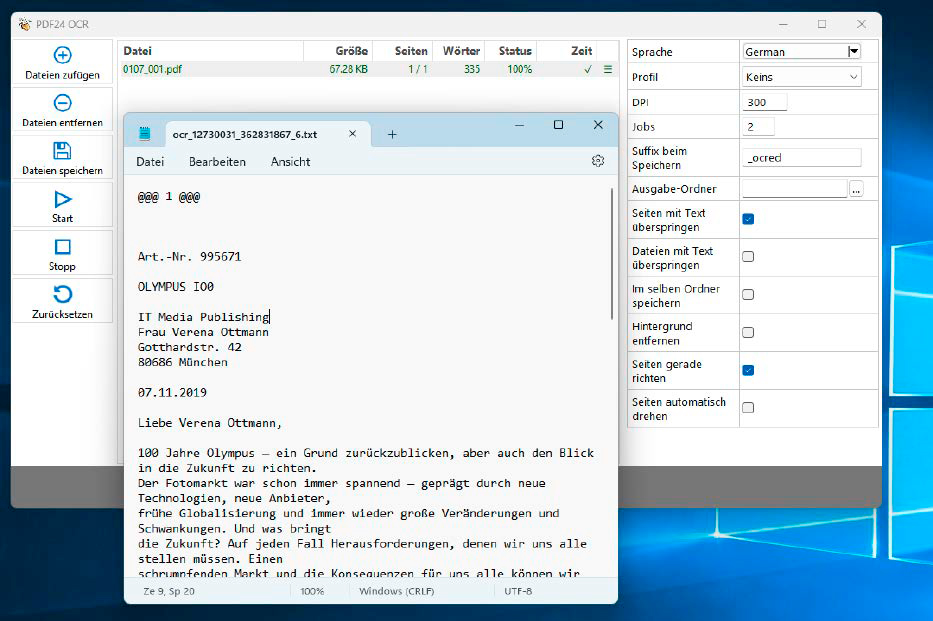
The free PDF24 Creator has an built-in OCR perform that reads textual content in PDF information in order that they are often searched later. It additionally outputs the texts as a TXT file for enhancing if required.
IDG
Alternatively, you can too use PDF24 Creator and name up the built-in textual content recognition by way of the “Open PDF24 OCR” button.
Select the specified PDF by way of “Add files” and begin the OCR with “Start.” Once full, click on on the three horizontal strains subsequent to the PDF and on “Show recognized text.” A TXT file opens with the acknowledged textual content, which you’ll adapt and save as required.
Digitize and optimize photographs
If you continue to have paper prints of photographs sorted in albums or mendacity round unfastened, you possibly can {photograph} them very simply, but additionally laboriously along with your smartphone.
If you solely need to digitize slides or negatives, you will see what you’re in search of in Kodak’s Slide-N-Scan range. The gadgets can be found with or and not using a show and help movie codecs of 135, 110, and 126 millimeters.
Of course, photographs will also be scanned utilizing the scan perform of a traditional mixture machine. There are additionally scanning applications with built-in picture processing which might be significantly appropriate for scanning paper prints.
Step 1: Scan photographs
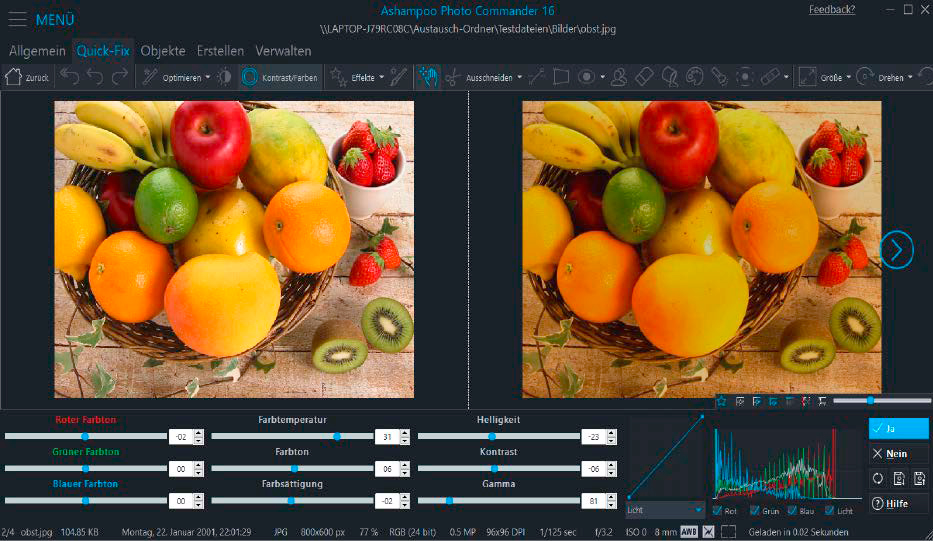
Photo Commander 16 from Ashampoo allows you to scan paper prints along side a scanner and in addition has fundamental enhancing instruments on board.
IDG
Ashampoo Photo Commander 16 is the proper software program for scanning and enhancing photographs.
After set up, click on on the three horizontal strains after which beneath File > Scan/Import > Scan picture. Select your scanner or the mix machine, specify the output format — right here you possibly can select between PNG, JPG, PDF, and Multipage PDF — and the folder by which the pictures are to be saved. Click on “Scan” to begin scanning.
Step 2: Optimize photos
If you wish to edit your scanned photos with Photo Commander 16, you will see numerous choices within the “Edit” menu, a few of which you can too entry by way of the navigation bar:
- With the “Quick Fix Tools” you possibly can optimize distinction, colours, and white steadiness, take away picture noise in three phases and straighten a picture.
- A mushy focus, red-eye remover, clone stamp, and eraser are additionally accessible.
- Under “Edit objects” you possibly can add textual content and shapes, whereas “Modify” adjusts the picture measurement and the canvas.
- Last however not least, you’ve the choice of influencing the colour depth, making use of blurring, and enhancing a picture with regard to the colour channels.
By the best way: You can customise the looks of this system beneath “Configuration” and “All settings.” For instance, unchecking “Modern app menu” beneath “General” makes the interface a lot clearer and simpler to make use of.
Digitize information and handle music
Music fans nonetheless rave in regards to the atmospheric crackling of a report in comparison with the sterile sound of a CD. If you need to benefit from the crackling sound in your cellular machine, you need to convert your information to digital.
Step 1: Digitize vinyl information
There are numerous methods to attach a report participant to your PC. If the machine has a USB port, merely join it to the pc as regular utilizing a USB cable.
However, if the report participant has a unique audio output, resembling line-out by way of cinch, jack, or related, the PC ought to have an acceptable line-in connection.
You may also want the suitable audio cable (resembling RCA to RCA, RCA to jack, or jack to jack) to attach the 2 gadgets collectively. Make positive you utilize the right connector sort, i.e. TS for mono or TRS for stereo alerts.
If your PC doesn’t have a line-in socket, you can too use the microphone enter, or — particularly really helpful for notebooks that shouldn’t have audio inputs — you may get a USB adapter with microphone and headphone connection, which is out there from Amazon from $9. They normally additionally present higher sound high quality than the built-in onboard sound chips on the motherboard.
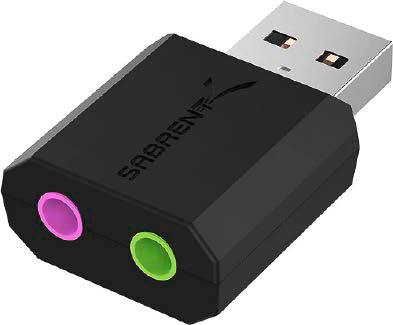
Especially with notebooks that shouldn’t have audio inputs, you possibly can retrofit audio sockets for little cash with a USB adapter. The adapters are literally meant for connecting headsets.
IDG
In addition to the {hardware} connection, additionally, you will want recording software program to digitize your information. The freeware Audacity is appropriate for this.
You should first configure it after set up: Under Edit > Settings > Devices within the “Playback” and “Recording” sections, choose the sound card or the connection in your PC because the “Device.” Alternatively, you can also make the choice by way of the drop-down menus in the primary window.
You may specify beneath Edit > Settings > Devices in “Recording” beneath “Channels” whether or not you need to make the recording in mono or stereo.
If essential, make additional settings beneath “Quality” and “Directories” if you wish to change the default storage folders for saving, opening, importing, and exporting.
If the whole lot is configured appropriately, begin playback of the report, and concurrently begin digitization by urgent the crimson button.
Attention: If the sound monitor in Audacity is lower off on the prime and backside, you need to alter the amount in this system.
To save the file, choose the specified format by way of File > Export, whereby the required library for MP3 is already put in. You can obtain further libraries freed from cost by way of the menu merchandise of the identical identify.
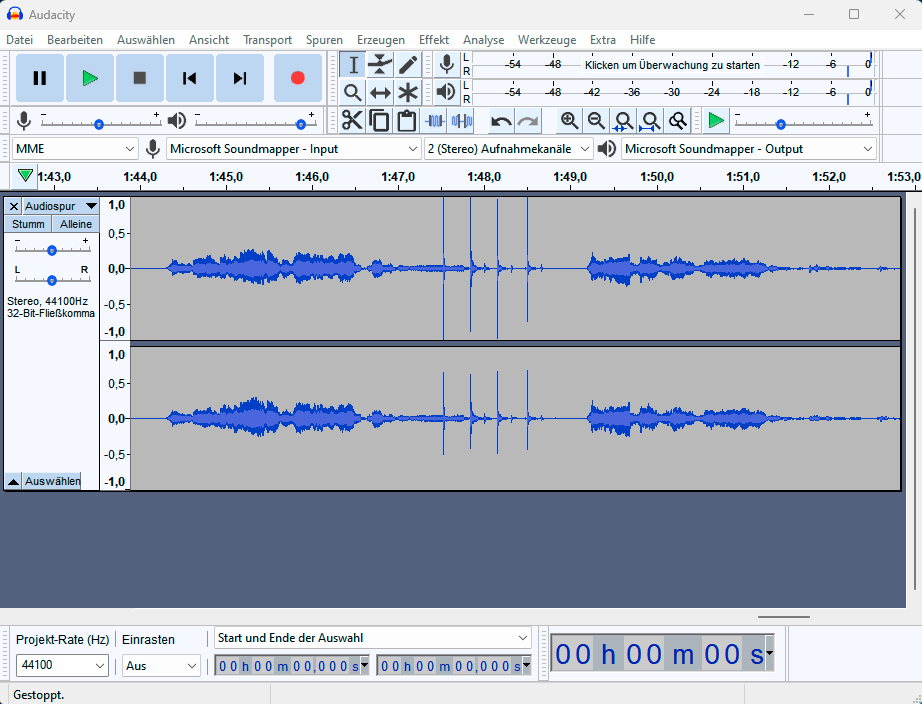
With the freeware Audacity you possibly can digitize information, cassettes, and different analog media, supplied you’ve a playback machine and the required connections in your PC. You can regulate the extent by way of the amount in this system.
IDG
By the best way: Music cassettes will also be digitized in the identical method. You want a cassette participant with audio or headphone output and the suitable cable to the PC. Audacity then serves as recording software program once more.
Step 2: Organize and play tracks
If you’ve your information in MP3 format in your laborious drive, you now must switch the info to your cellular machine. You can do that with Audials One 2024 Special Edition, for instance.
The program is primarily designed to report music, podcasts, and free movies from the web. However, it will also be used to handle and switch music.
The free Audials Play app provides you entry to the music in your PC and you can too obtain it to your cell phone. The content material of your PC then seems as a separate tab within the app.
IDG
After set up, click on on the sheet music image in the primary view. You will land within the “My music” space, the place you possibly can name up the “PC” storage location utilizing the arrow to the correct of the lettering. Click on the entry, then on the three dots and “Options.” In the “Additional folders to display” part, click on on “Add, music files,” and navigate to the folders with the digitized information. Confirm with “Select folder” and “OK.”
The folders together with the audio tracks now seem in the primary view of Audials One 2024 SE and might be edited utilizing the pencil icon.
To switch your music to your cellular machine, you will want the free Audials Play Android app. Log in with the identical Audials account to which you’ve registered Audials One 2024 SE.
Then faucet on “Music” and swap to the tab that bears the identify of your PC. You will discover your music there and may obtain it utilizing the three dots and “Copy to phone.”
This article was translated from German to English and initially appeared on pcwelt.de.