


Not everybody wants a pc with a full set of bells and whistles. A Chromebook’s simplified interface makes it fashionable with faculties—and people of us who function IT assist for much less tech-savvy relations. It can price lower than a funds PC, too.
You won’t even must spend something when you have an older laptop computer already mendacity about. Installing the equal of Chrome OS onto aged {hardware} takes lower than an hour’s price of elbow grease, and the ultimate consequence usually feels snappier than at present’s dirt-cheap Chromebooks.
Here’s find out how to do it.
How to transform a laptop computer right into a Chromebook
For this venture, we’ll be utilizing Neverware’s CloudReady working system, which relies on Chromium OS—the identical open-source code that Google constructed Chrome OS on. You can learn extra in regards to the fundamental differences between the two in case you’re curious, however all you want to know is that Neverware has made the expertise of utilizing CloudReady all however similar to Chrome OS.
Step 1: Check that your laptop computer will meet the necessities
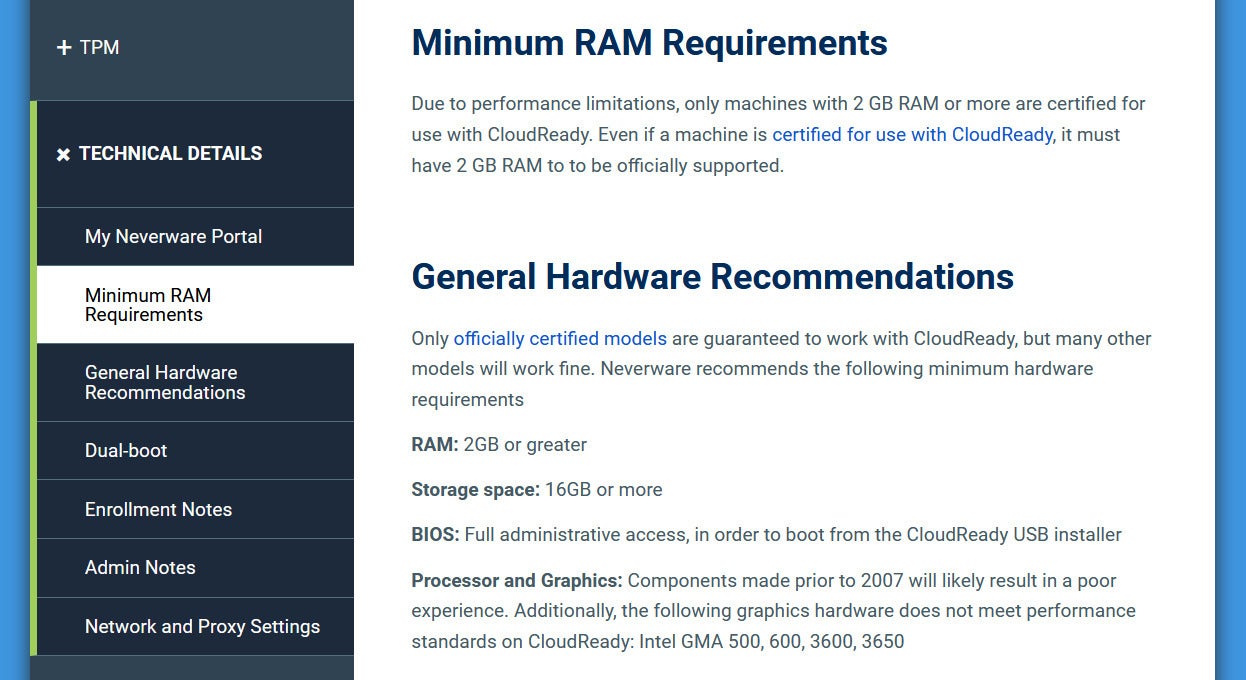
CloudReady’s system necessities are very minimal: Just 2GB RAM, 16GB storage, full BIOS entry, and manufactured after 2007.
Like Chrome OS, CloudReady’s system requirements are very minimal. The laptop computer will need to have 2GB RAM, 16GB storage, full BIOS entry, and ideally been manufactured after 2007. You will nonetheless must test your CPU mannequin, although, as Neverware says that processors with Intel Graphics Media Accelerator (GMA) 500, 600, 3600, or 3650 graphics {hardware} don’t meet CloudReady’s efficiency requirements. (In different phrases, Atom processors from the Silverthorne, Lincroft, and Cedarview households, which have been present in low-end laptops between 2008 and early 2012.)
Your best-case situation is to search out your laptop computer on Neverware’s listing of certified devices, which clearly outlines assist for options like a webcam or touchscreen. (Click on the mannequin’s title to see these particulars.) We lucked out that our take a look at mannequin, a 2013 Lenovo ThinkPad X240, had full function assist throughout the board.
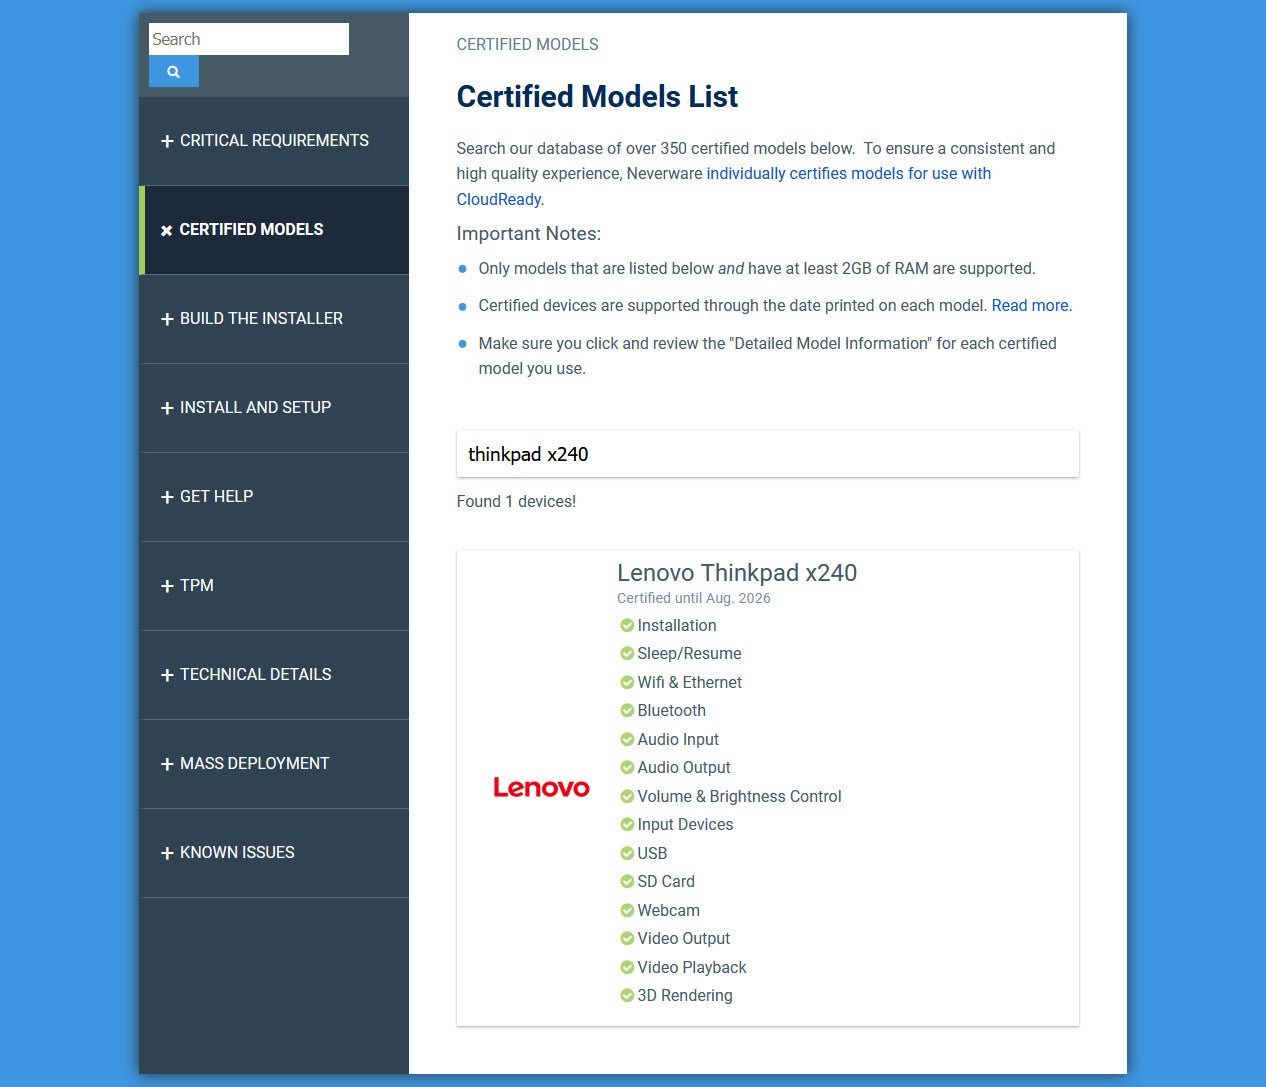
We lucked out with our take a look at machine, a Lenovo ThinkPad X240: All of its main options are supported.
Note: On the compatibility listing, you’ll see desktop programs like iMacs and NUCs listed as properly—so when you have a spare monitor, mouse, and keyboard, you may as an alternative spin up a Chromebox. Systems operating built-in graphics work greatest.
If your laptop computer meets the {hardware} necessities however isn’t on the licensed gadgets listing, don’t fear. You can check out CloudReady from the flash drive you’ll create subsequent, which can permit you to take a look at out how properly it really works with out having to nuke your system.
FRIENDLY REMINDER: Before you start putting in CloudReady, again up any recordsdata inside your present OS! The course of is identical as a clear set up of Windows, Linux, or MacOS and can utterly wipe your drive.
Step 2: Prepare the flash drive for set up
To set up CloudReady, you’ll want an 8GB USB drive (at minimal) and a PC, Mac, or Chromebook to create the set up media. The course of takes about 20 minutes.
We’ll be utilizing CloudReady Home edition, which is free and can work even in case you plan to make use of this Chromebook for varsity. You can ignore any notes or warnings about restrictions associated to administration licenses—they’re for the CloudReady Enterprise and Education variations, which might be bought by an establishment.
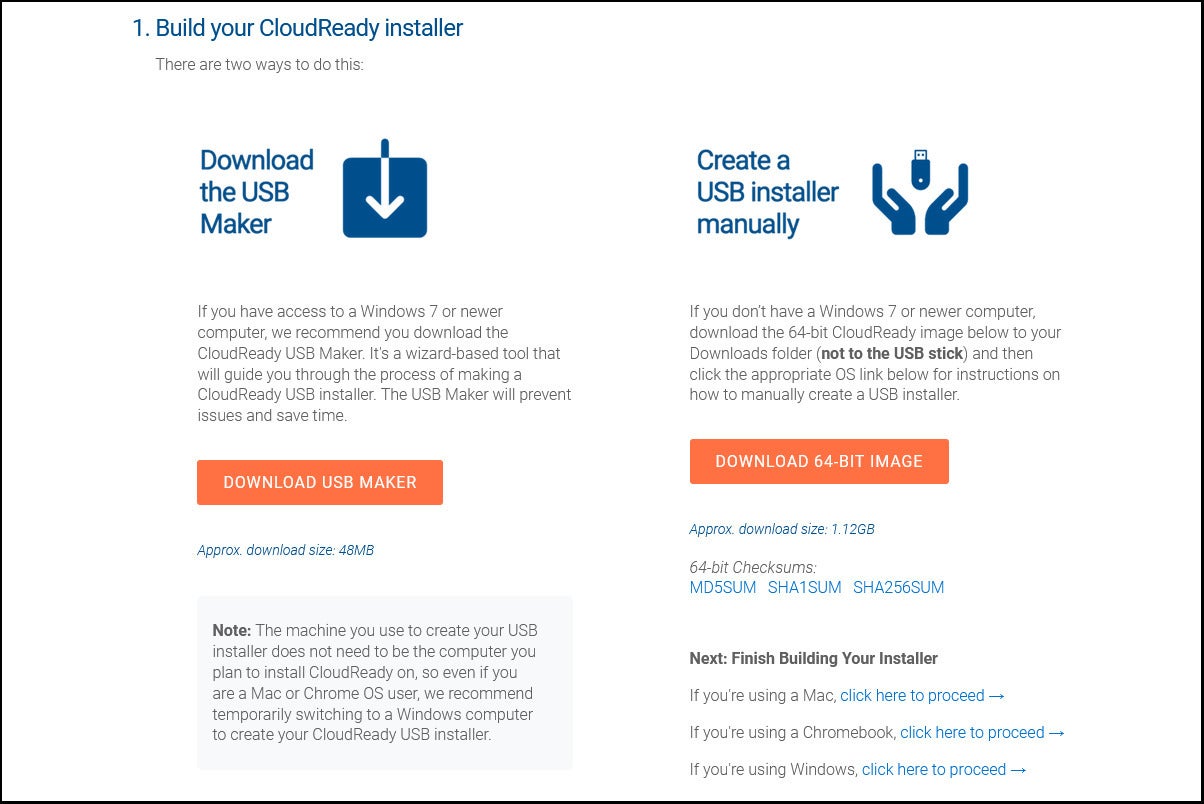
The best option to put together a CloudReady set up flash drive is with a Windows PC.
Using a Windows PC to create the flash drive installer is best, as you may obtain the USB Maker and let it deal with the entire course of. For Macs, Linux PCs, and Chromebooks, you’ll must obtain the CloudReady Home Edition picture first, then observe Neverware’s directions for manually constructing your installer.
Step 3: Boot to flash drive
In order as well to your newly created flash drive, you need to bypass your laptop computer’s computerized boot order, which often defaults to the first storage drive. You’ll do that by hitting a key in your keyboard when your PC first powers up, just like coming into the BIOS. Search on-line for find out how to entry the boot precedence menu on your specific laptop computer, because it’s not common. For instance, our Lenovo ThinkPad X240 required mashing F12 proper at startup, whereas for our HP Spectre x360, it was F9. CloudReady even supplies an inventory of boot keys for major laptop makers.
An various methodology is to enter your laptop computer’s BIOS (once more, you’ll need to seek for which key to press when powering in your laptop computer) and rearrange the automated boot order, then undo that change after your CloudReady set up.
In both case, you need to be capable of select the USB drive as your boot system. A white display with the CloudReady emblem will seem shortly thereafter.
Tip: Did you find yourself in your laptop computer’s default working system after booting, regardless of repeated button mashing? You probably waited too lengthy to begin urgent the important thing, otherwise you aren’t urgent the suitable mixture of keys. (Example: Function keys might require additionally holding the Fn key—or not.)
Step 4: Install CloudReady
When the welcome display seems, you may take one in every of two routes: Immediately wipe your laptop computer’s drive and set up CloudReady, or configure CloudReady on the flash drive. Choose the latter in case you’d like to check drive CloudReady for brief whereas—doing so lets you check out Neverware’s OS with none harmful modifications to your system.
Note: Neverware doesn’t suggest operating CloudReady indefinitely from a USB drive as a consequence of efficiency and storage limitations, in addition to a scarcity of OS updates.
Option 1: Installation
After booting to the flash drive, watch for the welcome display to look, then click on on the underside right-hand a part of the display the place the time exhibits. In the menu that seems, select Install OS.
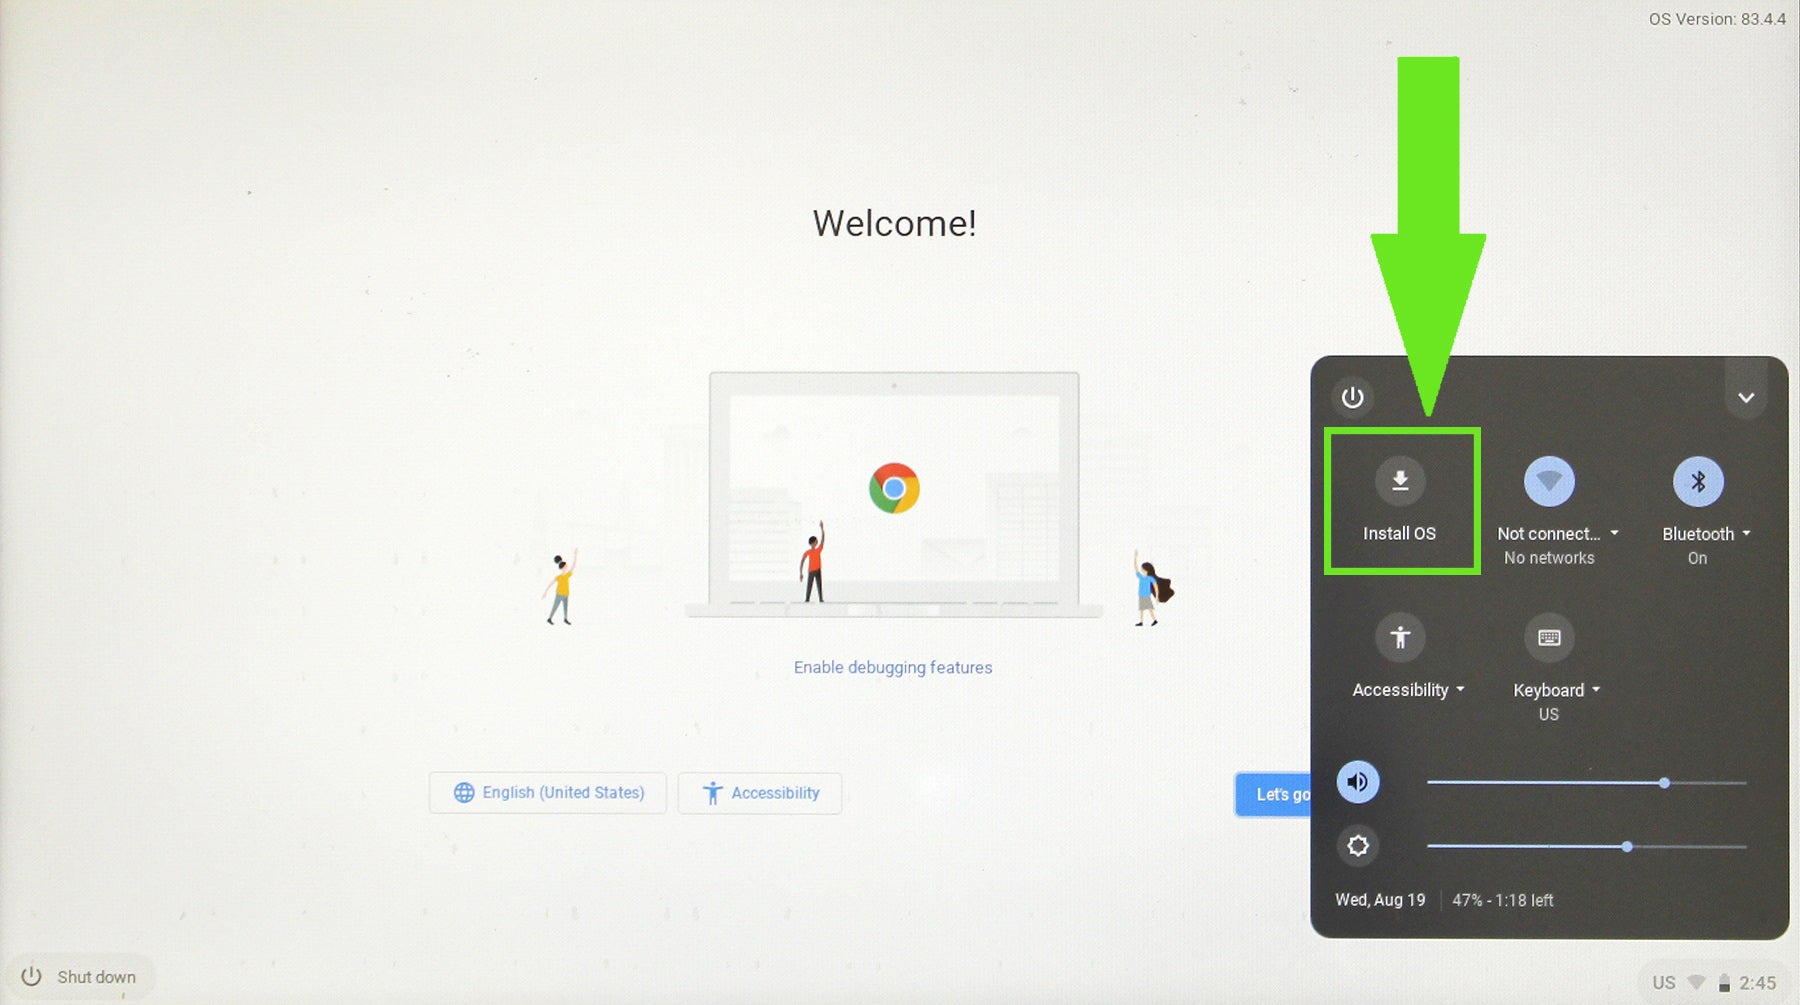
You’ll discover the choice for putting in CloudReady to your laptop computer inside this menu.
Confirm you’ve backed up your knowledge, after which proceed with the onerous drive wipe and CloudReady set up. Neverware says the method will final between 5 and 20 minutes, relying on the pace of your flash drive and the scale of your laptop computer’s onerous drive.
Upon completion, your laptop computer will shut down. Remove the USB drive, then energy the system again on (and undo any modifications to your BIOS’s computerized boot order, if relevant). You’ll see a welcome display as soon as once more, now operating out of your laptop computer. Click on Let’s Go to start setup.
Option 2: Try out CloudReady from the flash drive
When the welcome display seems, click on on Let’s Go to begin setup. After passing by means of configuration screens for Wi-Fi, knowledge sharing, and Google account login, you’ll attain the desktop. Close out of the pop-up window that exhibits information on the paid editions and present launch notes to start utilizing CloudReady.
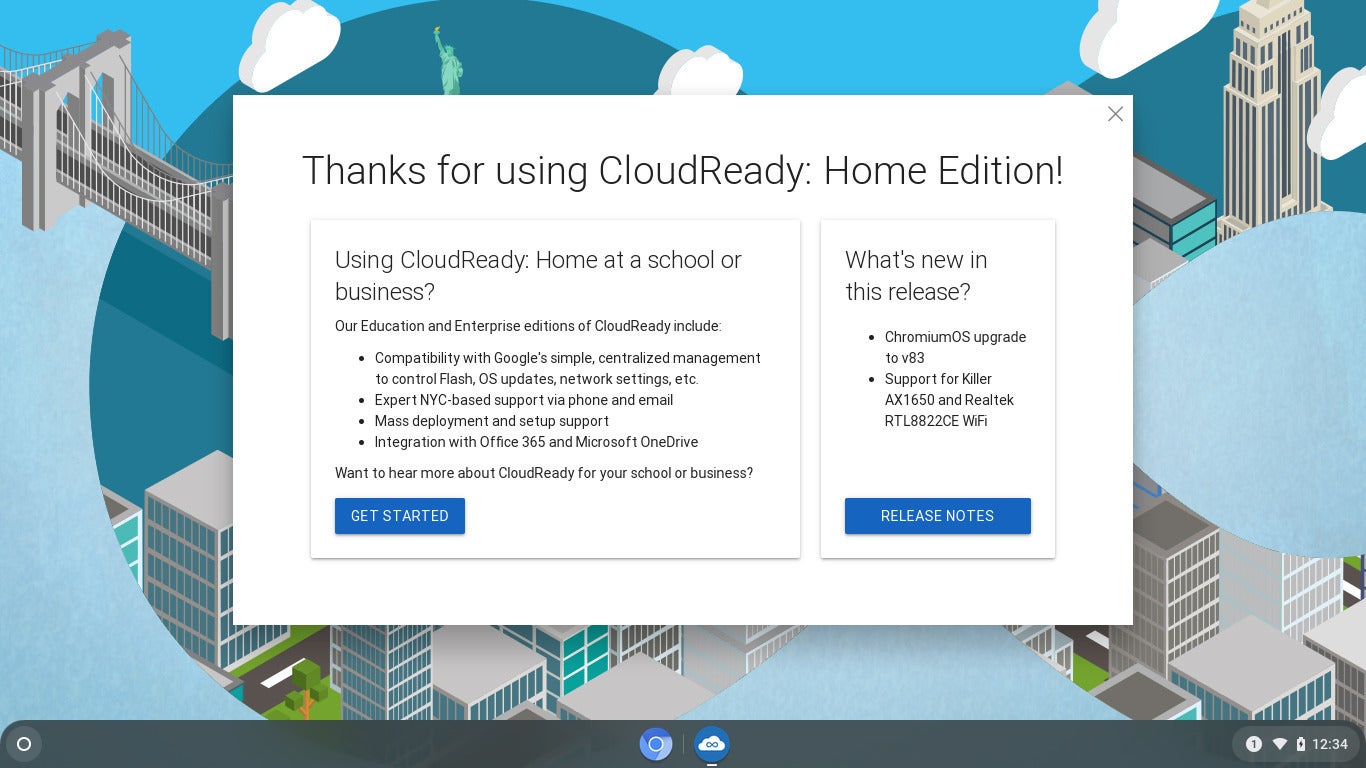
Unless you want to learn the discharge notes, you may shut out of this desktop begin display instantly.
You can later set up CloudReady domestically by clicking on the time within the backside right-hand a part of the display. Choose Install OS within the menu that seems. After completion, your laptop computer will shut down. Remove the USB drive, then energy the system again on (and undo any modifications to your BIOS’s computerized boot order, if relevant). You’ll see the welcome display as soon as once more, now operating out of your laptop computer; start setup by clicking on Let’s Go.
Step 5: Enable Proprietary Media Components
In order for CloudReady to perform identical to Chrome OS, you’ll must take one additional step. Paid video streaming providers that depend on DRM safety (like Netflix and Hulu) received’t work till you allow a set of proprietary media plugins. It’s the one factor that doesn’t work proper out of the field.

Avoid operating into Netflix’s M7361-1254 error by enabling Chromium’s Proprietary Media Components.
Access the system settings by typing chrome://os-settings right into a Chromium browser window. (You may click on on the time within the backside proper of the display, after which on the gear icon.) Choose Media Plugins, then set up Proprietary Media Components.
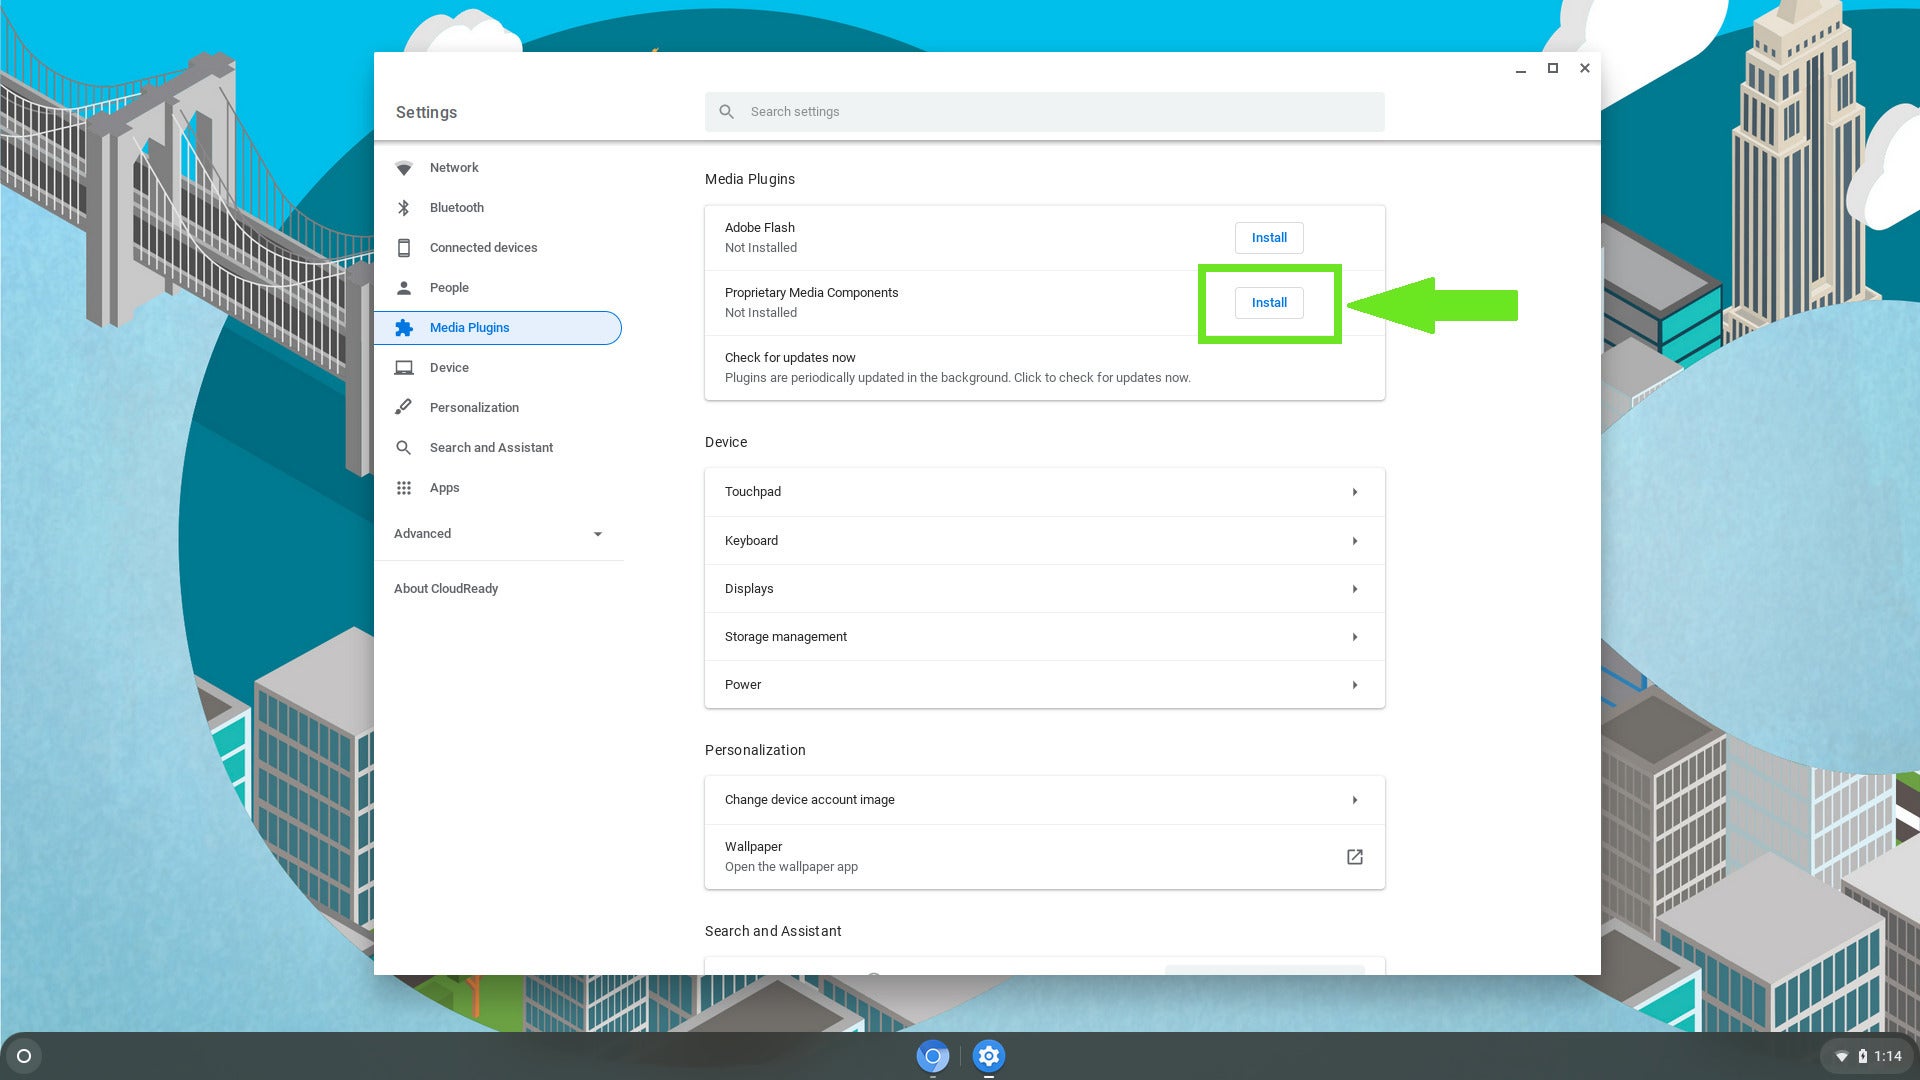
Unlike Chrome OS, it’s a must to take one additional step to make each DRM-protected streaming video and Adobe Flash work in CloudReady.
You may select to put in Adobe Flash now, too, although it’ll nonetheless stay off by default. You’ll want to complete enabling Flash afterward by opening Chromium and navigating to Settings > Site Settings > Flash, then clicking the toggle subsequent to Block websites from operating Flash. That will change the setting to Ask first, permitting you to activate Flash on a case-by-case foundation.
How properly does it run?
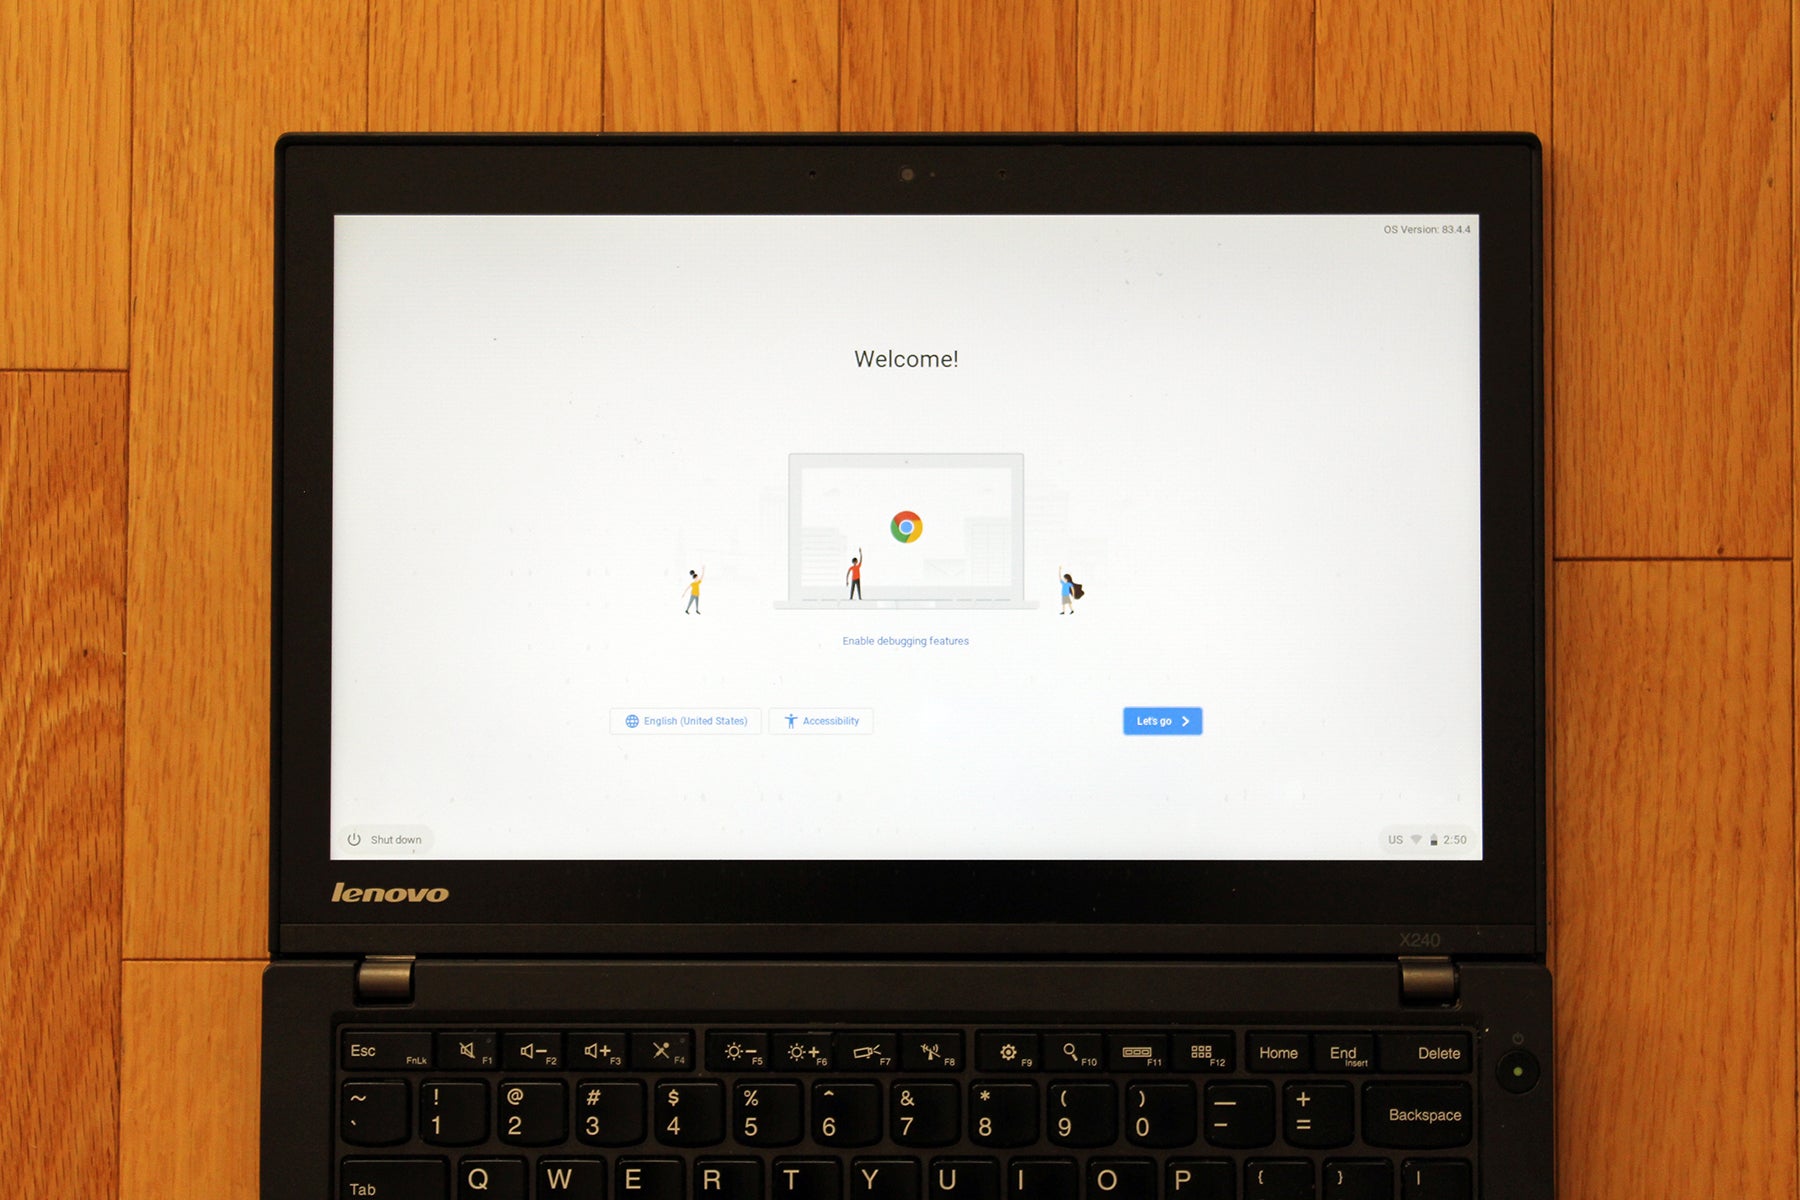
As a Windows PC, our Lenovo ThinkPad X240 was beginning to get lengthy within the tooth. As a Chromebook, its {hardware} mechanically made for a easy, nice expertise.
For this text, we used a 2013 Lenovo ThinkPad X240, borrowed from our IT division’s stash of decommissioned laptops. This 12.5-inch touchscreen laptop computer is lengthy within the tooth by at present’s requirements, principally as a consequence of a spinning-platter onerous disk drive—when working inside Windows 8.1, I may really feel delays in response throughout mundane use.
But our X240’s Intel Core i5-4300U processor, 8GB RAM, and 500GB drive completely crushes at present’s funds Chromebooks. It hangs fairly properly with mid-range fashions, too, regardless of its 1366×768 decision show. When we tried CloudReady off the flash drive, the touchscreen labored instantly and the system ran buttery easy; even when put in on the onerous disk drive, CloudReady had a a lot quicker response time than Windows 8.1. Normally I’d swap in an SSD on a semi-older laptop computer to delay its life, however I discovered I may use CloudReady on the X240’s present {hardware} with out craving for that improve.
Standby battery life additionally improved, permitting us to go from a day of use between prices in Win 8.1 to a few days in CloudReady.
If you don’t have an previous laptop computer
Try looking for gently used notebooks amongst dependable pals or household. Local universities generally even have surplus departments, which offload older laptop tools by promoting it to the general public. On event, you will discover good refurbished computer systems by means of Amazon WarehouseRemove non-product link or WootRemove non-product link, too.
Final suggestions
- If your older laptop computer has low-end {hardware} (or very previous {hardware}) paired with a hard-disk drive, you’ll get higher efficiency by swapping in an SSD. Make positive to search out out the peak of your present onerous drive earlier than shopping for, in order that it’ll match the house.
- Though CloudReady features all however the identical as Chrome OS, one small distinction is that the keyboard layouts don’t match precisely. Most keyboard commands carry over, however a couple of are somewhat totally different (like taking a screenshot). Our Lenovo ThinkPad X240 didn’t even match Neverware’s suggestion of CTRL + F5 for a web page refresh; for some inexplicable cause, CTRL + F11 labored as an alternative. You may must experiment to search out the suitable key combos.