

After an extended day of looking at a display screen, your eyes can really feel drained. Luckily, Windows presents a number of instruments for many who have hassle seeing, both due to easy fatigue or a incapacity. Taking benefit of those options can ease eye pressure, making you are feeling more energizing and extra productive.
Accessibility is a significant power of the Windows working system. Both Windows 10 and 11 provide quite a few methods to make working simpler on the eyes. Keep in thoughts that each one eyes are totally different! Some types of help is likely to be helpful whereas others won’t be. All of our suggestions are free, although we’re going to supply one hardware-based suggestion that you simply will must pay for.
Are you on the hunt for a brand new monitor? If so, it is best to try our roundup of the best monitors obtainable at present.
Buy a greater monitor
More and extra, laptop computer makers and show producers are providing high-refresh-rate shows that push above the default refresh charge of 60Hz. These are primarily provided for avid gamers and smoother inking for skilled artists, however your eyes can thanks, too. When a display screen refreshes, your eyes should compensate. But at the next refresh charge these fixed updates blur collectively, easing the pressure in your eyes. Just don’t push it too far: even Samsung, a show producer, thinks 75Hz is enough.
Keep an eye fixed out for shows that publicize themselves as flicker-free, too. I’d want to make use of LED bulbs at our home, however my spouse complains that even flicker-free LED bulbs can set off her migraines. Some shows use a know-how known as pulse-width modulation to handle the quantity of sunshine generated by the brightness controls. You won’t be capable to consciously sense the flickering, however your eyes may.
(Open these pictures in a brand new tab to assist protect your drained eyes.)
Mark Hachman / IDG
I want massive, vivid shows that provide HDR capabilities for gaming, however that’s not for everybody. Display luminosity (how a lot gentle a show places out) is mostly measured in nits. We take into account about 250 nits or so to be appropriate for on a regular basis use; some laptops put out far more than that in order that they can be utilized outdoors. You can keep away from flickering points by shopping for a 250-300 nit show and working it at most brightness.
Turn on the blue gentle filter
Some shows, just like the Dynamic AMOLED 2X discovered contained in the Galaxy Book3 Pro 360, promise to chop blue gentle simply by regular operation. Regardless, turning on the blue light filter in Windows 10 or enabling the blue-light filter in Windows 11 is a brilliant, straightforward strategy to keep away from eye pressure and guarantee a extra restful sleep. Blocking blue gentle offers your show a yellowish forged, however it’s price it. It’s additionally quite a bit less complicated than shopping for a display screen movie or particular glasses.
IDG / Alex Huebner
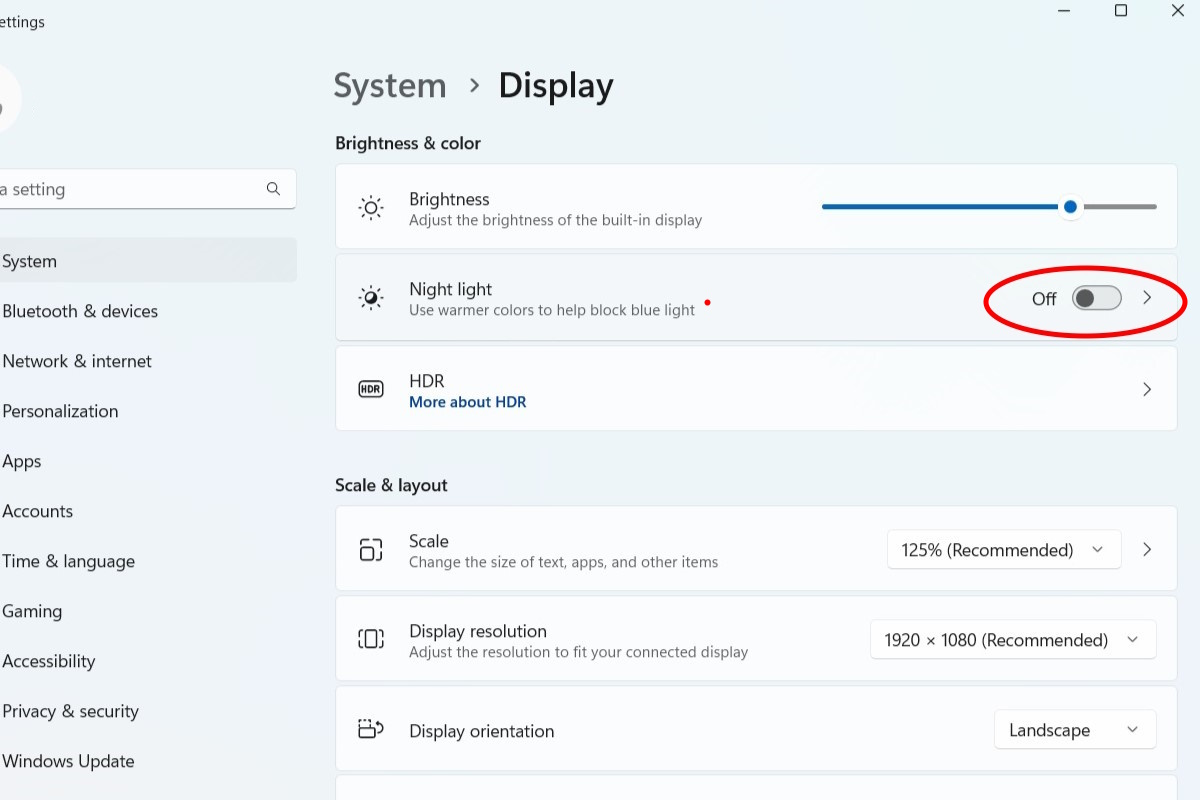
In Windows 11, navigate to System > Display inside the Settings menu and activate “night light.” Note that it is best to be capable to schedule Night Light and modify its power, too.
(Don’t) modify the decision
In normal, increased display screen decision normally interprets into extra element, in order that pictures, textual content, and so forth are sharp and properly outlined. You may say, properly, adjusting a 4K show to 1920×1080 will increase the dimensions of the icons—that’s good, proper? Not actually—that is one adjustment we normally suggest you don’t make. Sometimes adjusting the display screen decision too excessive can decrease the refresh charge.
Screen decision is adjusted on a display-by-display foundation. To mess around with the settings, go to the Windows Settings menu (System > Display) and click on on one of many shows within the diagram. Scroll right down to Display decision and make any tweaks you need to. Just remember that any adjustments you make will mechanically revert again until you manually approve them.
Adjust the dimensions and scale of icons, textual content, and extra in Windows
That’s why adjusting the decision to alter the dimensions of your Windows icons is a foul concept. Windows already presents two other ways to regulate the dimensions of what you’ll see in your show and each are price realizing about and experimenting with.
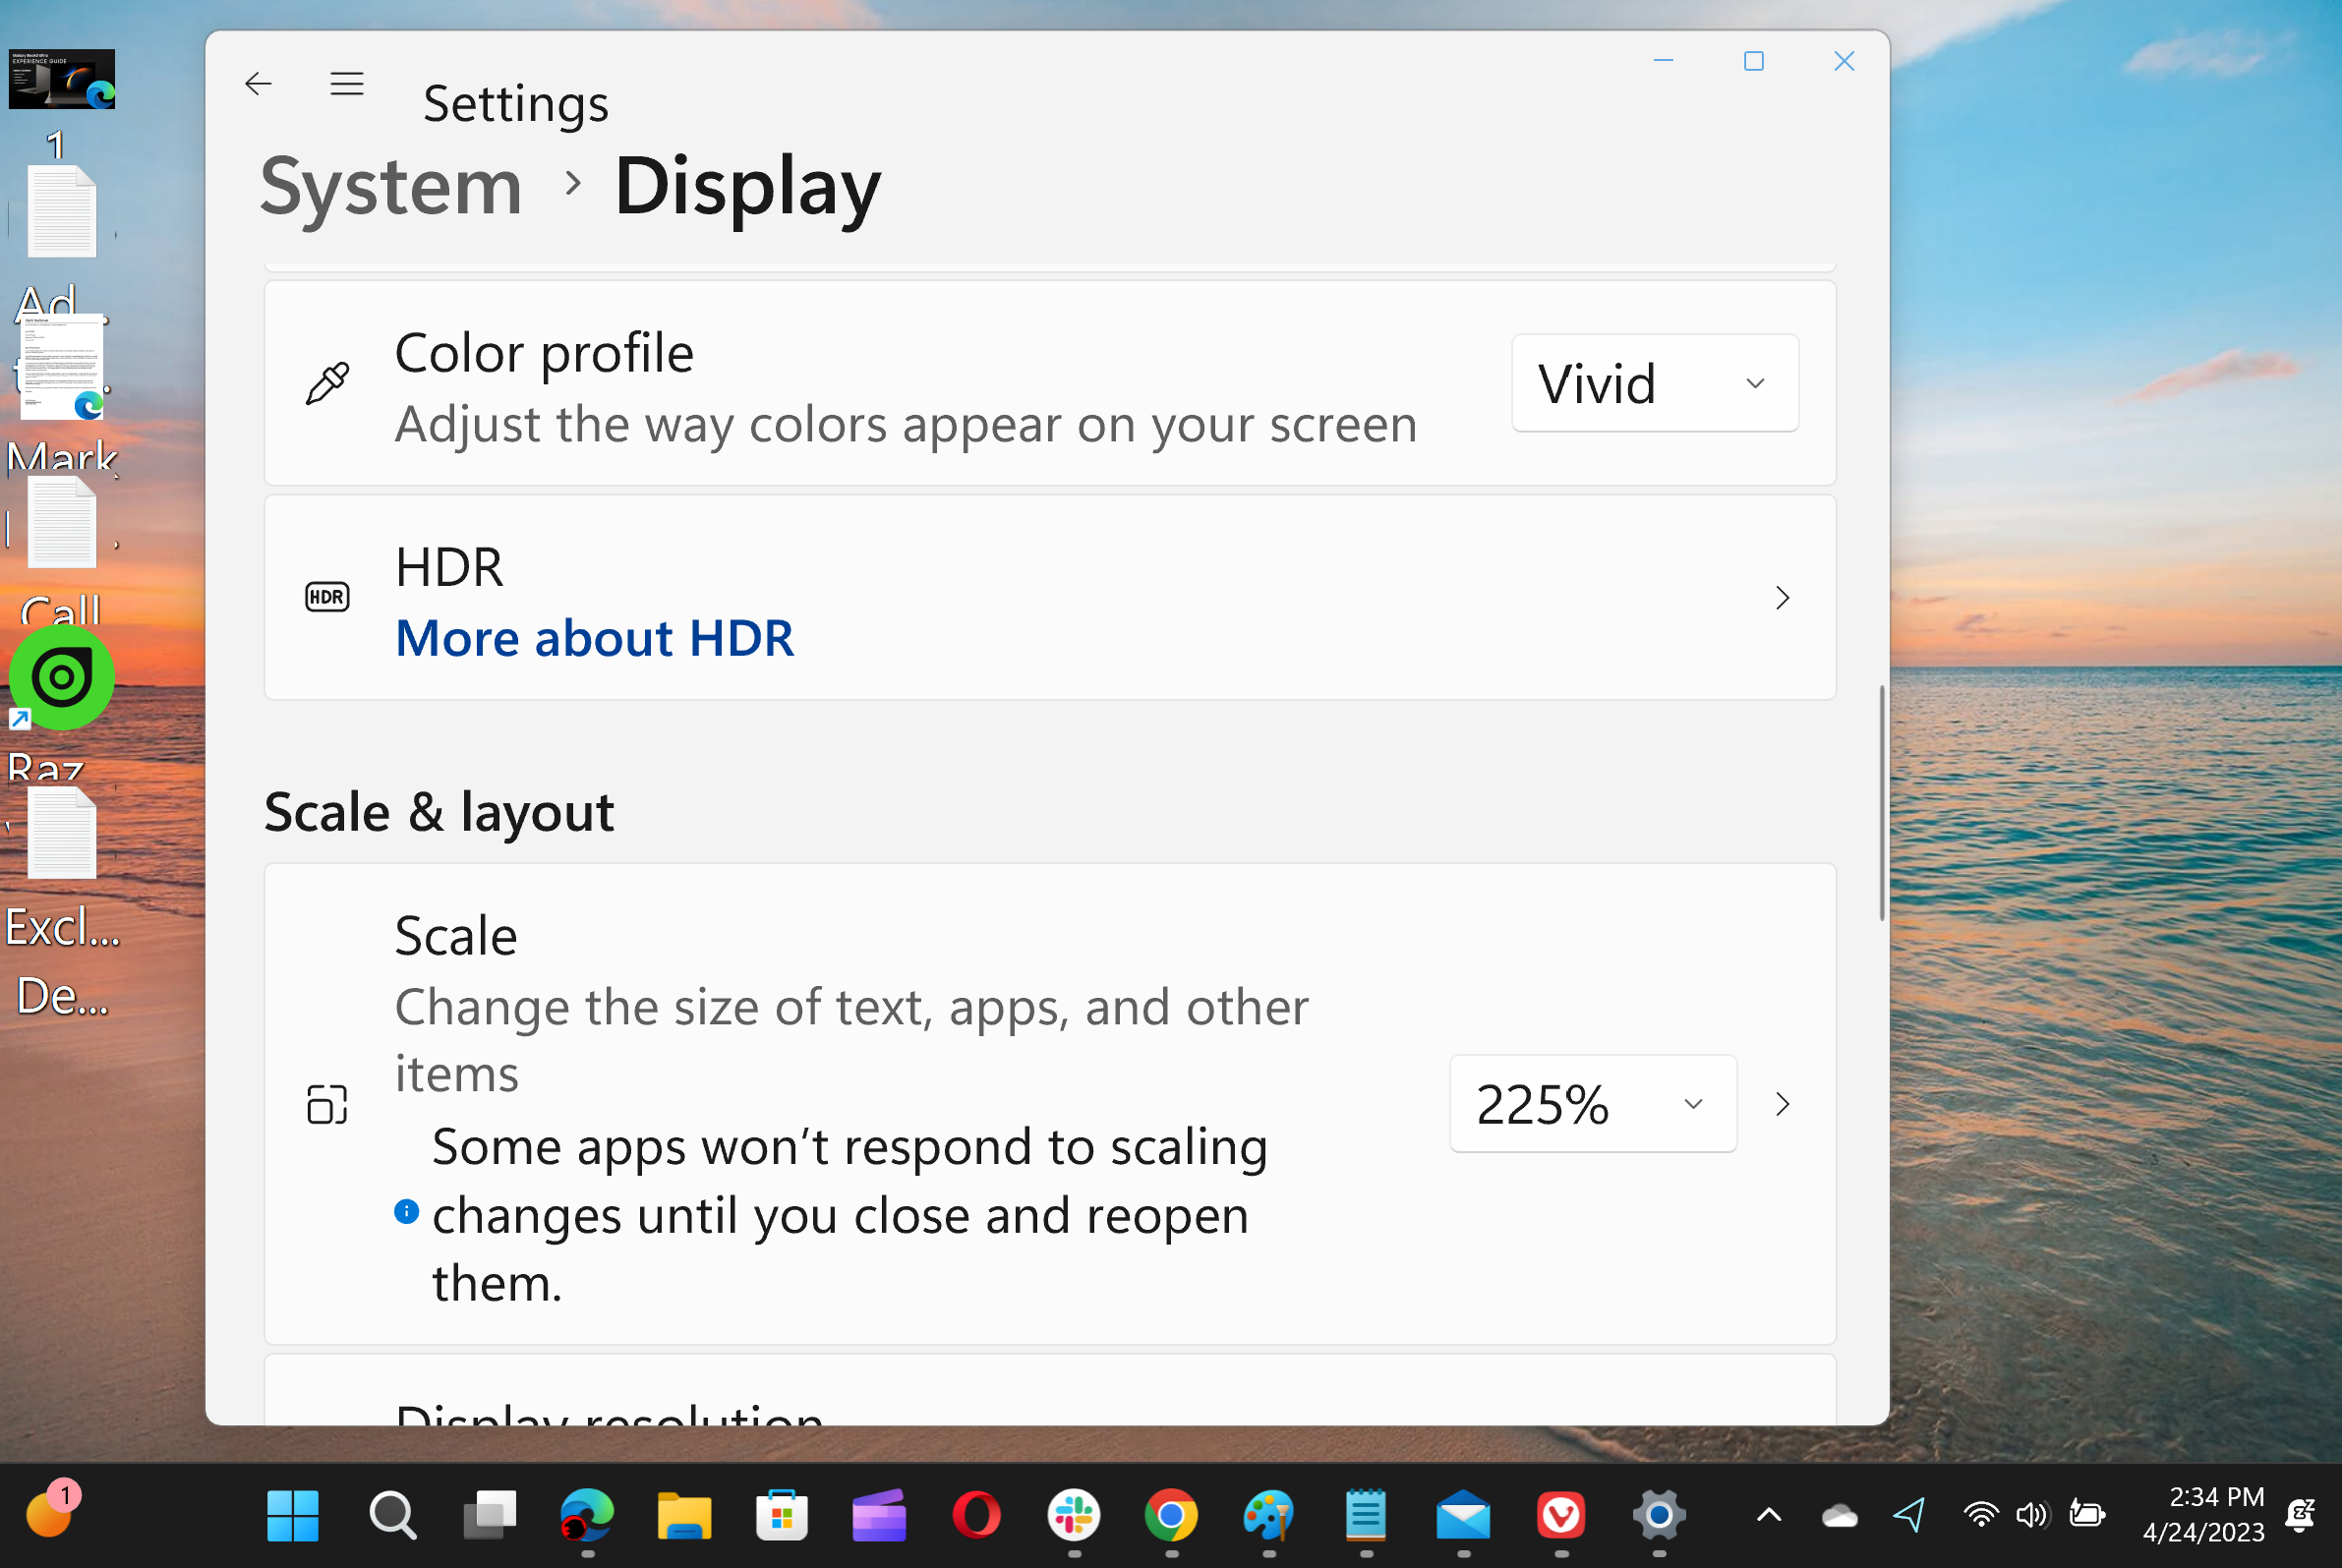
In the Windows 11 Settings menu (System > Display) Windows presents the choice of adjusting the size of textual content, apps, and different objects. This setting adjusts the size of the varied parts in your display screen on a display-by-display foundation—you’ll must tweak it for a laptop computer show in addition to any exterior screens. As the title suggests, this tweaks the dimensions of every little thing in your display screen corresponding to textual content, scrollbars, numerous UI interfaces, the works. We’d agree with Windows that it is best to select from the drop-down choices as an alternative of enjoying with customized scaling preferences.
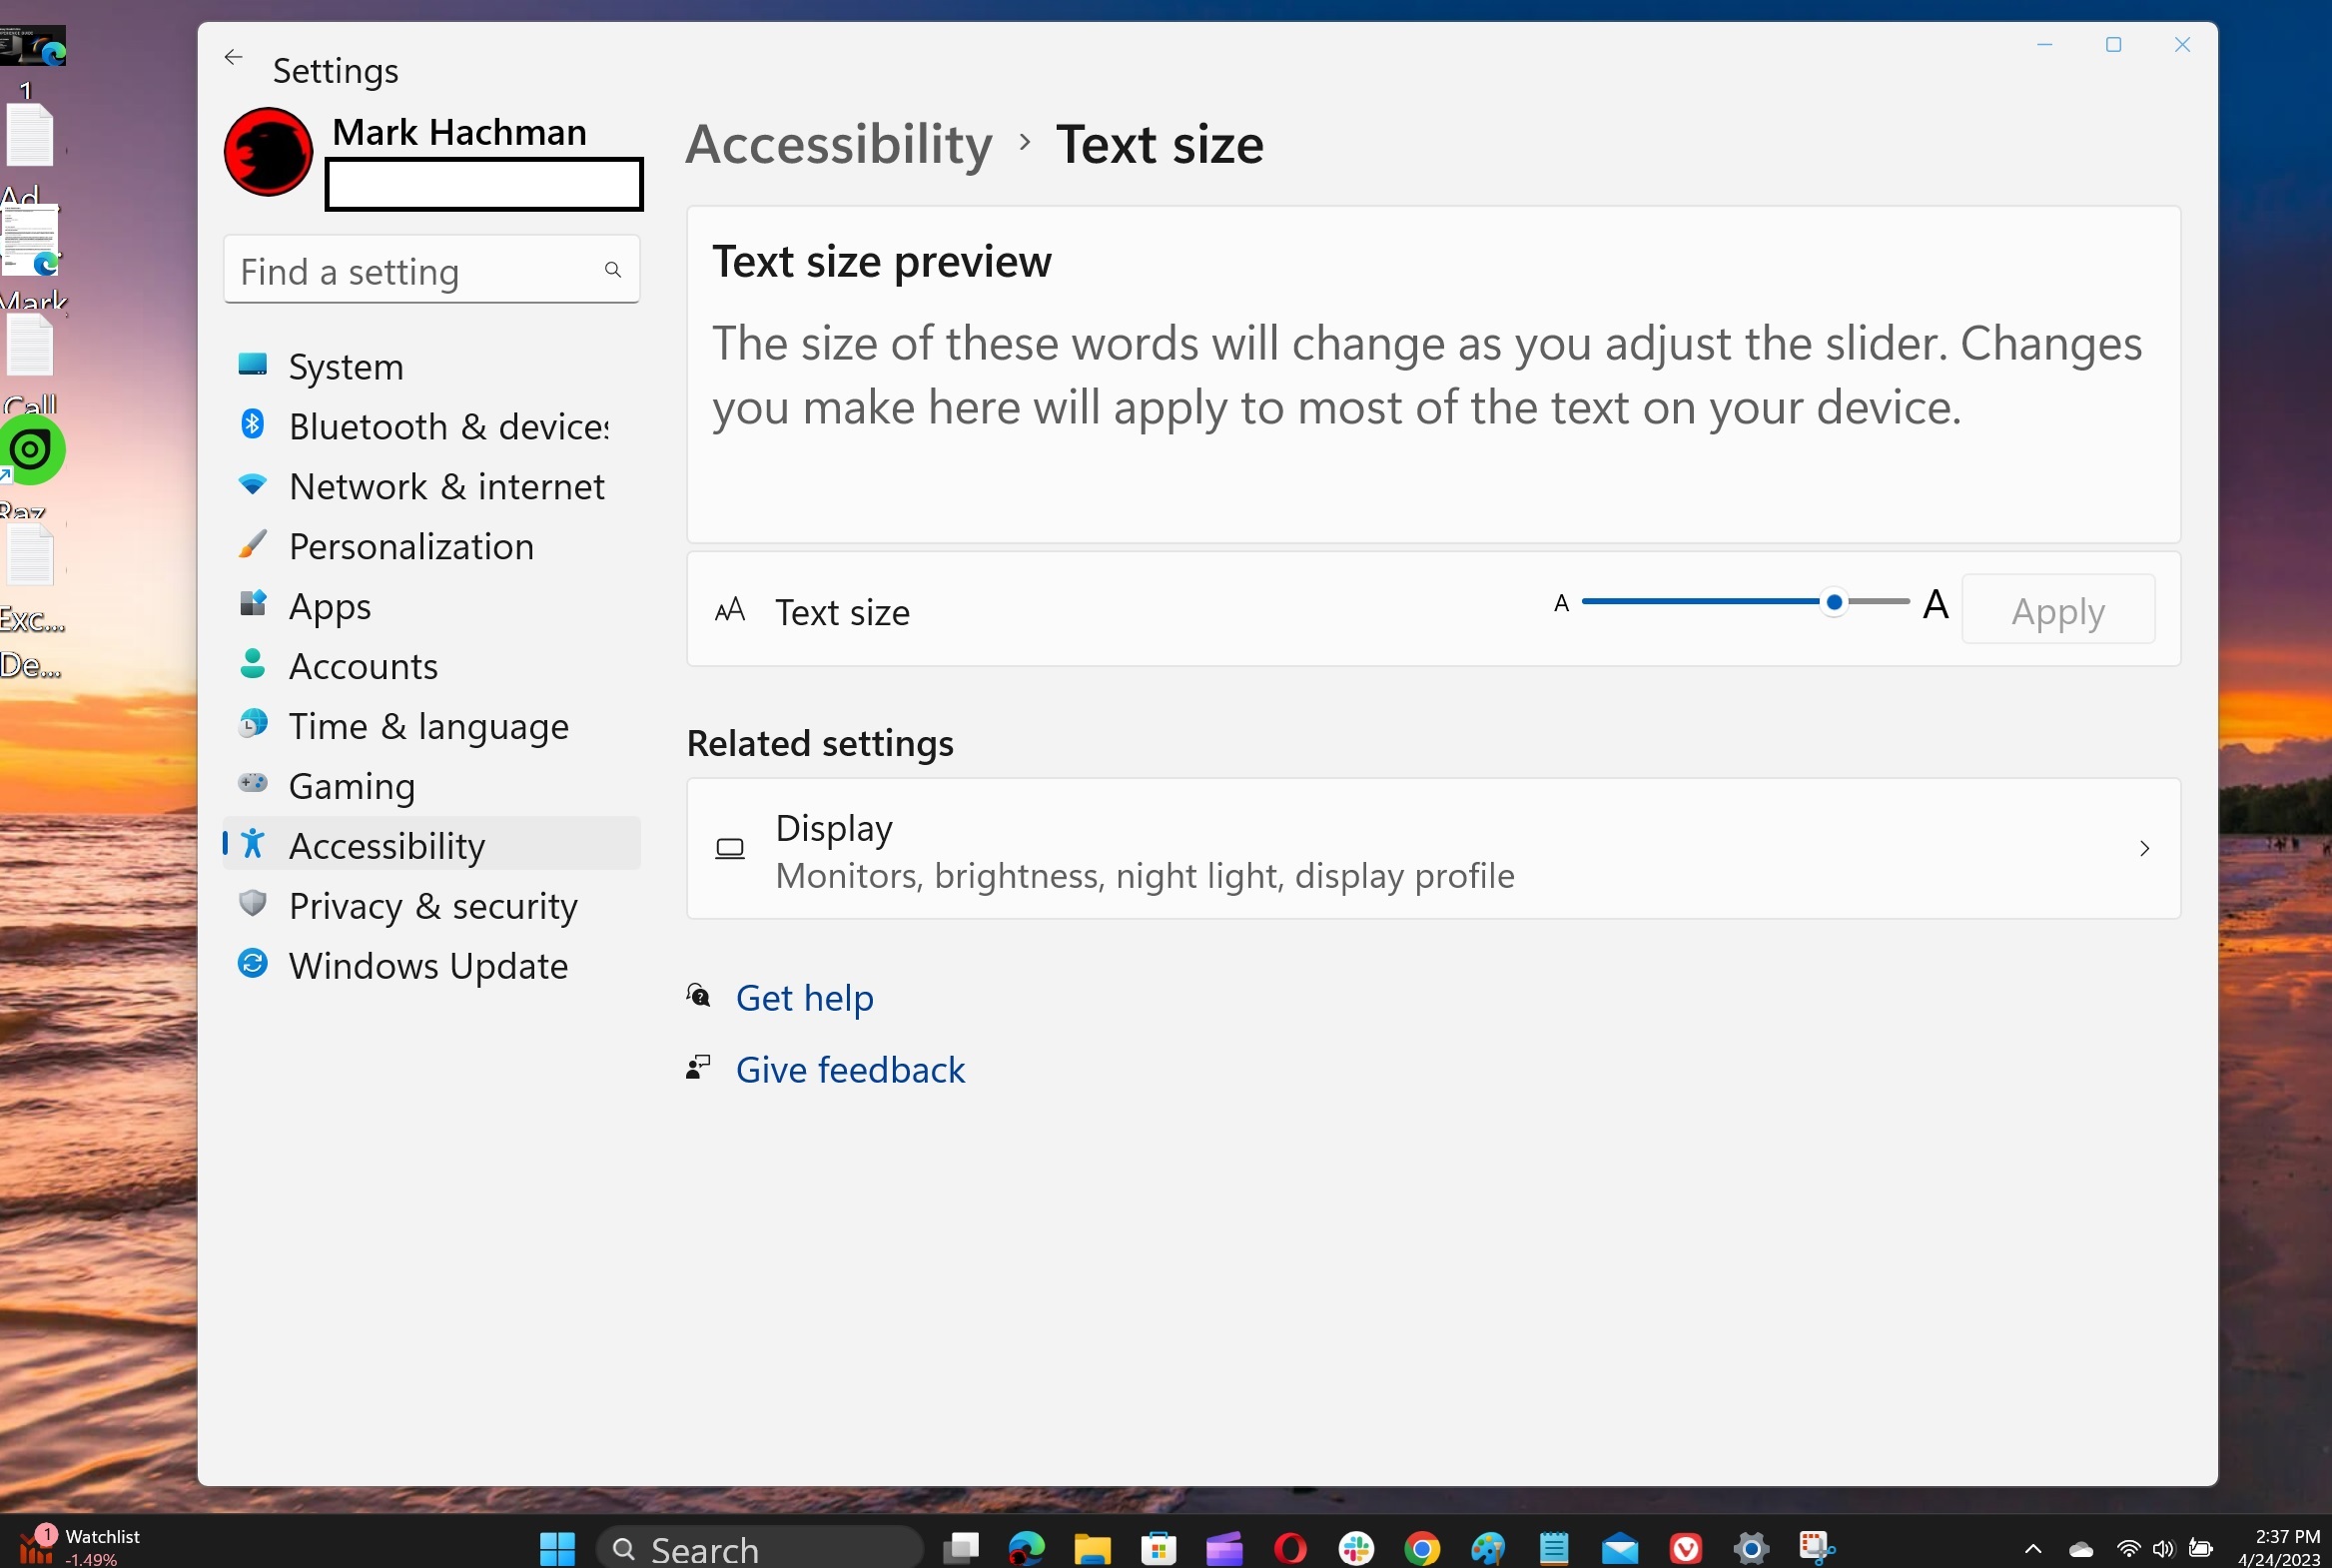
An analogous setting in Windows 11 (Accessibility > Text measurement) presents the choice of adjusting the textual content measurement up and down. Doing so enlarges or shrinks the textual content, however leaves the dimensions of icons and navigation parts unchanged. This isn’t a foul concept for customers who can acknowledge the icon of, say, Microsoft Edge with out issue however battle to learn the textual content on a web page. Just remember that you simply’ll see a blue display screen (not a BSOD) for a number of seconds whereas Windows re-configures itself.
Use Windows’ built-in Magnifier to enlarge a portion of the display screen
If you’re feeling the occasional must squint at an remoted graphic or quantity, you’re a great candidate to check out Windows’s Magnifier perform. This perform is off by default, however could be configured to activate both earlier than or after sign-in by way of the Win and + shortcut on the Windows Settings menu (Accessibility > Magnifier). Combining the Windows and plus keys activates Magnifier, which could be configured as a vertical rectangle, a full-screen enlargement, or a “docked” field that zooms in on a line or two. You can flip off Magnifier with the Win and the Esc key shortcut and zoom out and in with Win and the – key.
Mark Hachman / IDG
Magnifier is without doubt one of the methods to higher view some of the tiny details in the Start menu and there are alternatives to invert the colours of the magnified textual content to make them simpler to learn.
For those that are nonetheless having issue studying, Microsoft includes Narrator and Read Aloud, that are designed for the visually impaired. There’s additionally a Reading shortcut (Ctrl+ Alt by default), however it doesn’t appear to work on my machine.
Enlarge your mouse cursor and textual content cursor
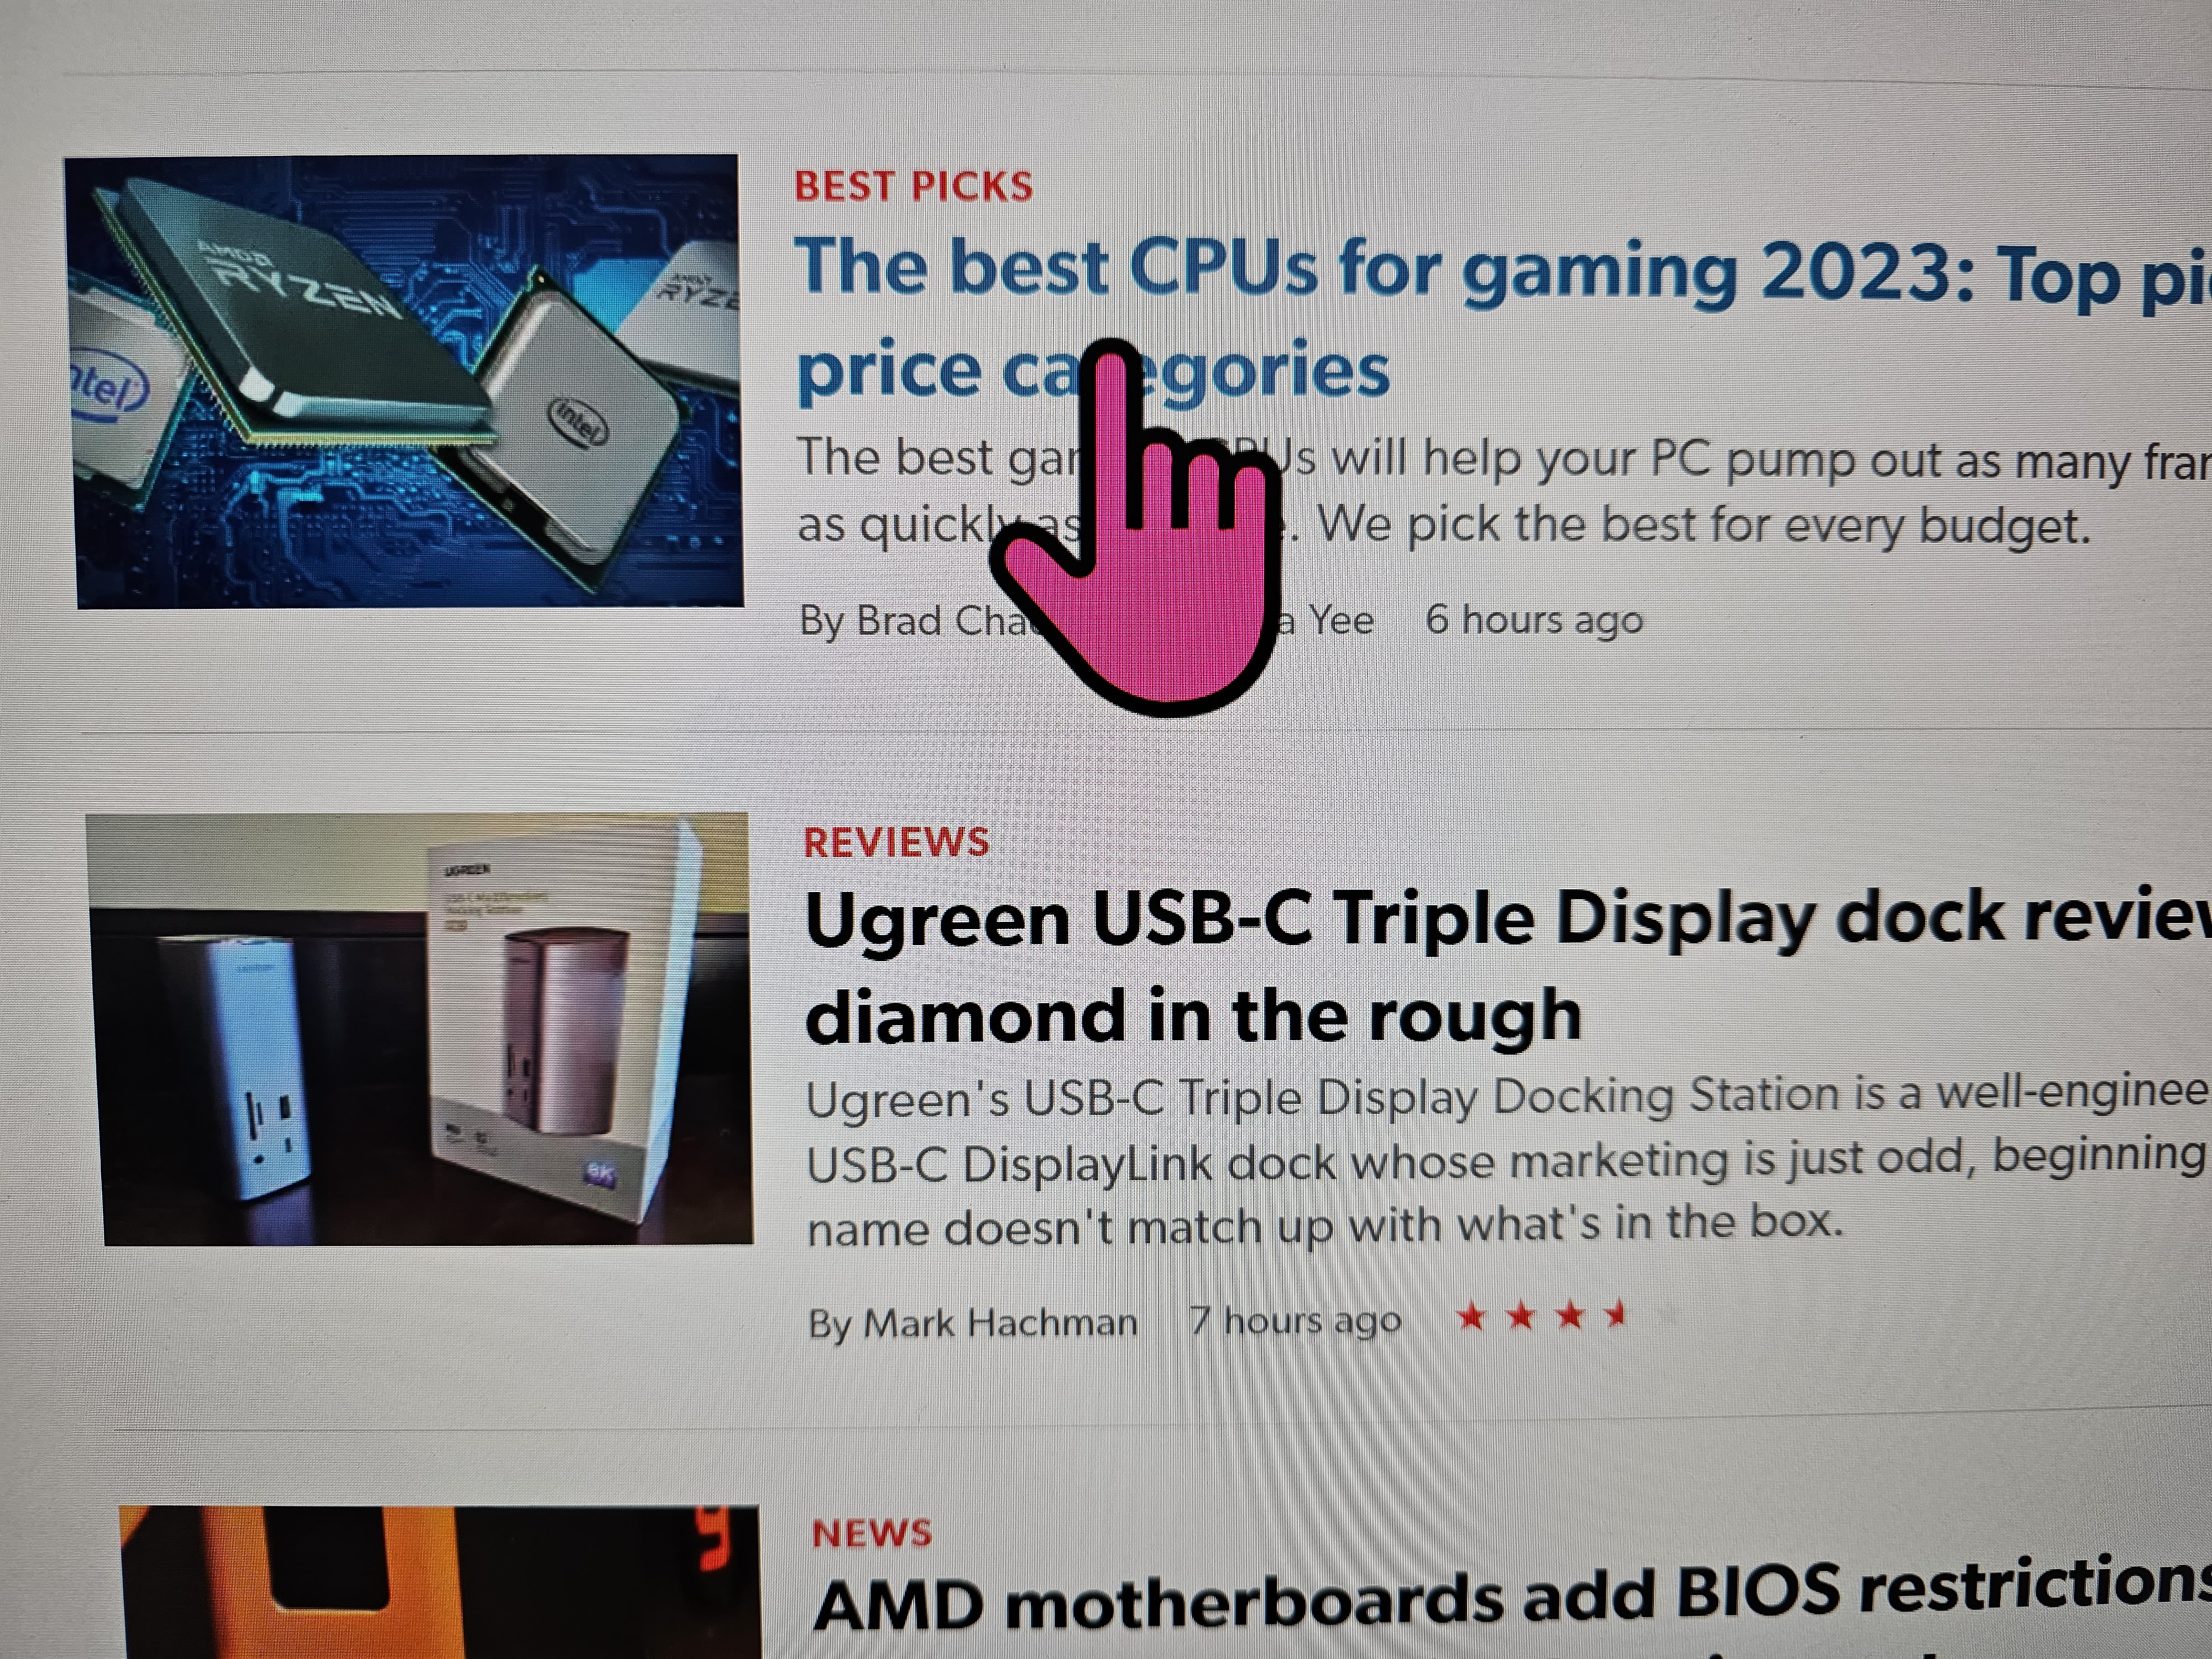
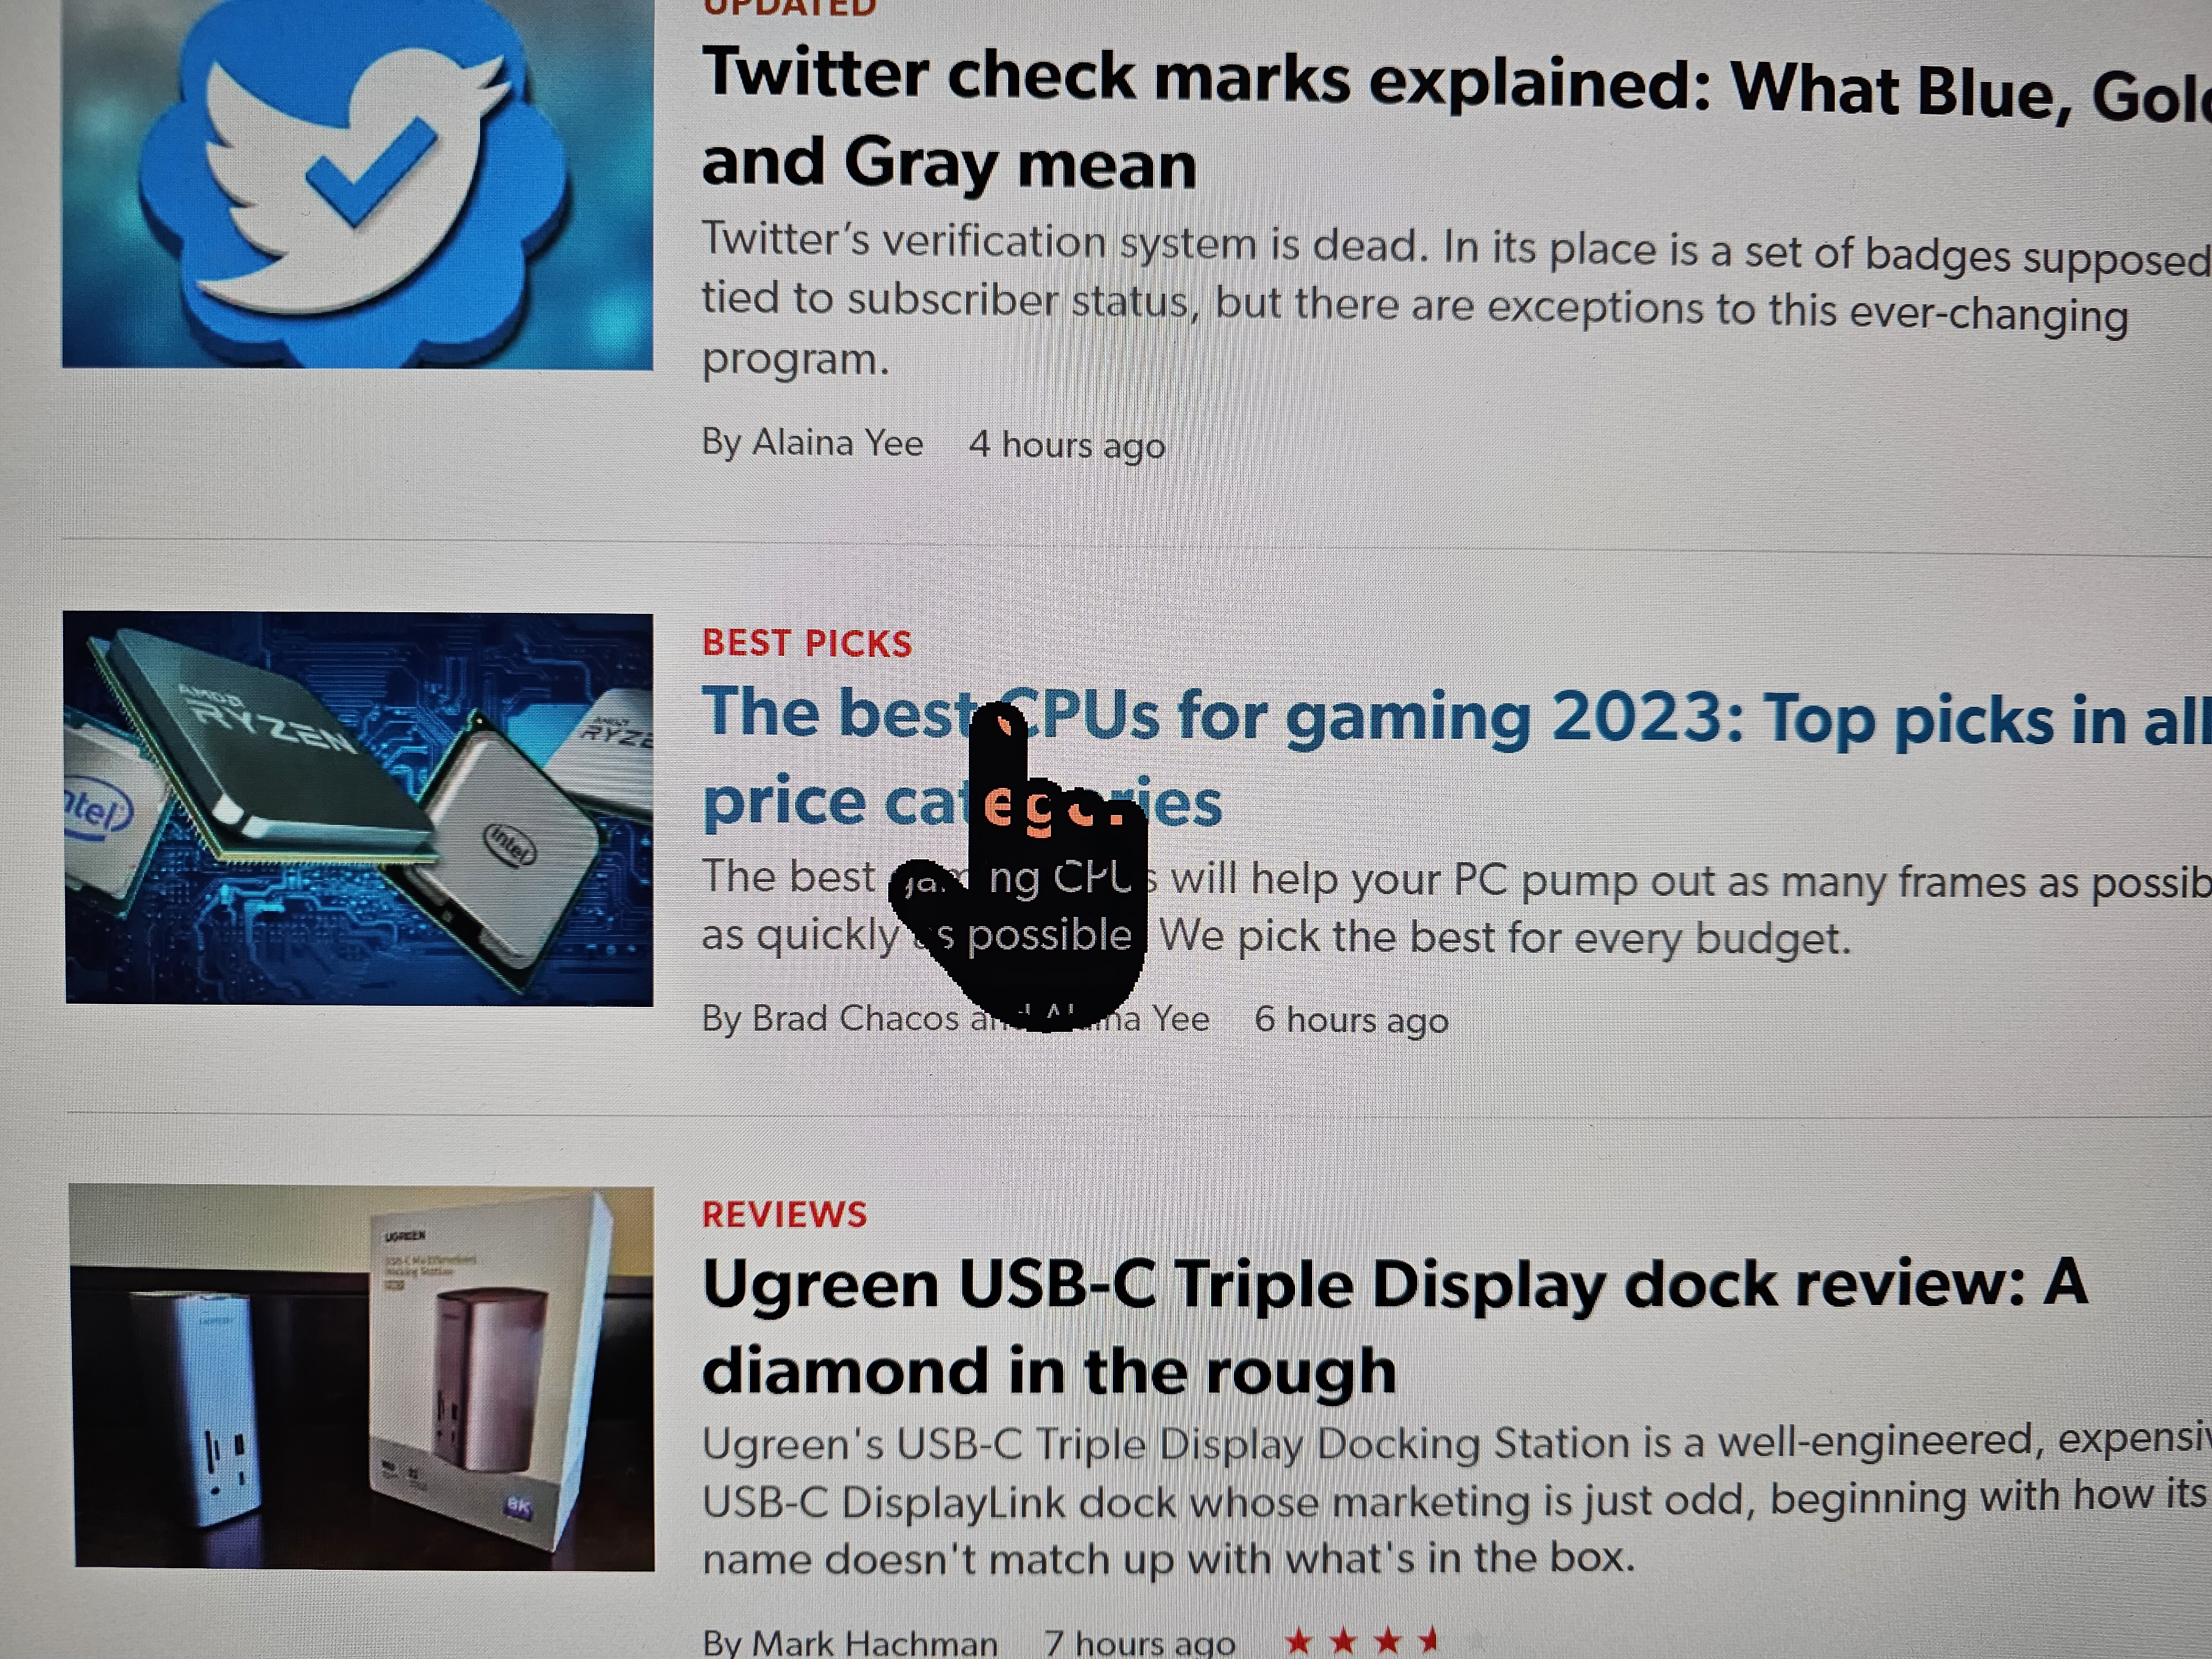
If you’re having hassle monitoring your mouse cursor on the display screen, you can also make it bigger and in a unique coloration by way of the Settings menu (Accessibility > Mouse pointer and contact). Sometimes I’ll configure the mouse to shift backwards and forwards between gentle and darkish relying upon the background—sure, you are able to do that!
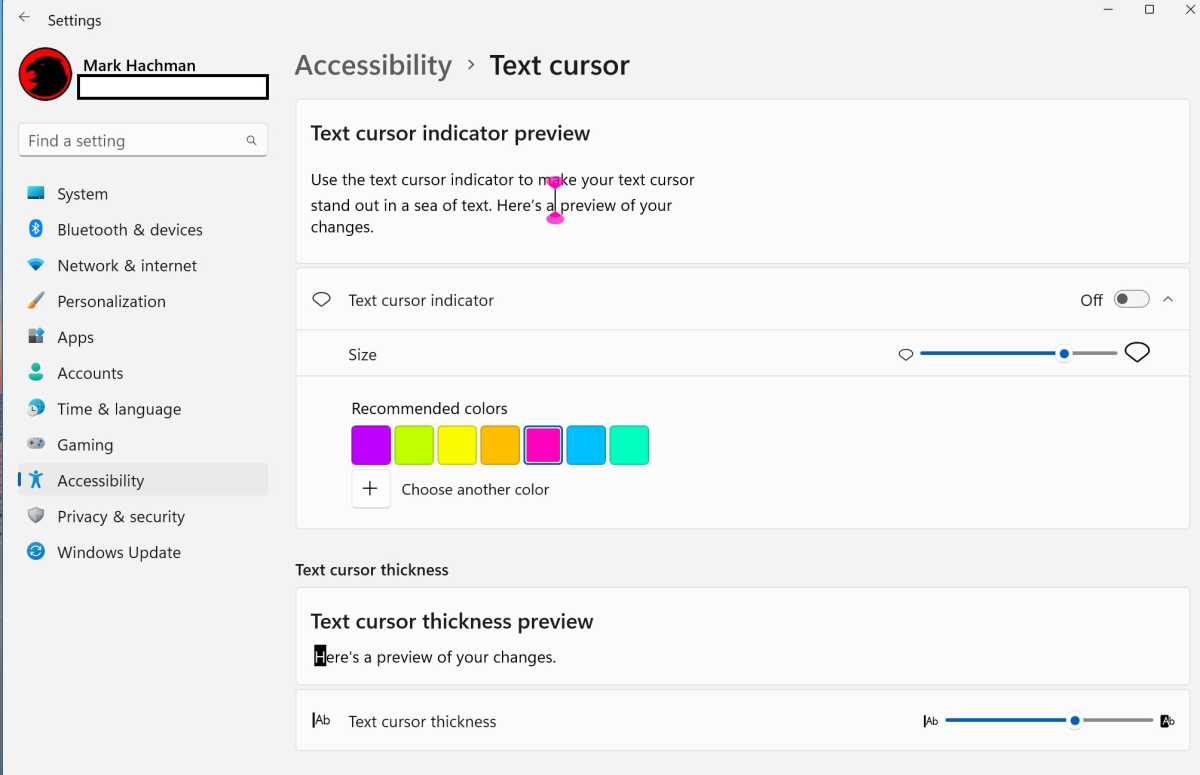
You may also ask Windows to activate a “text cursor indicator preview,” which provides a spot of coloration on the prime and the underside of any line you’re typing. This is surprisingly helpful for nearly anybody.
Mark Hachman / IDG
Adjust Windows’ coloration schemes to account for protanopia and extra
Various types of what some name “color blindness” (hassle seeing pink or inexperienced, for instance, is known as protanopia or deuteranopia) could be accounted for inside Windows. Go to the Windows 11 Settings menu (Accessibility > Color filters) and toggle the “color filters” to the on place. You’ll then choose what coloration filter works for you. (Toggle them on and off with Win + Ctrl + C).
Windows will then modify the relative power and shades of the Windows UI to make it simpler so that you can see.
Turn on darkish mode in Windows
Finally, there’s the previous standby. It’s late, it’s darkish, and also you don’t need your show blasting out any extra gentle than it’s important to. That’s the place darkish mode is available in.
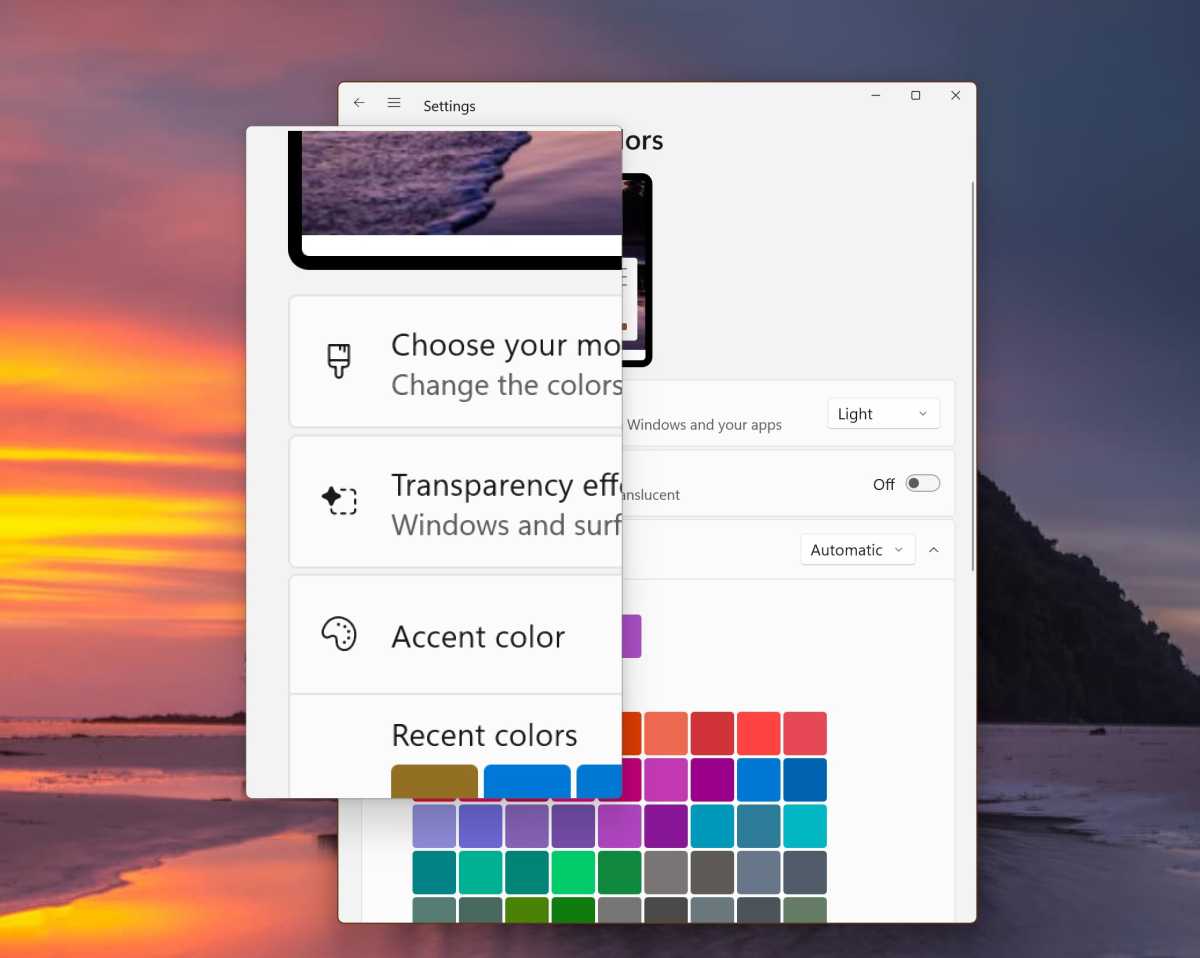
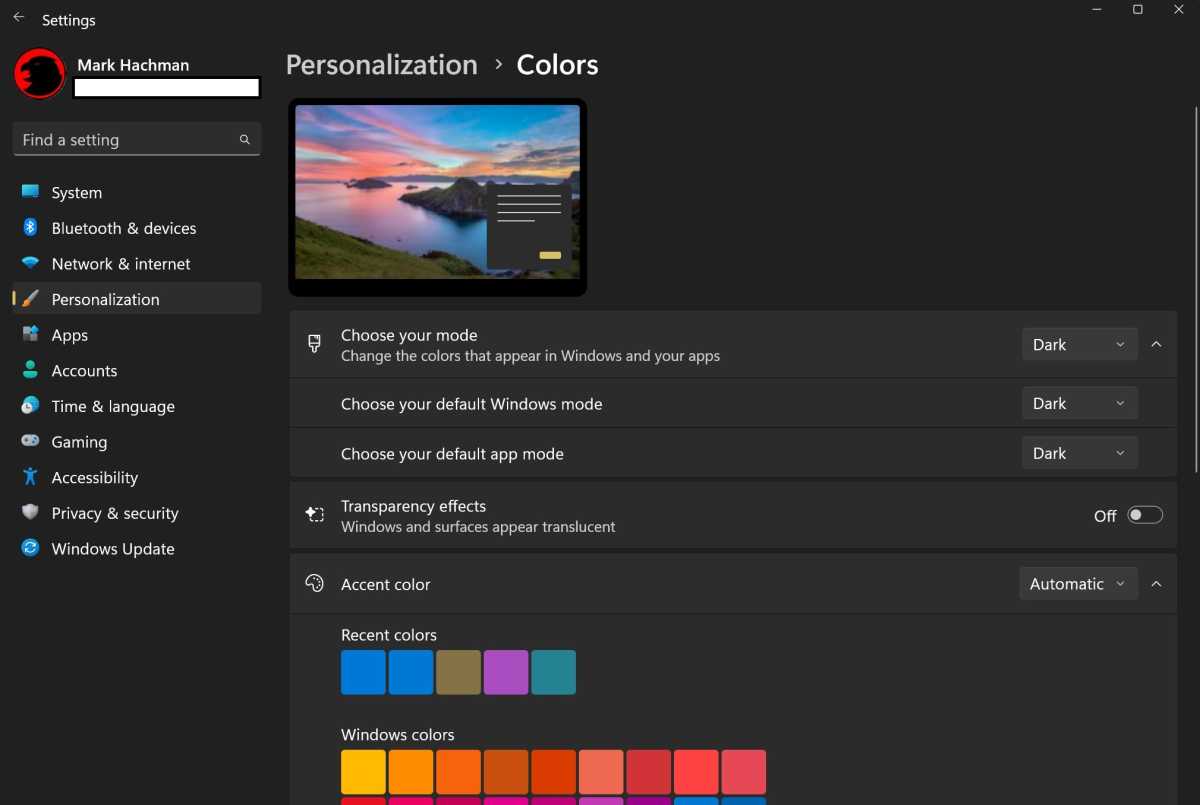
Within the Settings menu (Personalization > Colors), you’ll have the selection of choosing the default Windows mode (gentle/darkish), which may have an effect on UI parts like your taskbar. Choosing your default app mode (gentle/darkish) turns the background of sure Windows apps like Mail and Calendar darkish, too.
Mark Hachman / IDG
That gained’t at all times have an effect on apps like Microsoft Edge, which has its personal settings. (In the higher right-hand nook, click on the vertical three dots, scroll right down to Settings. On the following web page, scroll right down to Appearance). Here, you’ll be able to specify whether or not Edge has its personal settings or conforms to the Windows settings. You could discover related settings on different apps, too.
The concept behind all of those settings is that it’s essential discover a setup that works greatest for you. Would you favor not carrying bifocals whereas working, however use a laptop computer display screen and a desktop show? Configure the dimensions and scale of the varied parts accordingly. Having hassle distinguishing benchmark graphs due to their reliance on pink and inexperienced? Color filters may help with that.
If solely a brand new prescription was as fast and straightforward, proper?