
So there it’s–my new mini PC, the A9 Max from Geekom. A sensible little powerhouse, barely greater than a sandwich tin, whisper-quiet and amazingly highly effective. I unpacked it, plugged it in, and accomplished the preliminary setup. Everything works completely, as my test shows.
And but I understand after only a few minutes: it gained’t keep this manner for lengthy. As quickly because the software program is put in, my fingers begin itching for a screwdriver. Why? Because an off-the-shelf PC is at all times a compromise–an excellent one, however not my private superb.
Christoph Hoffmann
As a expertise journalist and IT knowledgeable, I take a look at ready-made PCs from a distinct perspective. Manufacturers should enchantment to a large viewers and, above all, put a beautiful worth on it. This inevitably signifies that prices are reduce in sure areas. Not within the CPU, since that’s the showpiece, however in parts whose true efficiency is just revealed in demanding on a regular basis use.
For me, the acquisition of such a mini PC is due to this fact not the tip, however the starting of an optimization mission. I’m shopping for a wonderful basis on which to construct my custom-made system.
More RAM brings a efficiency increase
The first and best improve is nearly at all times the RAM. The Geekom A9 Max comes with 32GB of RAM, which is greater than sufficient for many customers and on a regular basis duties equivalent to looking, workplace work, and streaming. But my on a regular basis use is totally different.
I typically run a digital machine for testing software program, dozens of browser tabs with CPU-intensive net purposes, picture modifying applications, and communication instruments on the similar time. This is the place 32GB rapidly turns into a bottleneck. The system begins to really feel sluggish, switching between applications takes longer, and productiveness suffers.
The answer is straightforward and cheap: an improve to 64GB, for instance with the Kingston FURY Impact SO-DIMM 64GB DDR5-5600 CL40 kit. Replacing the RAM modules often takes only a few minutes, and the outcomes are instantly noticeable. Everything runs extra easily, the system has extra headroom, and it’s higher ready for tomorrow’s software program. For me, this small funding gives the most effective bang to your buck.
SSD upgrades: extra pace and storage
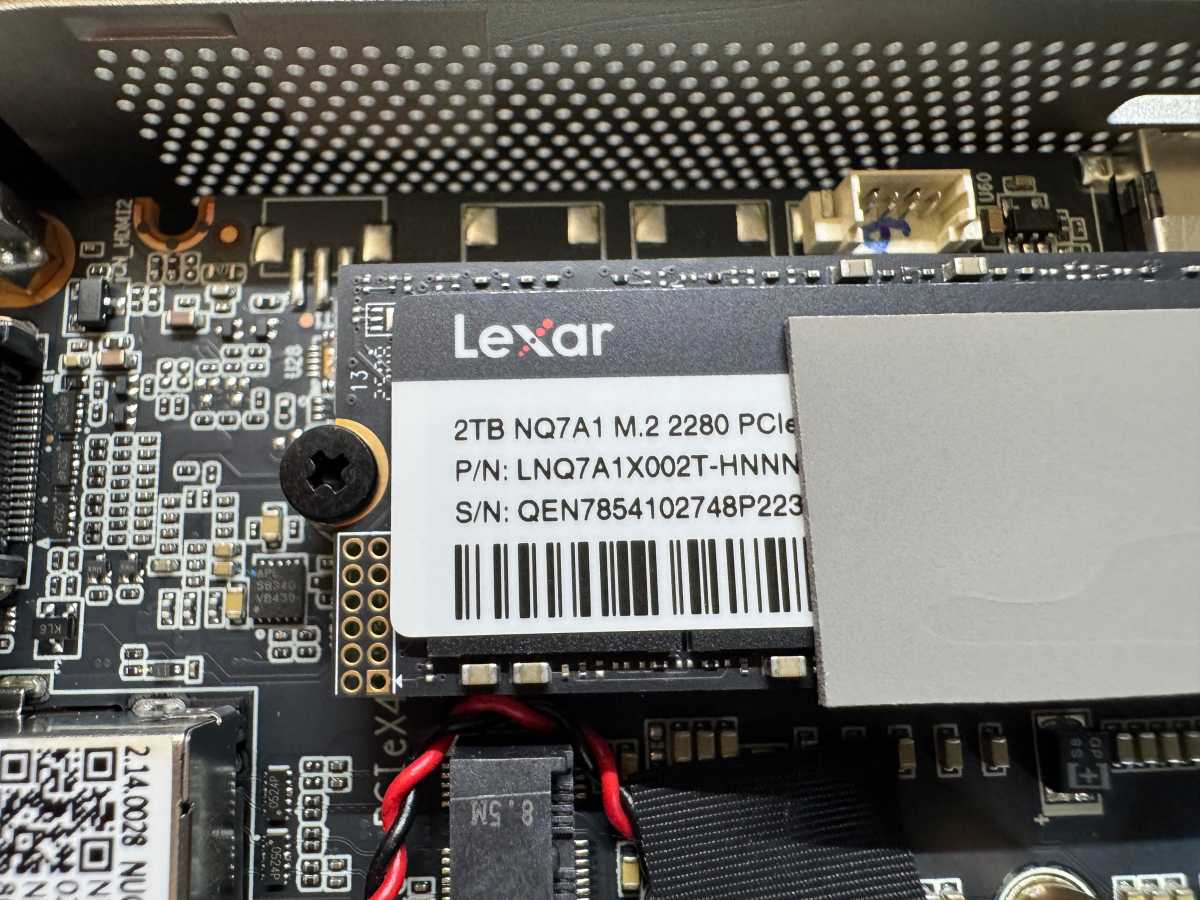
The second candidate for a direct enchancment is the mass storage system, i.e. the SSD. Here, producers save on two fronts: capability and pace. Models with 512GB or 1TB are sometimes put in. The NVMe SSD with 2TB of capability in our A9 Max comes from Lexar and is labeled LNQ7A1X002T.
Christoph Hoffmann
That feels like so much at first, however I historically separate the Windows set up on the C: drive from my knowledge, which I sync with Dropbox. That’s why I’m placing a second SSD within the mini PC–an exterior arduous drive could be an possibility, however inner storage is unbeatable for fast entry.
However, pace is much more necessary to me. Not each NVMe SSD is identical. Manufacturers typically set up low-cost fashions which might be quicker than outdated SATA arduous drives, however are nowhere close to the potential of recent interfaces.
The NVMe SSD from Lexar put in within the Geekom delivers a learn efficiency of 6,242 MB/s and a write price of 5,423 MB/s in CrystalDiskMark. That’s an above-average consequence for a PCIe 4.0 SSD, so there’s no motive to interchange it for efficiency causes.
The system features a brief M.2 slot (M.2-2230) for a further SSD. The number of appropriate drives is considerably restricted. For our improve, we selected the Crucial P310 SSD 2TB. The different is the Corsair MP600 Mini, which is available in 1 and 2TB variations.
If the usual SSD put in within the mini PC delivers below-average values, it is smart to interchange it with a high-end SSD. It transforms the mini PC into an actual powerhouse. Programs begin directly, massive recordsdata are copied in seconds, and your entire system feels extra direct and responsive. It’s a degree of consolation I wouldn’t need to miss in my every day work.
Upgrading is straightforward
Before you begin ordering or visiting a neighborhood vendor, it is best to verify the precise specs of the mini PC. The Geekom A9 Max has a brief M.2 interface (M.2-2230) for a further SSD, appropriate for the Crucial P310 SSD 2 TB M.2.
The RAM configuration is attention-grabbing. The A9 Max (and plenty of different fashions) comes with 32GB of RAM with two 16GB modules. To improve to 64GB, each sticks have to be changed.
There’s a wide variety of appropriate 64 GB kits (2 × 32 GB) dual-channel DDR5 with 5600 MHz. Popular choices embody the Crucial CT2K32G56C46S5 and the Crucial Pro CP2K32G56C46U5. Alternatively, you may select a single (although costlier) reminiscence stick to maintain the choice of upgrading to 128GB open.
Before you start the improve or set up, be sure the mini PC is totally switched off and disconnected from the facility provide. To discharge any residual energy from the system, press and maintain the facility button for about 5 seconds.
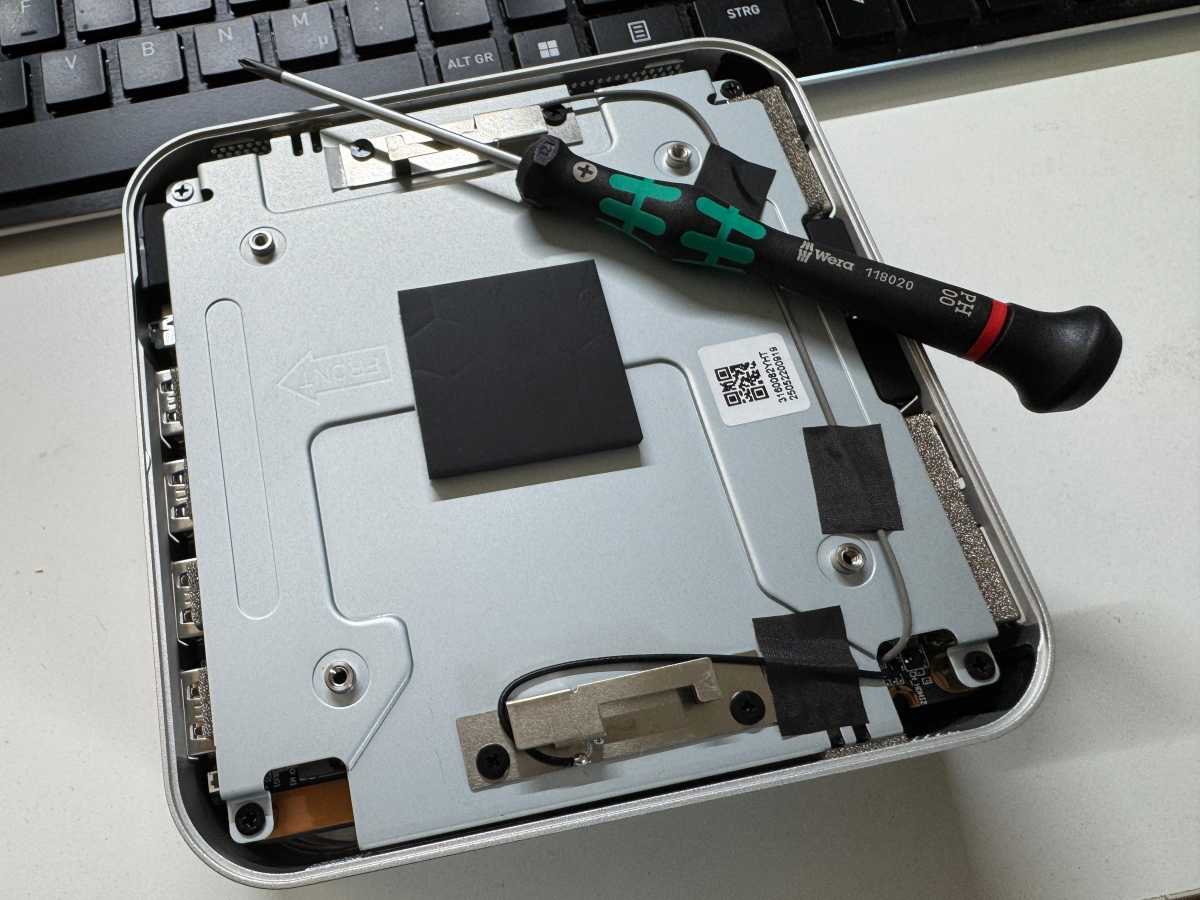
Opening the case could be a bit difficult (see part: Troubleshooting: No extra Wi-Fi and Bluetooth). The screws on the underside are hidden behind the rubber ft, which will be pried out with a pointed object. Once the screws are loosened, deal with every thing with care.
Christoph Hoffmann
Once the inside workings of the mini PC are uncovered, you may entry the slots for the 2 SSDs (1 × M.2 2280 and 1 × M.2 2230) and the 2 reminiscence slots. Some mini PCs additionally embody a mounting bracket for a 2.5-inch SATA SSD, such because the Samsung 870 EVO.
With the Geekom A9 Max (and most different fashions), insert the M.2 SSD at a slight angle into the slot supplied. Then rigorously press it down and safe the tip with the small screw supplied. That’s it!
The RAM modules are held in place by small steel or plastic retaining clips on either side. Gently push these clips outwards to launch the RAM module, which can raise up barely and will be eliminated.
Take the brand new RAM module and take note of the notch. This should match the corresponding information within the slot to forestall incorrect set up.
Insert the module into the slot and press it down firmly and evenly till you hear the retaining clips on the aspect click on into place. Done!
After set up, shut the case and reconnect all cables. Start the mini PC and enter the BIOS (often by urgent F2 or Del) to substantiate that the brand new RAM is acknowledged.
Once put in, the brand new SSD gained’t robotically seem as a drive in Windows. It should first be initialized in Disk Management.
That’s it! The mini PC now has extra space for storing and, because of the RAM improve, additional efficiency headroom.
Troubleshooting Wi-Fi and Bluetooth points
Please observe: When opening the case and eradicating the inside steel cowl, the black and grey cables could develop into disconnected. These are soldered to the steel cowl and related to the Wi-Fi card. If the connection is misplaced, Wi-Fi or Bluetooth performance will now not be out there.
The cables are mounted to the steel cowl with adhesive strips, which limits their size. To be certain that the cables keep firmly connected when the quilt is lifted, it’s greatest to take away the strips and reposition the cables so they continue to be plugged in.
Christoph Hoffmann
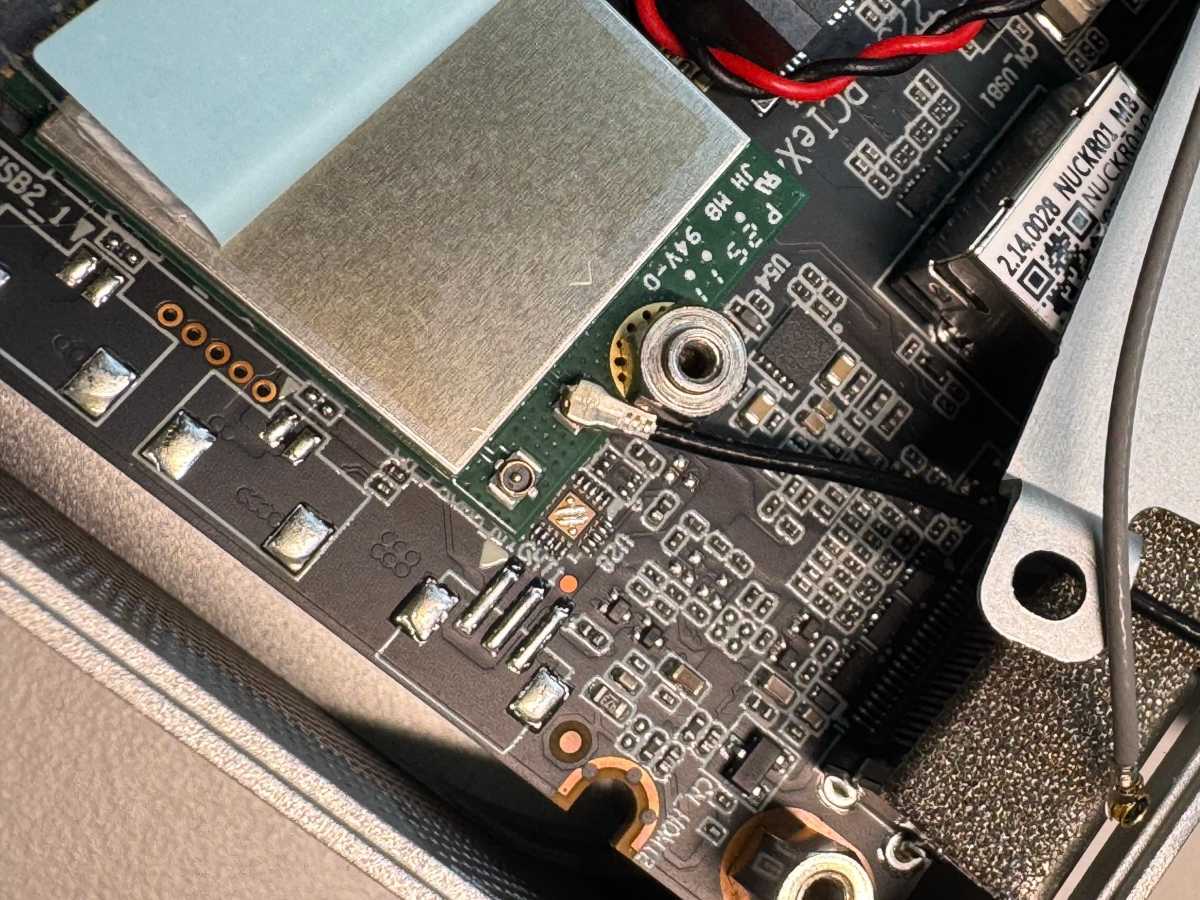
If the cables have already been disconnected, the ends have to be reconnected to the Wi-Fi card. This is situated beneath the M.2-2280 connector, which is why the SSD should first be rigorously eliminated.
After exposing the Wi-Fi card, rigorously raise the self-adhesive, clear plastic cowl with tweezers or fold it again. Then rigorously reconnect the black cable to the connection labeled “Main” and the gray cable to the “AUX” connection.
This course of requires persistence and should take a number of makes an attempt. Make positive the quilt is correctly closed earlier than reinserting the SSD.