
There are as many types of good gentle switches (and dimmers) as there are gentle bulbs, and whereas the prospect of upgrading your previous dumb swap might sound daunting, they’re normally fairly easy to put in.
The job requires no particular instruments, other than a screwdriver (an electrical one is useful) and maybe a pair of pliers. If you wish to be additional secure, choose up a non-contact voltage tester to make sure the wires you’ll be coping with aren’t electrified. You can discover a name-brand voltage tester on Amazon for lower than $20. Also, in case your swap is situated in a darkish area, a head-mounted flashlight can be invaluable.
Got your gear prepared? Here’s get the job finished safely and efficiently.
Before you begin
An cheap non-contact voltage sensor will let you recognize if the wires you’ll be coping with are electrified.
Christopher Null/Foundry
Before you begin this mission—and earlier than you even purchase a sensible swap—it’s worthwhile to decide what kind of swap you’ll be changing. If the swap is the one one controlling the sunshine (or outlet) it’s linked to, you may have a easy 1-way or single-pole circuit. If the sunshine could be managed by different switches—at reverse ends of a room, for instance—you may have a 3-way or perhaps a 4-way circuit.
Many good switches don’t work with multi-way implementations, so test fastidiously before you purchase. And in the event that they do, relying on the model of good swap you purchase, you would possibly want to put in a appropriate companion swap in these secondary areas.
Examine your present swap and wiring
Your first step is to show off the ability to the swap on the circuit breaker. Even if the swap seems to be off, it’s good to make use of a voltage sensor to double test. (An excellent voltage sensor is not going to even want to the touch the wiring to gentle up when the road is reside, so that is a straightforward—and essential—step to take.)
With the ability to the swap disabled, take away the duvet plate and unscrew the 2 bolts attaching the swap to the receptacle. Make positive you don’t lose the bolts; I wish to preserve my previous switches with their cowl plates and different {hardware} in a plastic bag, labeled with details about the place the swap was once. It’s a good suggestion to test as soon as once more that no energy is flowing by touching the voltage sensor to the wires resulting in the swap.
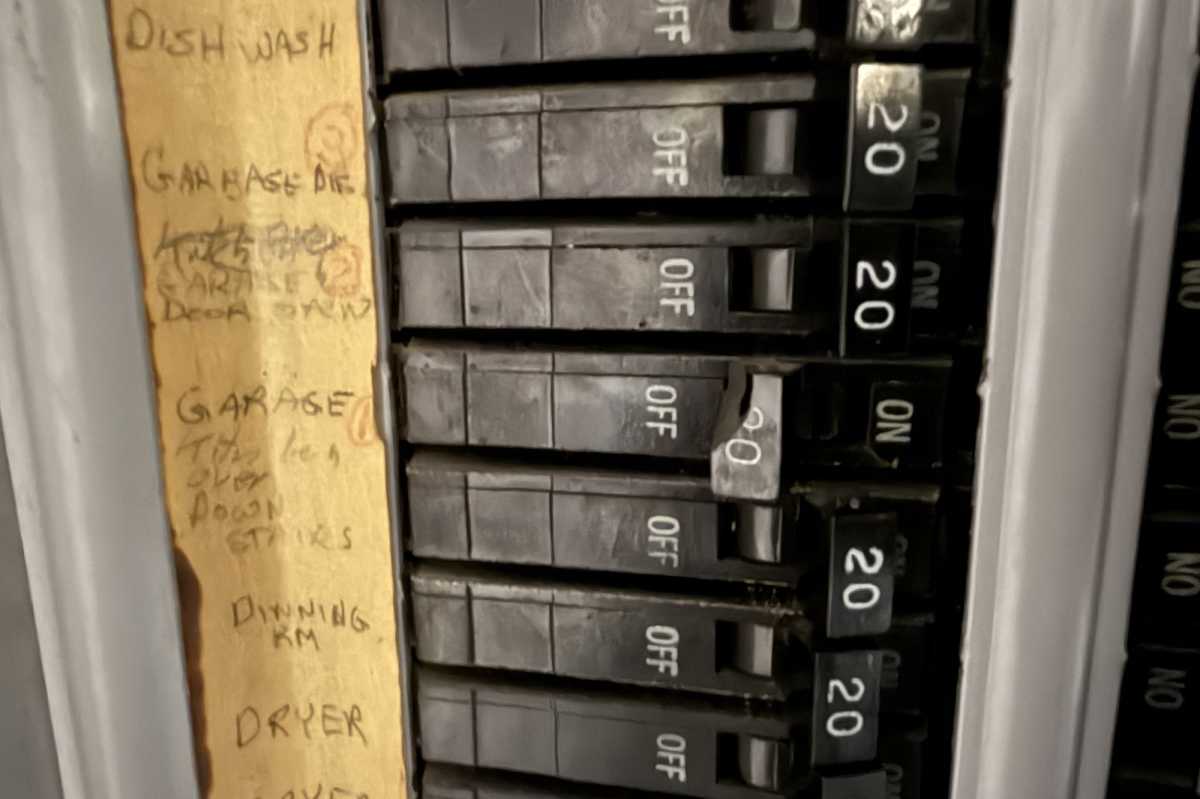
The first step in your set up course of is to show off the circuit breaker linked to the swap you’ll be changing.
Christopher Null/Foundry
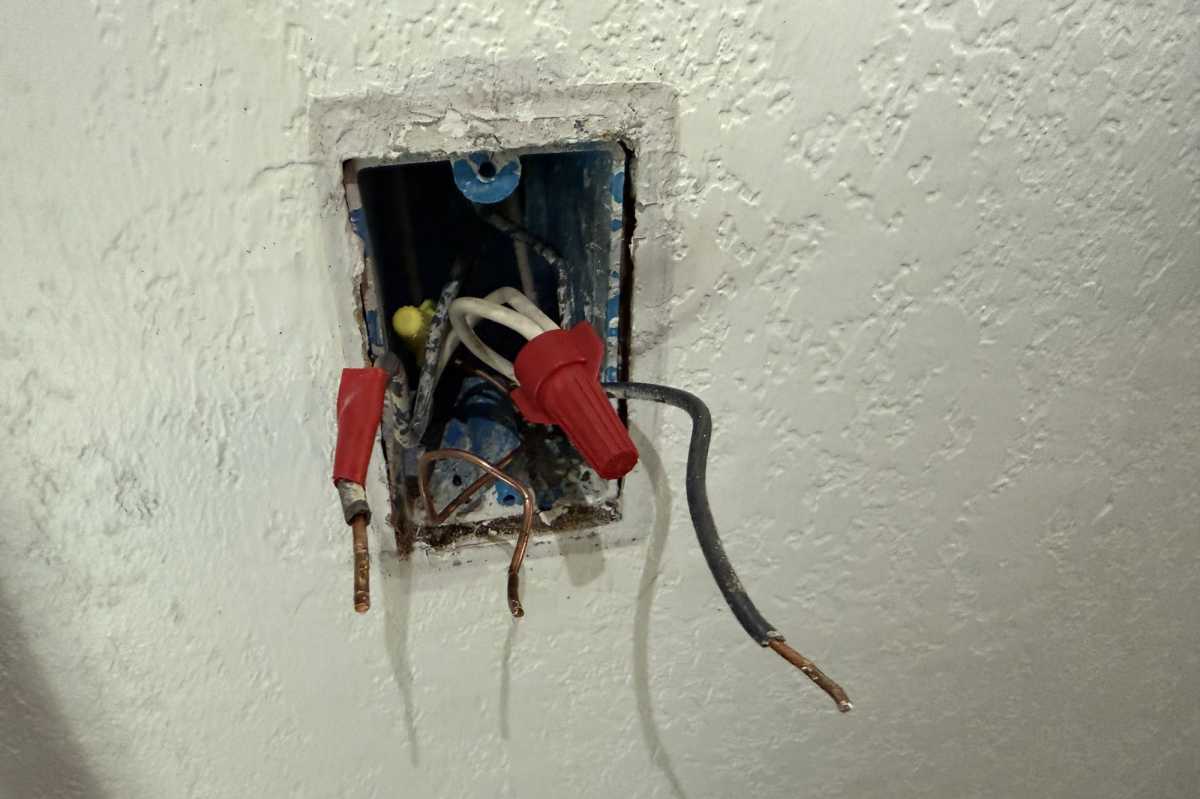
Now, pull the swap out of the field contained in the wall. Household wiring is stiff and exhausting to work with, so don’t be shy. Once you may have the swap out from the wall a bit, you must be capable to take inventory of the wiring inside. At a minimal you’ll more than likely see two black wires linked to the swap and a floor wire, which will likely be in all probability naked copper, linked to a inexperienced screw. It’s frequent for wires to be splattered with paint and drywall mud, a lot that they could really look white or patterned; that is all par for the course.
In the again of the receptacle, search for a twisted pair (or extra) of white wires that look like unused and are capped off with a wire nut. These are impartial wires that function a return path to finish the circuit again to the ability supply (your circuit-breaker field). Conventional switches don’t want impartial wires, however most good switches do.
If you don’t see impartial wiring within the field, you’ll want a sensible swap that may be put in with out it. This will likely be clearly marked as “no neutral required” on the product itemizing, so store fastidiously. Our information to the best smart dimmers and switches will show you how to on that entrance, and all our opinions may even talk about any impartial wire and companion swap necessities.
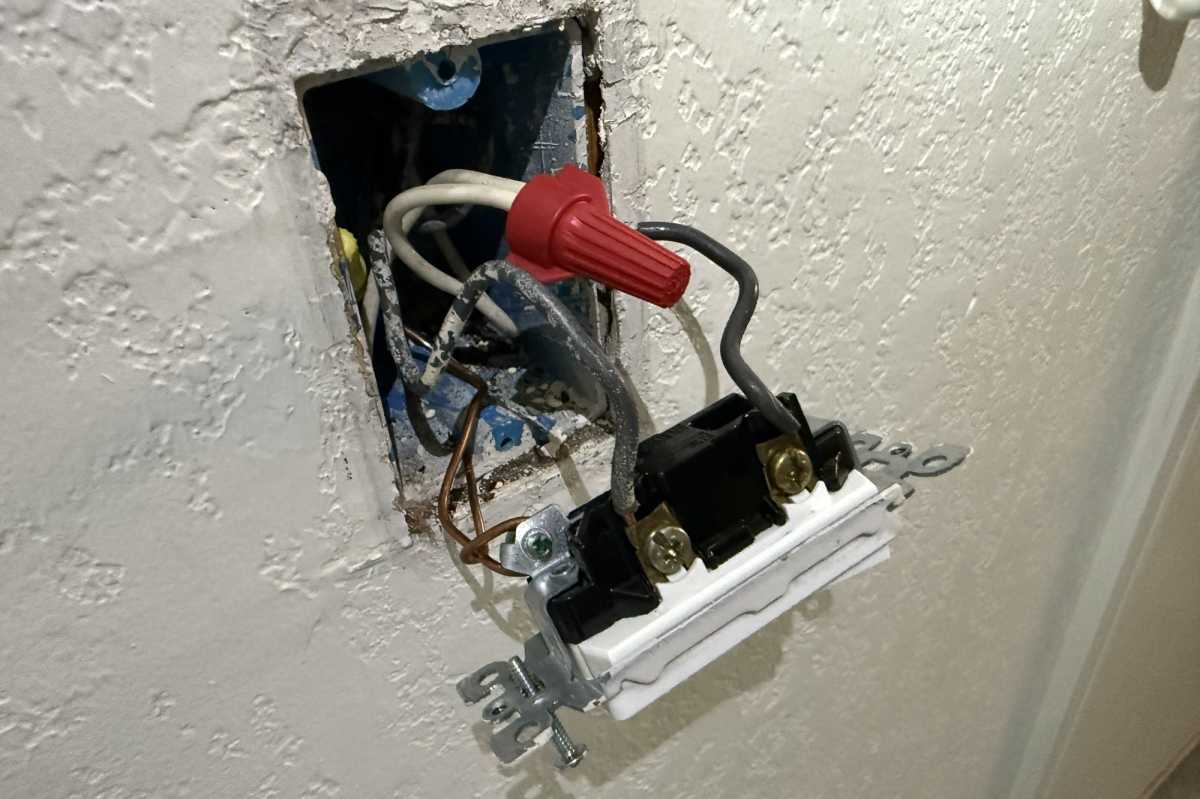
Don’t be stunned if the wires inside {the electrical} field are painted over or spattered with drywall mud.
Christopher Null/Foundry
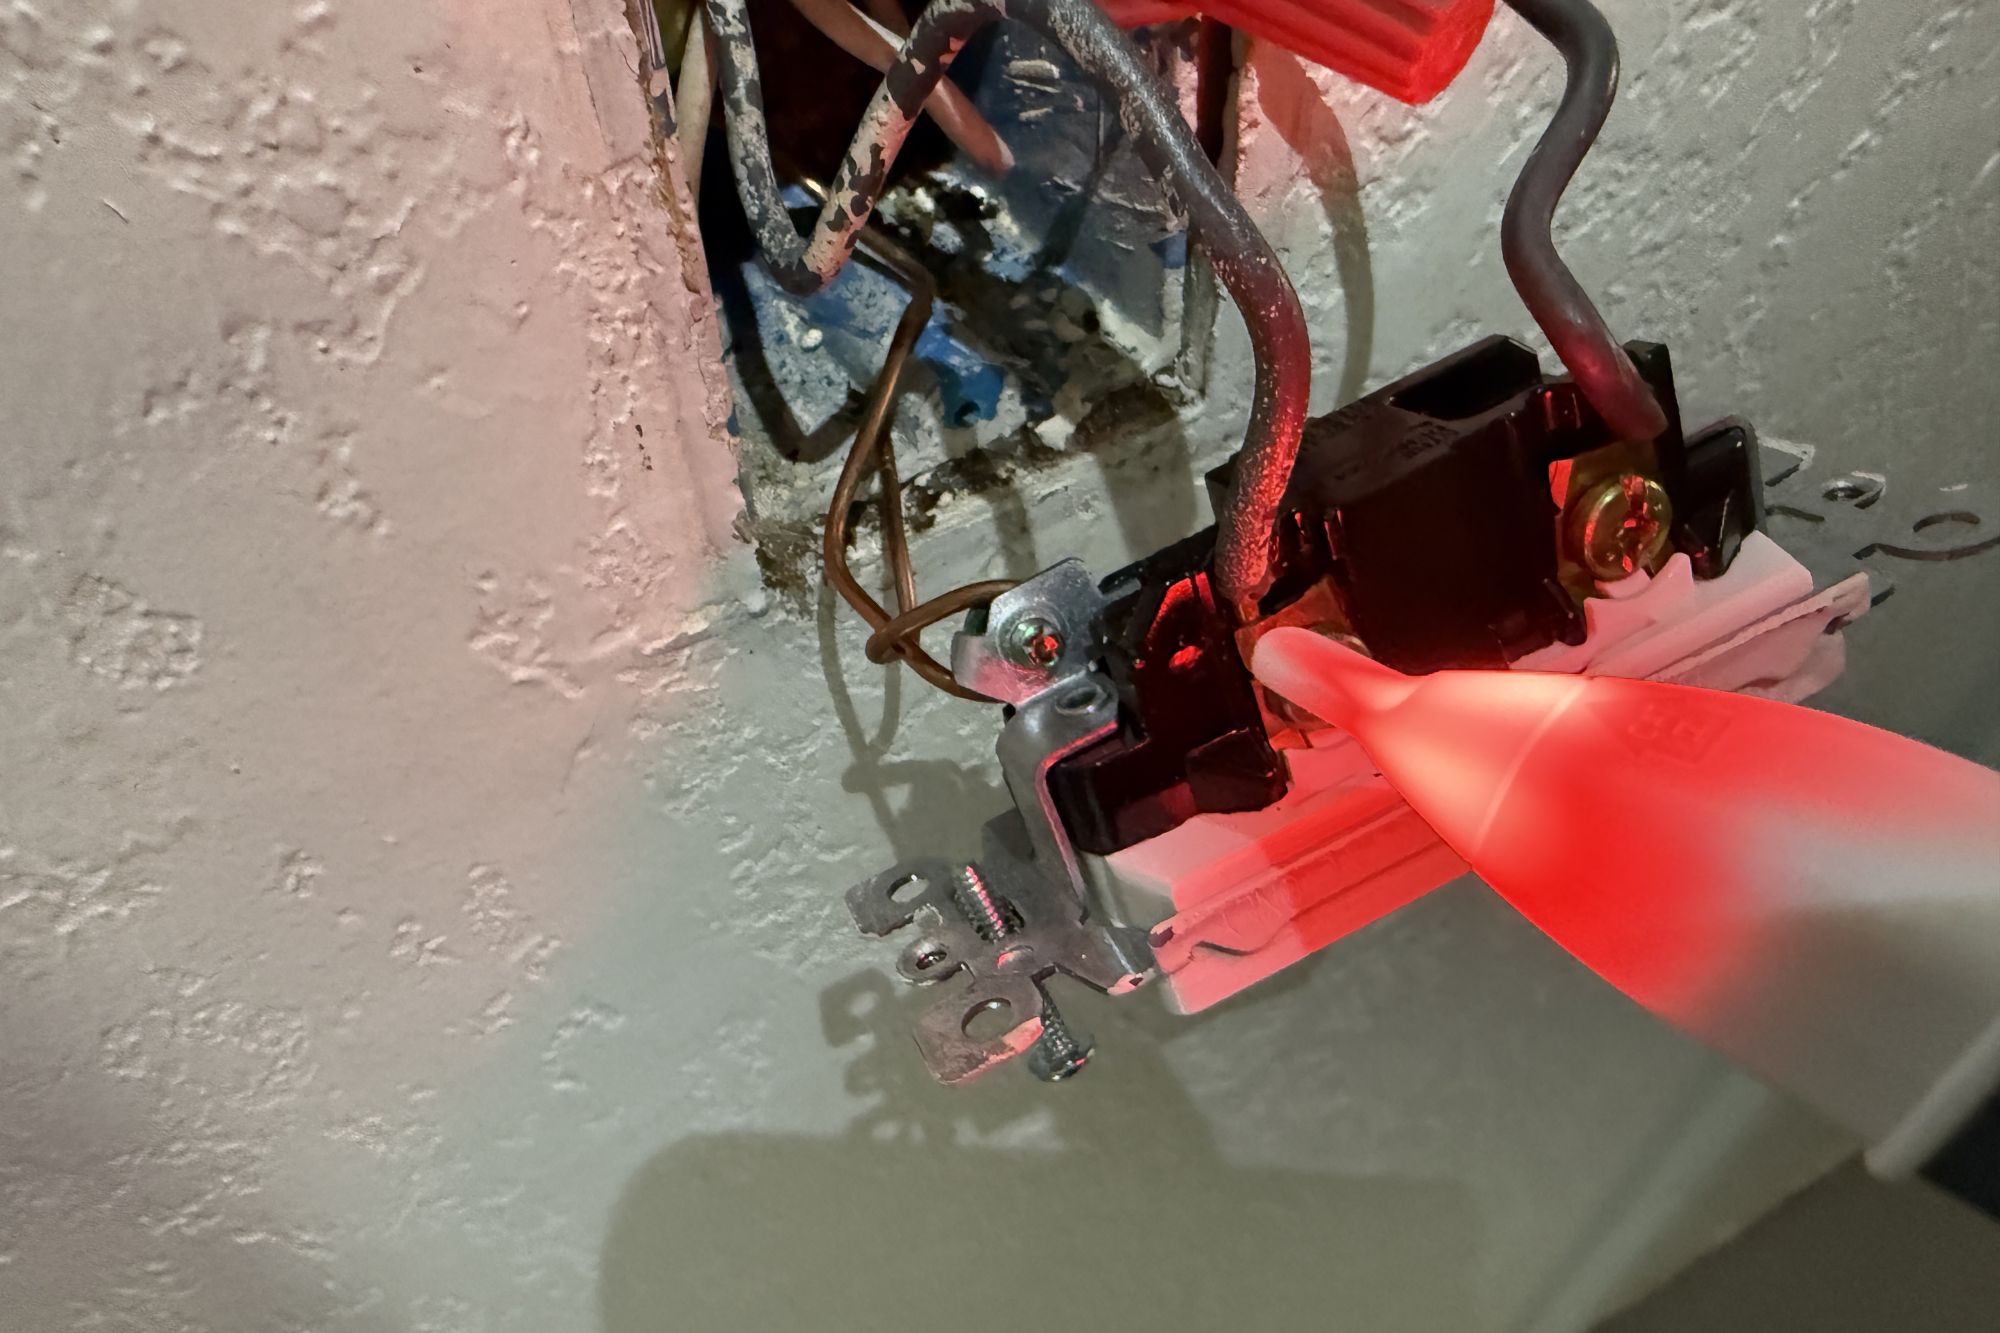
Your subsequent step is to find out which of these two black wires is the line (the “hot” wire that connects to the panel and your energy supply) and which is the load (connecting to the sunshine bulb or outlet). While you may guess at this—line wires would possibly go down towards the ground, whereas load wires would possibly go up into the ceiling, the place the sunshine is—there’s no dependable technique to inform simply by trying on the wiring within the field to know what’s what.
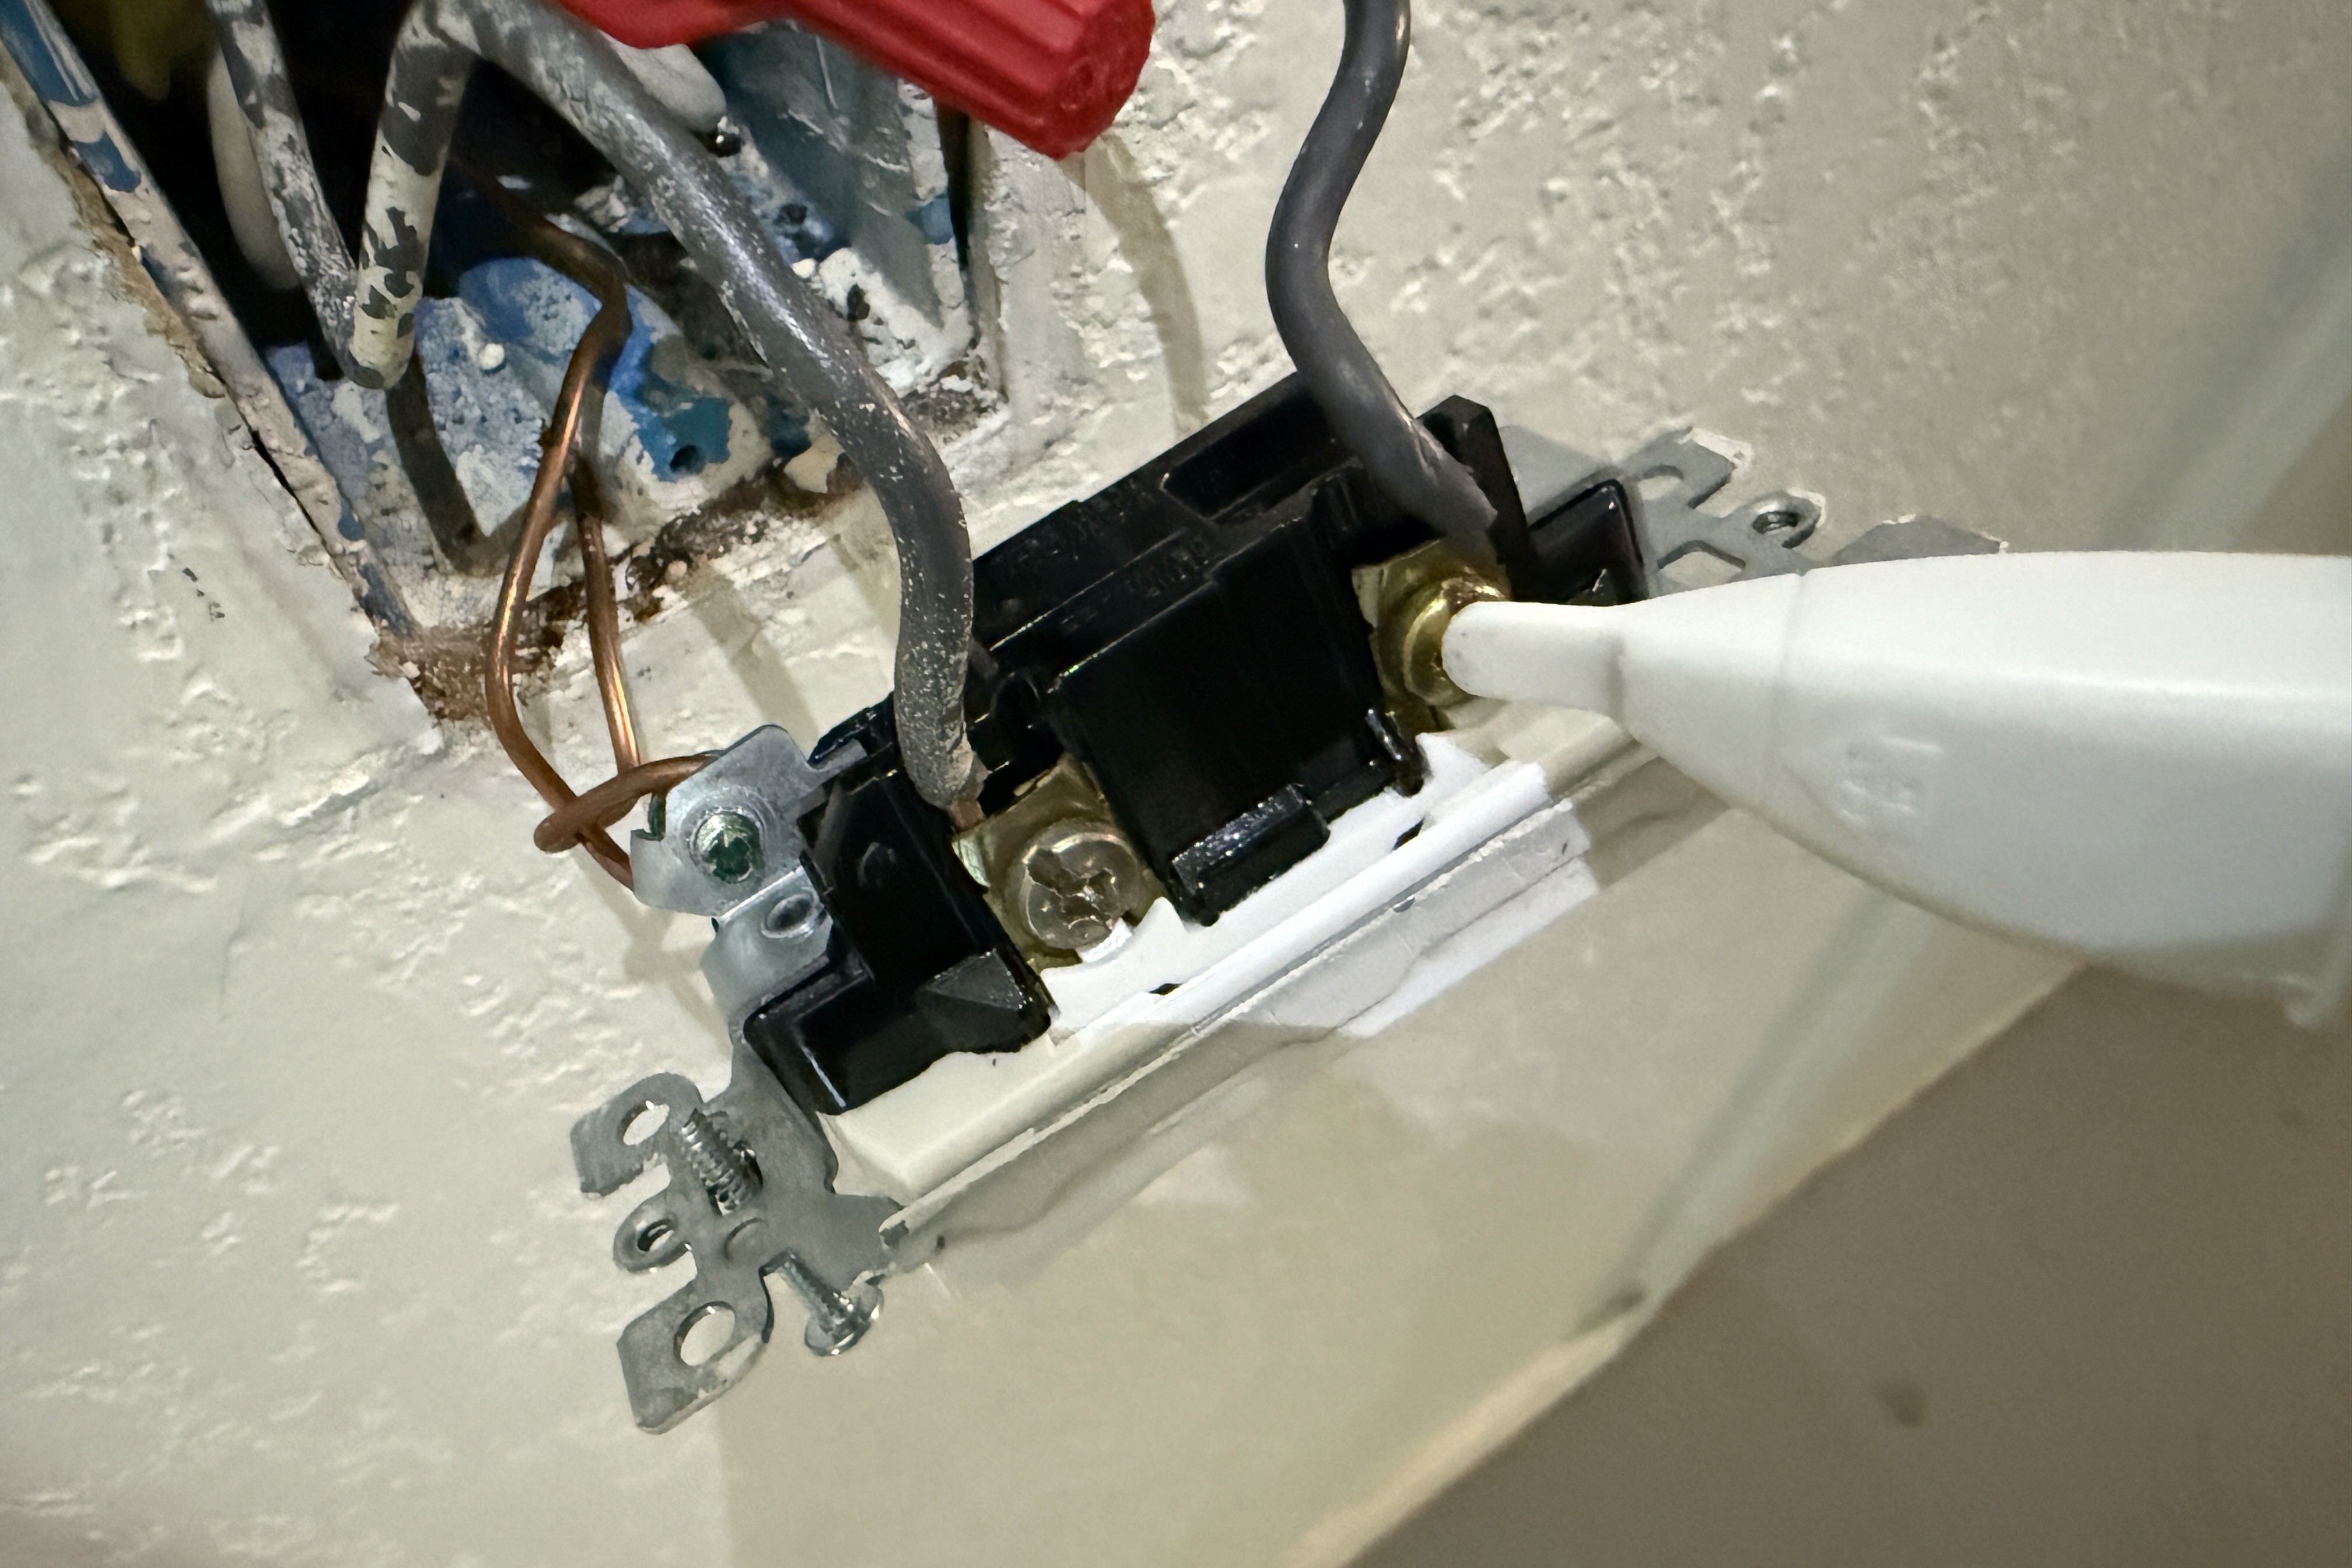
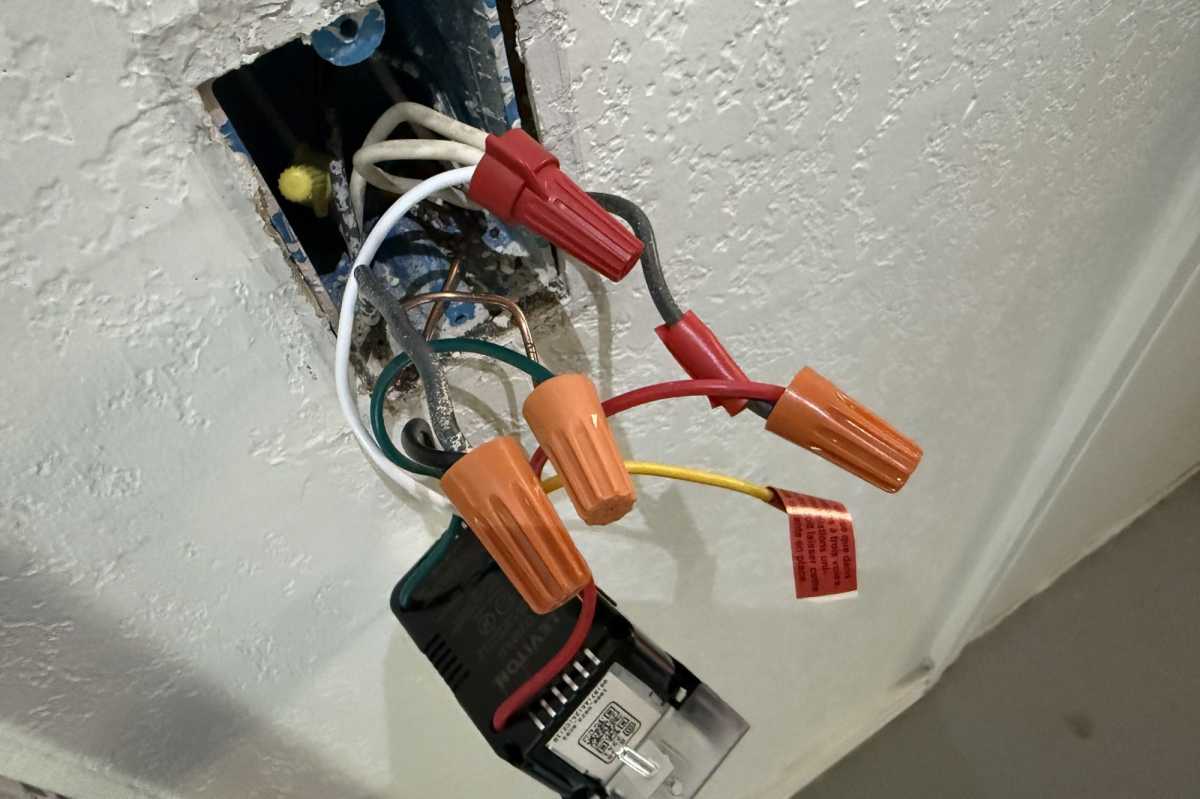
The foolproof means is to show the circuit breaker again on, set the swap to its off place, after which contact your voltage sensor to every of the black wires. When the voltage sensor lights up, that’s the road wire. If it stays darkish, that’s the load. You would possibly wish to mark the wires for future reference; within the images, I put some crimson electrical tape across the load wire to match the crimson shade of the load wire on the good swap I’m working with.
Are there greater than two black wires within the field? Or a crimson wire? In this case, you might be prone to have a multi-way swap. Red wires are generally used for the “traveler” wires that run from swap to change, however that is removed from common as a result of the National Electrical Code (NEC) solely mandates the colours of impartial wires (white or grey) and grounding wires (inexperienced or inexperienced with a yellow stripe, though grounding wires can be naked copper).
In truth, most switches I’ve labored with use black wires for traveler wires, too. This might effectively complicate your set up—and may in the end require just a little trial and error in complicated multi-way installations to get all the things working correctly.
Now that every one your wiring is recognized, flip the ability again off on the breaker. Double test that it’s off and prepare for the subsequent step.
Remove the present swap
Pro tip: Take a photograph of the setup earlier than you begin disassembling issues, simply in case your good swap doesn’t work and also you want put all the things again to the way in which it was earlier than you began your mission.
If you uncover that each the road and cargo wires are black, it’s a good suggestion to label one or the opposite so that you don’t must guess. I caught a bit of crimson tape on the load wire right here to match the load wire on the good dimmer I used to be putting in.
Christopher Null/Foundry
But this ought to be the simple half. Just loosen any screws connecting the wires to the swap, after which take away the swap totally from the boxx. Again, preserve monitor of that are the road and cargo wires. Neutral and floor ought to be self-explanatory.
Install the brand new swap
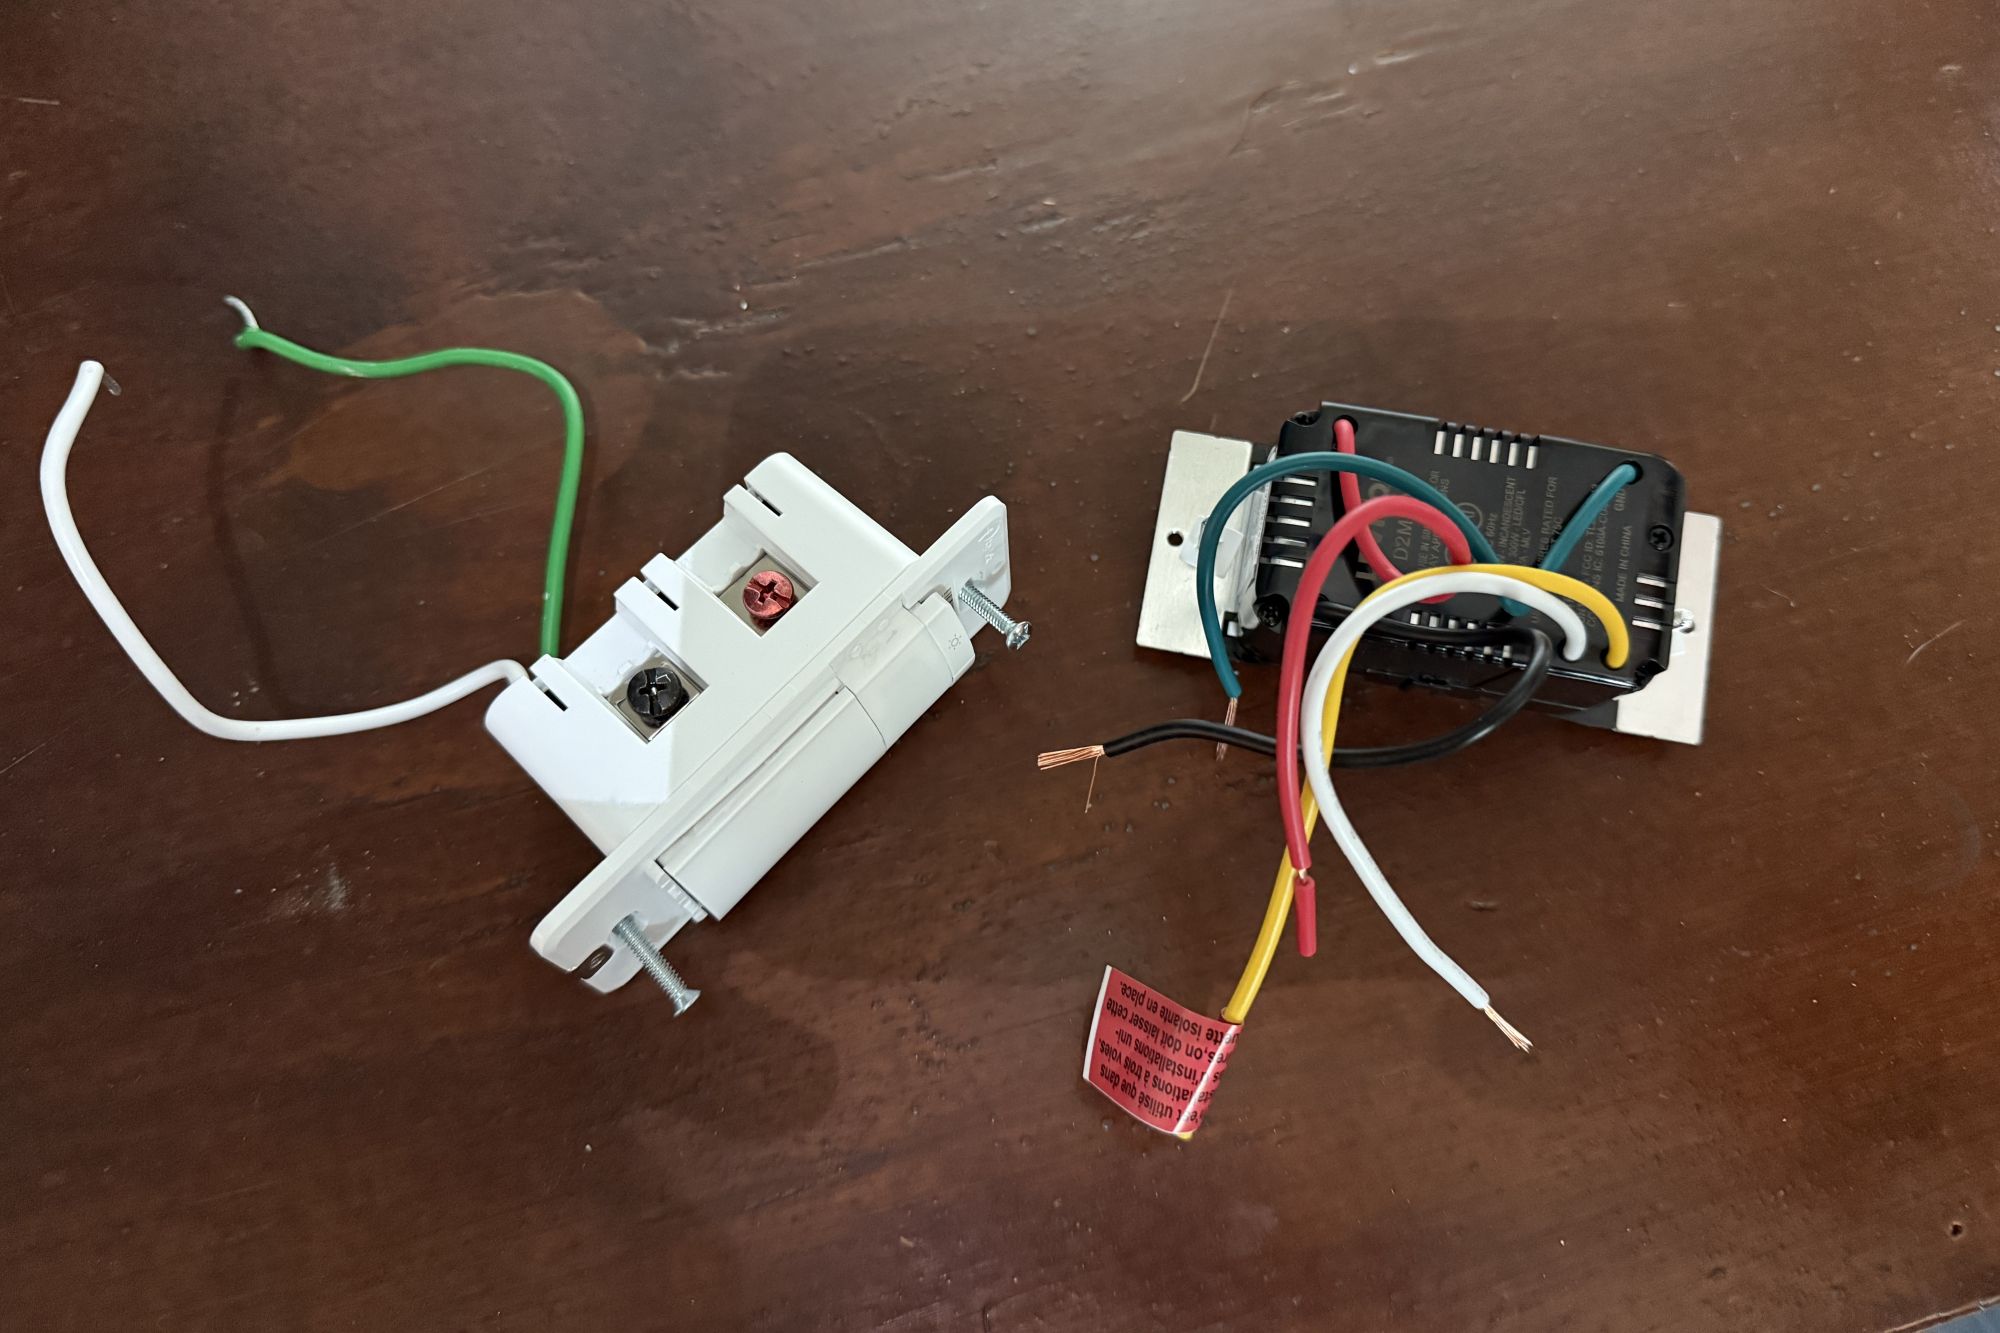
A typical single-pole good swap would require you to make 4 connections: line, load, impartial, and floor. Different good switches, nevertheless, use totally different connection programs. Some use screwpost terminals just like what you’ll see on a dumb swap, some use push-in connectors the place the wire slides right into a small gap (often known as backstabs), and a few use pigtails that connect to your family wiring with wire nuts. Still others use numerous mixtures of those three strategies on the identical gadget, with each screws and pigtails, for instance.
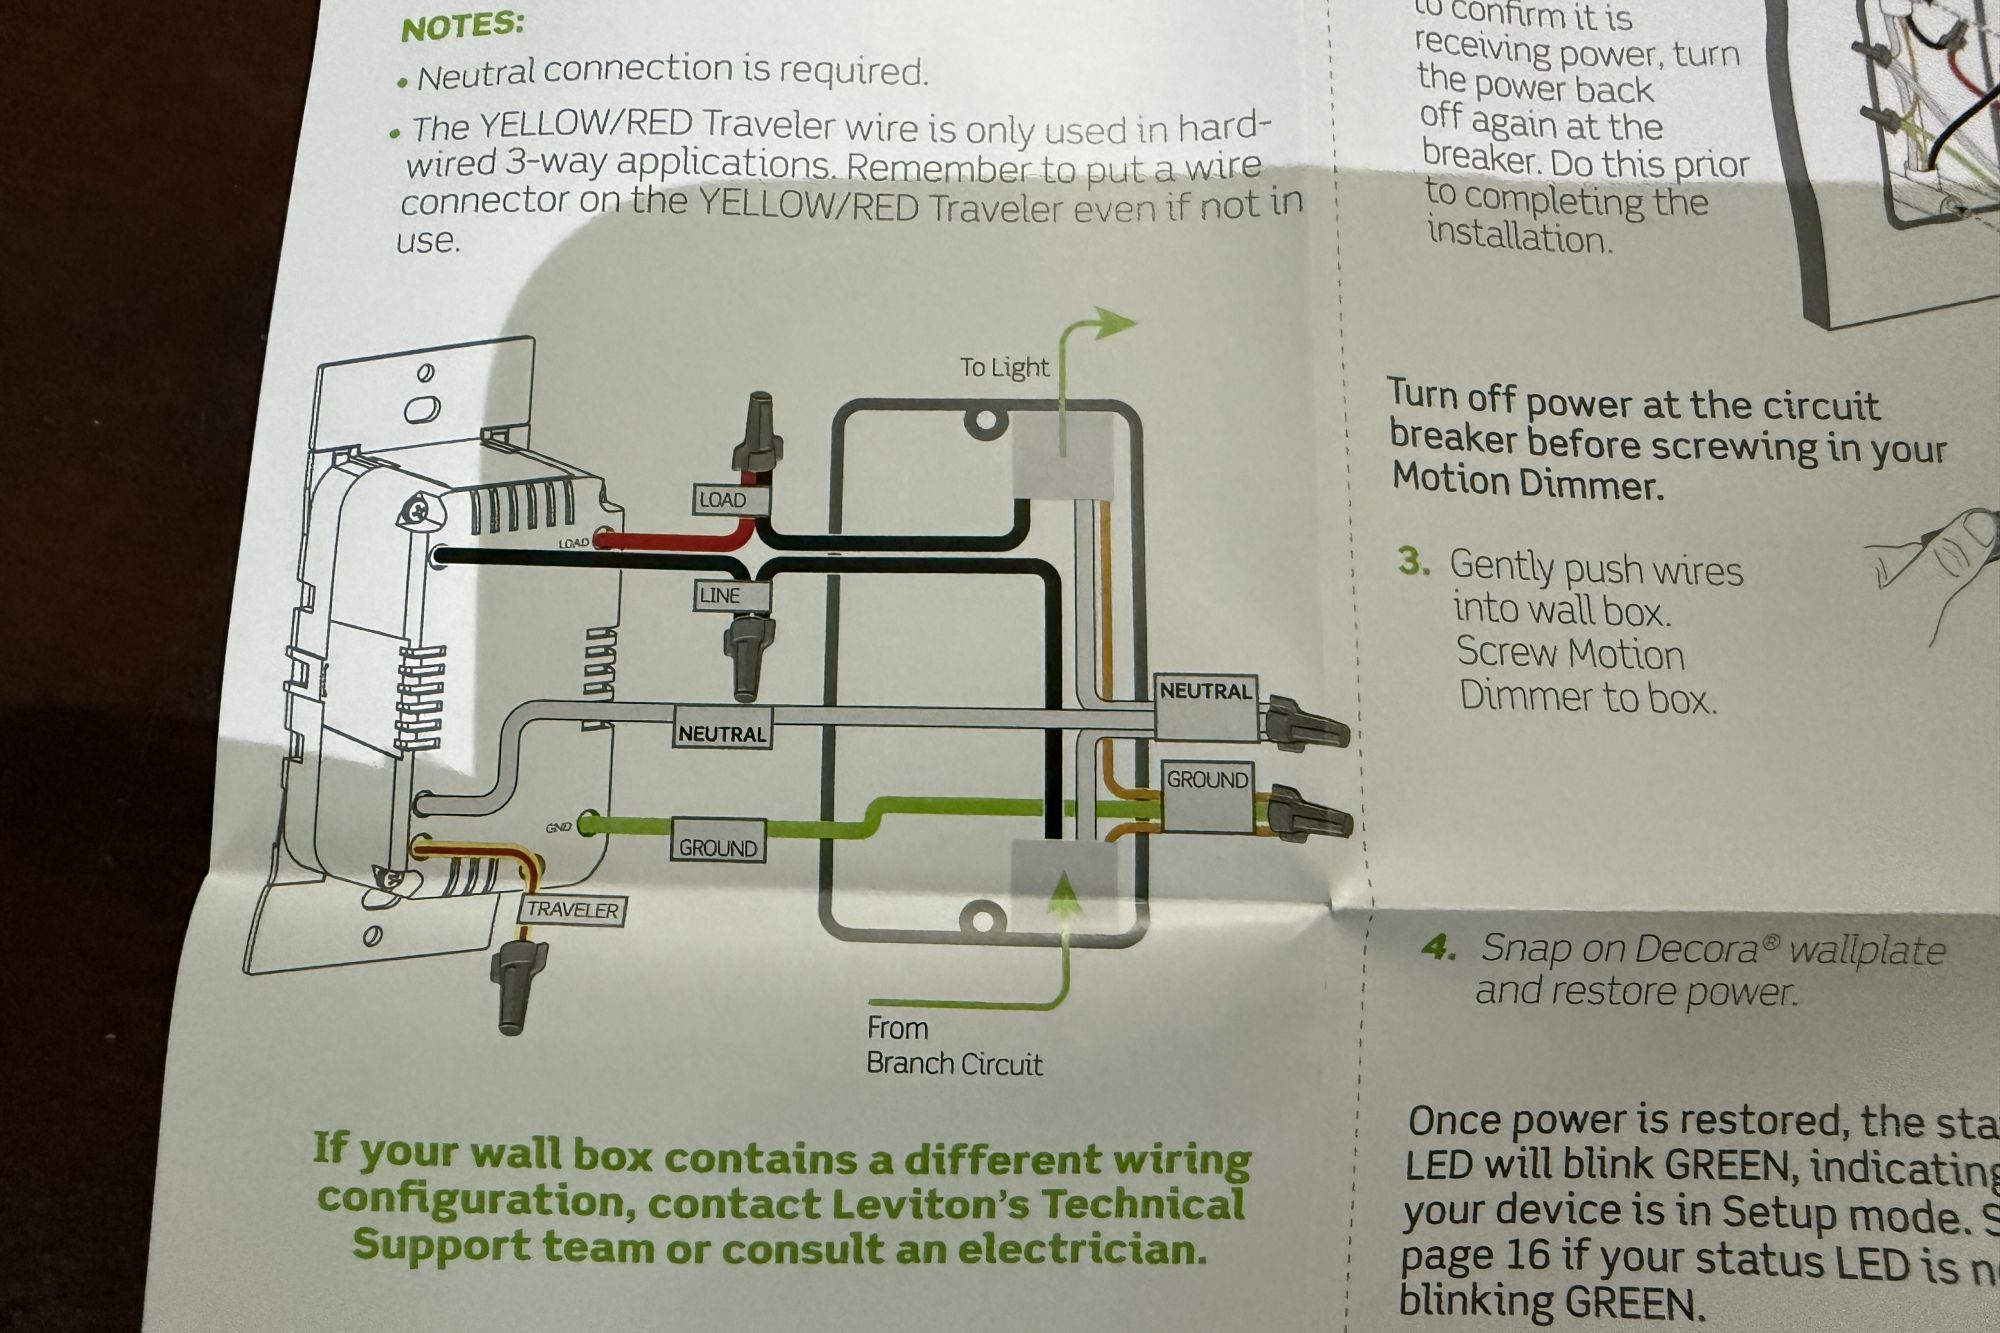
Most good swap {hardware} is effectively labeled as to which wire or screwpost goes to which wire in your receptacle, however you may also confer with the wiring diagram that sometimes comes with the swap to double-check that you’ve all of it proper.
Chances are you’ll must make at the least a number of pigtail connections, and wire nuts will likely be included within the bundle if so.
Pro tip: Included wire nuts don’t all the time match, particularly when coping with a fats bundle of impartial wires, so I preserve a container of wire nuts of assorted sizes readily available so I can experiment to search out the fitting dimension wire nut for every connection, making certain it’s cosy.
Connecting wire nuts is straightforward however requires just a little endurance. First, be certain that the naked ends of the wires contained in the field are all straight; use needle-nose pliers to straighten them out if wanted. If the good swap you’re putting in has stranded wires, twist the strands collectively tightly so none are protruding.
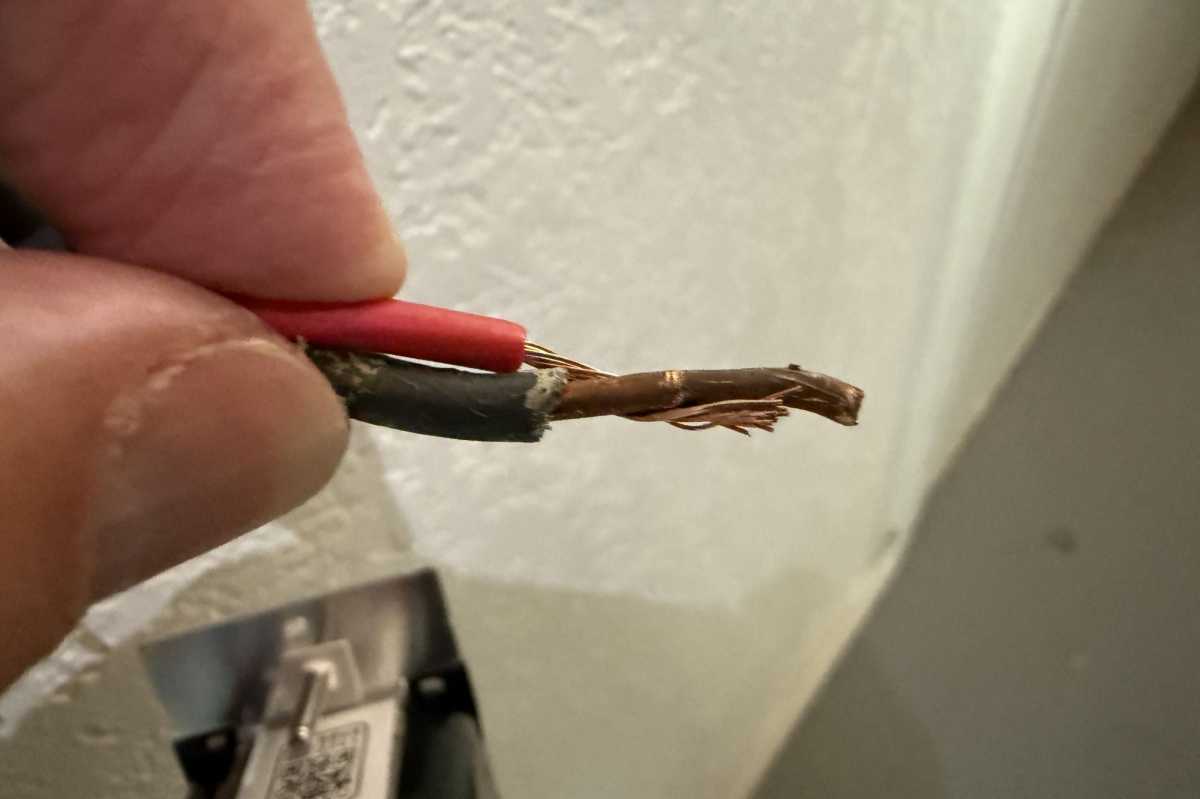
The wire coming from the field will in all probability be stable copper, however the swap you’re putting in would possibly use stranded wire. Twist the strands collectively after which twist them round th stable wire earlier than securing them with a wire nut.
Christopher Null/Foundry
Next, bundle up all of the wires you’re connecting to a single nut, slip the wire nut over the ends of the wires, then tighten the wire nut by turning clockwise till you may’t flip it any additional.
You shouldn’t see any uncovered wire (aside from the bottom wire) protruding from the again of the wire nut. Test the connection by pulling firmly on every of the wires to make sure they don’t come free. A single free nut will trigger the entire swap to fail, and it’s the most typical motive why your good swap gained’t work if you end the set up.
Make positive all of your wiring connections are tightly secured with wire nuts. You would possibly want to make use of a bigger wire nut than what got here together with your swap if there are greater than a few impartial wires contained in the field.
Christopher Null/Foundry
Pay particular consideration to impartial wiring, as that is usually probably the most tough connection to make efficiently, since you’ll normally have three or 4 wires going right into a single wire nut. That mentioned, the method is identical: Bundle up all of the wires, twist on the nut (attempt a bigger one if needed), and yank on them to make sure they’re all safe.
Push all the things into place
The hardest a part of putting in a sensible swap comes subsequent: Getting the swap into the field. Smart switches are notoriously giant compared to dumb ones, as a result of they’ve so many digital parts inside that dumb switches don’t. When mixed with all the additional wire nuts, they are often very tough to wedge again into the field and get them flush with the wall.
The greatest tactic I’ve discovered is to bend the wires in half, which turns the wire nuts round in order that they’re going through the wall, then push every of them into the receptacle, way back to they may go. Start with the impartial wire, then the bottom, then the road and cargo wires. Don’t be afraid to bend the wires in a number of locations and push exhausting to get them cosy in opposition to the again of the receptacle—a screwdriver deal with might help with this. You can even use needle-nose pliers to assist bend the wires additional if the area is tough to work in.

Stuffing all of the wires again into the field generally is a problem when putting in a sensible swap, as a result of it’s going to invariably be bigger than the one you’re changing.
Christopher Null/Foundry
With the wires in place, connect the swap to the receptacle utilizing the 2 bolts, which ought to be pre-attached. Don’t be alarmed if area is tight; the bottom of the swap will push the wires in the previous couple of millimeters because it retreats into the receptacle. Make positive the swap is vertically plumb (i.e., straight up and down), and that every one sides of the swap are flush with the wall.
Many switches are inclined to listing to at least one facet when they’re hooked up to the receptacle as a result of wiring behind them, which might go away you with an unattractive completed product. If this occurs to you, again the 2 bolts out and rearrange the wiring behind the swap. This generally is a bit tedious but it surely’s price it to make the completed set up extra engaging.
Make positive the newly put in swap is plumb and flush with the wall prior to installing its cowl plate.
Christopher Null/Foundry
At this level, I like to show the ability again on and ensure the swap is working. If it’s, the hooked up gentle will illuminate usually, even earlier than you configure the swap with its cell app. If it doesn’t work, one in all your wire nuts has in all probability come free—otherwise you linked the wires incorrect. Turn the ability again off and begin over.
Finish up
Many good switches include a canopy plate, but when yours didn’t you would possibly must buy one in case your previous plate not suits (resembling in case you are changing a toggle swap, as most good switches use a paddle design). Don’t use a metallic cowl plate with a sensible swap; it may possibly block the radio alerts it makes use of to speak together with your router (Wi-Fi fashions) or good residence hub (Thread, Zigbee, Z-Wave, or proprietary fashions).
The final step is to enroll the swap with the producer’s app or together with your favourite good residence ecosystem if, say, you may have a Matter-compatible swap. Note that many switches have a QR code printed on the swap {hardware} to be used throughout this course of, so that you would possibly want to finish this step earlier than you place the duvet plate on. Check the set up information to make certain.
Troubleshooting
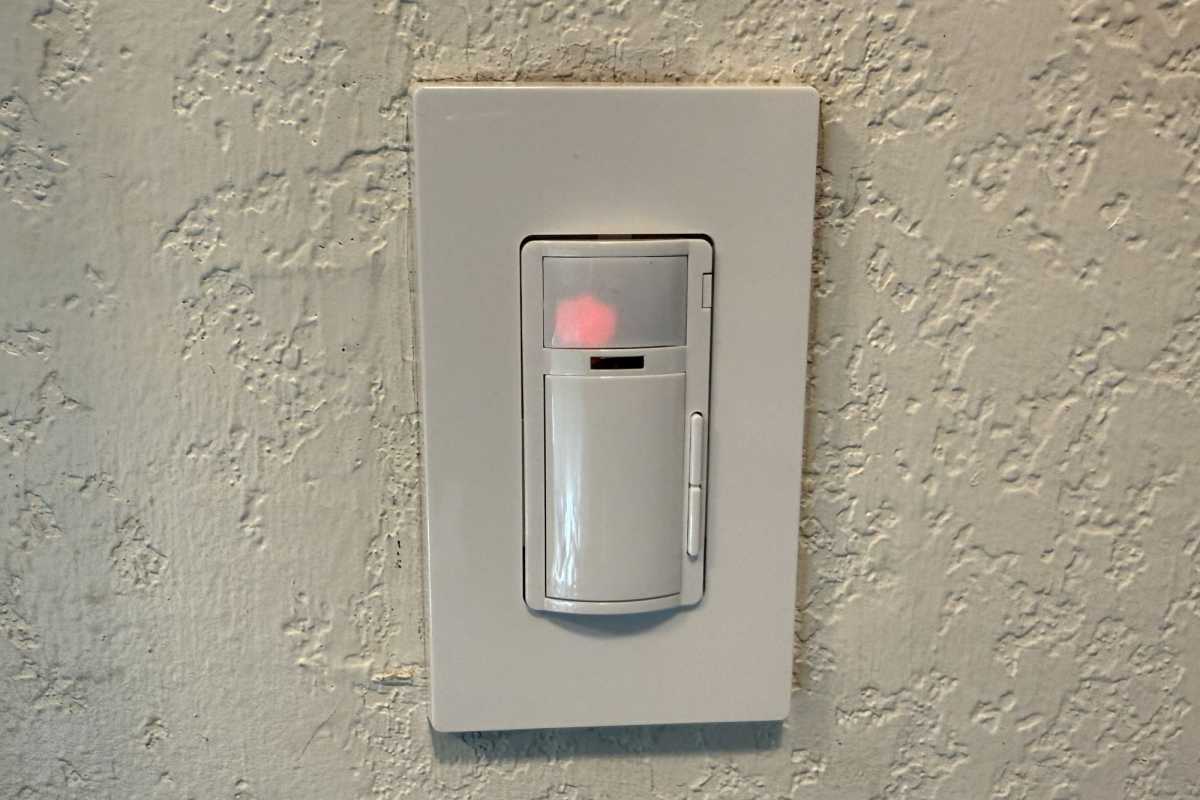
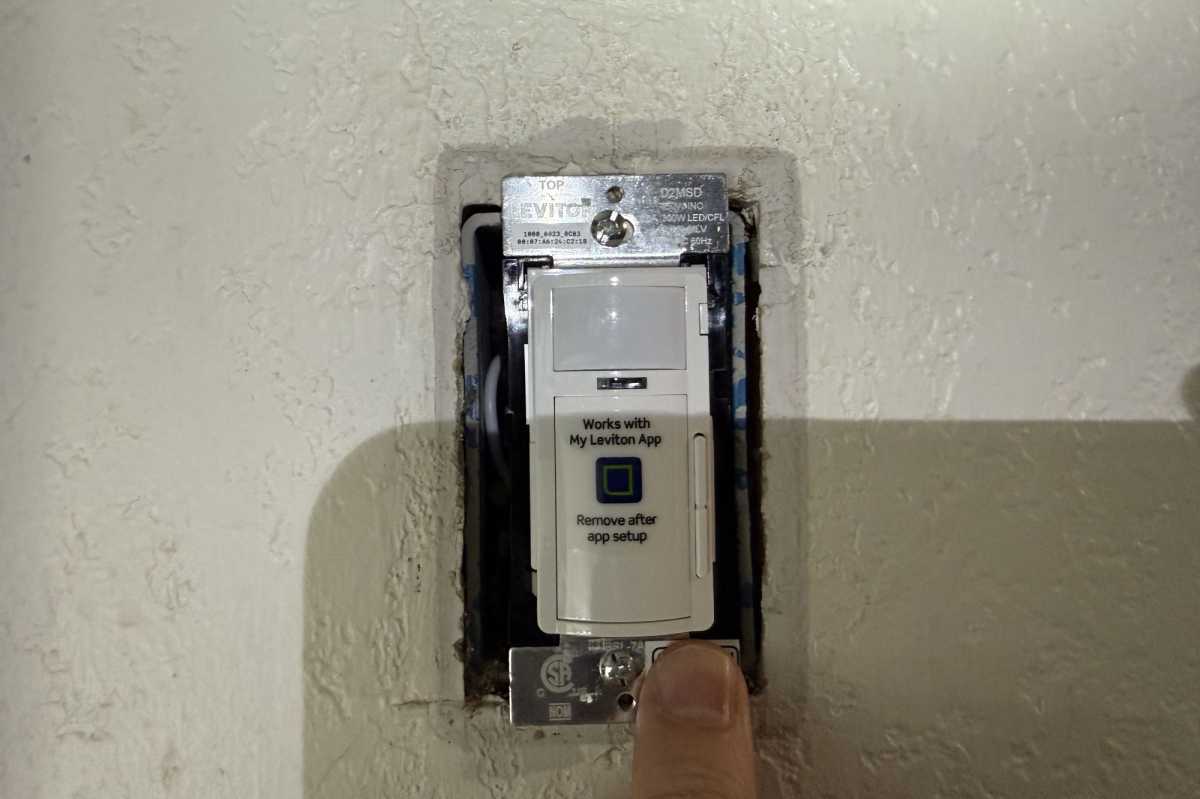
A newly put in Leviton Decora Wi-Fi Motion Sensing Smart Dimmer (mannequin D2MSD).
Christopher Null/Foundry
Is the swap not working proper? The offender is normally a wire nut that got here free when you have been making an attempt to jam all the things again into the field. If all of the connections look intact, test that you simply didn’t combine up the load and line wires—or join one in all them to a traveler wire by mistake.
If you think that is the case, use a voltage meter to be sure you have the road wire accurately recognized, then swap the load and traveler wires to see if that fixes the problem. Either means, test all of your wire nuts obsessively to make sure they’re as tight as doable.
Above all: Keep checking that the ability is off any time you’re working with wiring. Electrical shocks are not any picnic.