


Photoshop Blur filters are designed primarily for retouching photos—to melt, haze, cloud, fuzz, or distort particular areas of an image or your entire picture. Backgrounds are sometimes blurred out to intensify the primary topic of a photograph, or to cut back muddle within the atmosphere. Blur filters additionally gather, then fuse the colours in a specific space to create a particular impact comparable to movement.
Blur results defined
When you choose Filter > Blur, Photoshop shows a dropdown menu with 11 Blur results. They are outlined as follows (and grouped by similarity):
Average: Photoshop considers all the colours of a specific space, then calculates the common shade of the mixed hues, and fills the realm with that shade. Once the realm is “averaged,” you may apply extra results comparable to a smooth gradient, a easy texture, or a modest sample to create an uncluttered background that doesn’t “compete” with the primary topic of the picture.

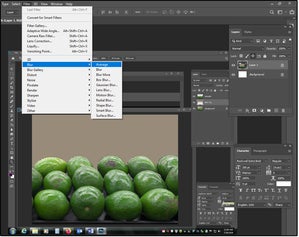
01 Use the Photo store Average filter to equalize and unclutter backgrounds.
Blur: Use this filter to melt the jagged edges of an object you “cut out” (utilizing the lasso or the pen instrument) from a bigger photograph. It’s additionally very helpful for decreasing noise in an image lined with mud particles, scratches, half-tone dots, or a Moiré sample from a scanned web page. This is an particularly efficient answer for an outdated wrinkled or scratched photograph that’s been scanned.
Blur More: The similar outcomes because the Blur filter, solely elevated by 4 occasions the impact. The adjustments are delicate on each Blur and Blur More, so you might have to “Blur More” repeatedly to attain the specified outcome.

02 Use the Photoshop Blur & Blur More filters to melt edges and clean over picture defects.
Box Blur & Gaussian Blur filters
Box Blur: The Box Blur finds the perimeters of the objects in a picture, then averages the colours of the pixels adjoining to the goal objects to create a smooth, silky blur impact. With contrasting colours, the Box Blur creates delicate, glowing edges between the objects or the objects and the background. Use this filter to melt the petals of a flower (see our coral rose in determine 03), whereas concurrently enhancing the perimeters so the flower stands out in opposition to a busy background.
Gaussian Blur (or Gaussian distribution) appears to be the preferred. It makes use of a bell-shaped curve, which has its highest level within the heart, then decreases on either side (similar to a bell) to blur the chosen space of a picture. It makes use of a sliding scale from 0.1 to 1000, which produces a variety of outcomes.

04 Photoshop’s Gaussian Blur is a well-liked selection.
Note that the perimeters of the chosen space include colours from the encompassing areas, which can produce a fuzzy or feathered define. To keep away from this take away (lower out) the encompassing space first, blur, then paste the encompassing space again into place (which is able to possible create a tough edge until you barely blur the perimeters of the cut-out space as effectively).
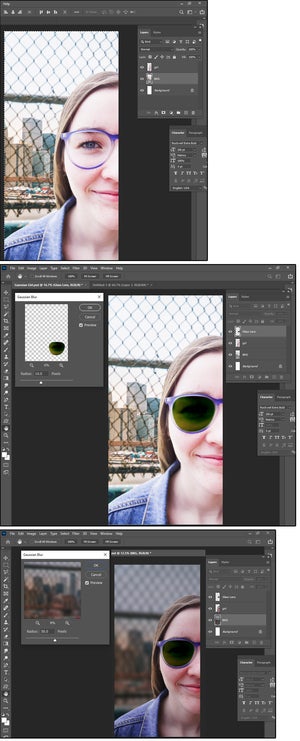
In our instance (see determine 04), the consumer wished to make use of a particular photograph of a younger woman, however he wished the woman’s id masked, and the background was a cluttered mess. First, we modified the Color Balance to make the glasses appear like sun shades.
We used the Gaussian Blur at a Radius of 10 to blur the attention with the glass lens. Next, we adjusted the Brightness/Contrast on the woman’s face to -100 and +40, respectively. And final, we adjusted the Brightness/Contrast of the glass lens to -80, +50, respectively.
For the busy background, we adjusted the Brightness to -150 and the Contrast to +10. Then we used the Gaussian Blur at a Radius of 50 to barely blur the background sufficient to showcase the woman, however nonetheless keep a hazy view of the town and the fence behind her. The consumer liked it!

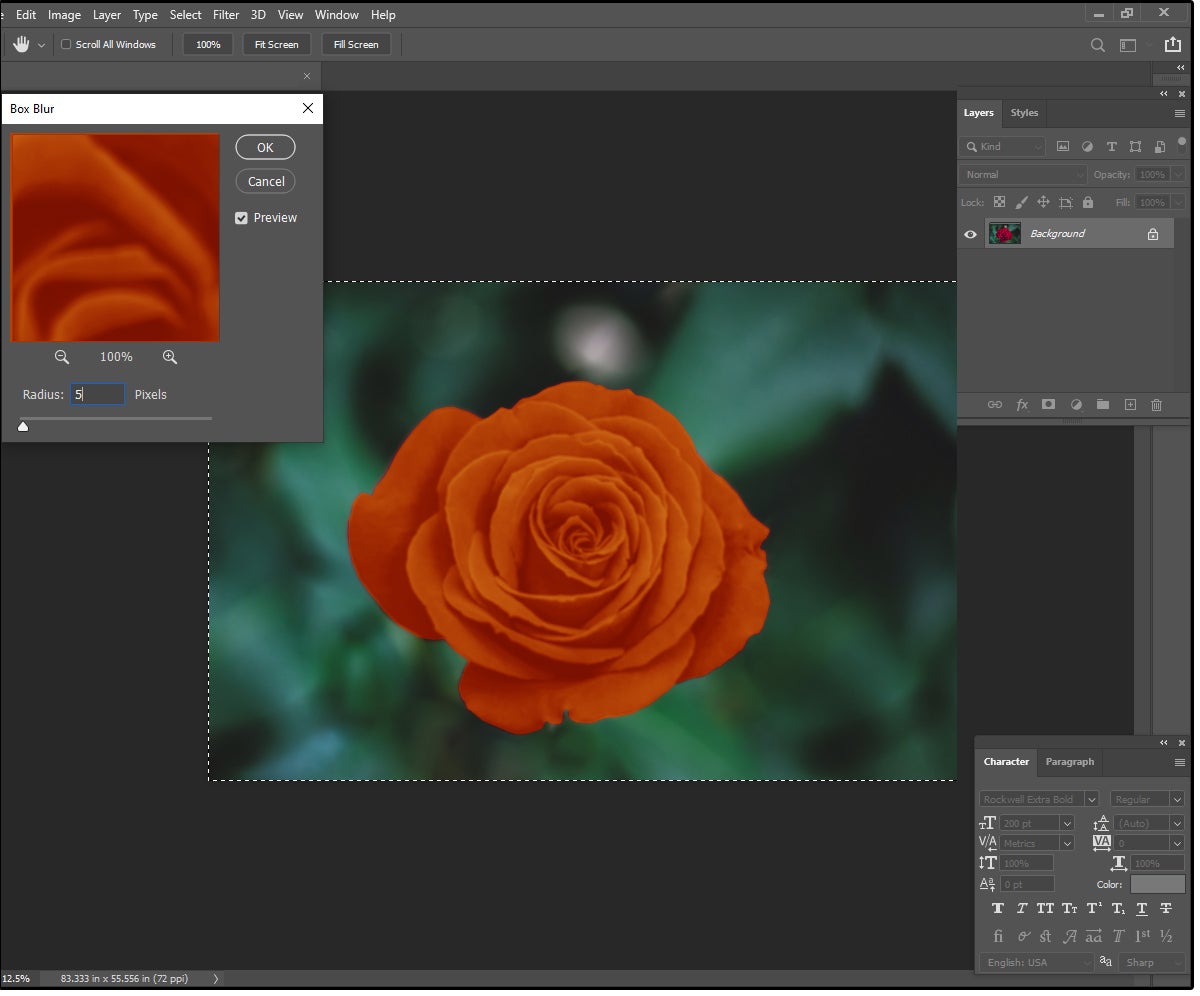
03 Use Photoshop’s Box Blur to create a smooth, silky impact with glowing edges.
Lens Blur filter & Motion Blur filter
Lens Blur: Use this filter to regulate the depth of area in your photographs—for instance, to blur out a cluttered background or improve a fuzzy background. This highly effective filter supplies 14 ranges of adjustable results, together with six shapes and a number of other depth map choices. You have larger management over the ultimate outcomes of your picture as a result of you may fine-tune so many results.
Check out the crimson rose in determine 05. We set the Blur Focal Distance to 100. We used an Octagon form with a Radius of 35, a Blade Curvature of 55, and a Rotation of 25. For the Highlights, we did Brightness 10 and Threshold 20. The Noise was set to 3 with Uniform Distribution. The lovely crimson rose appears to be like like velvet on a background of inexperienced sand.

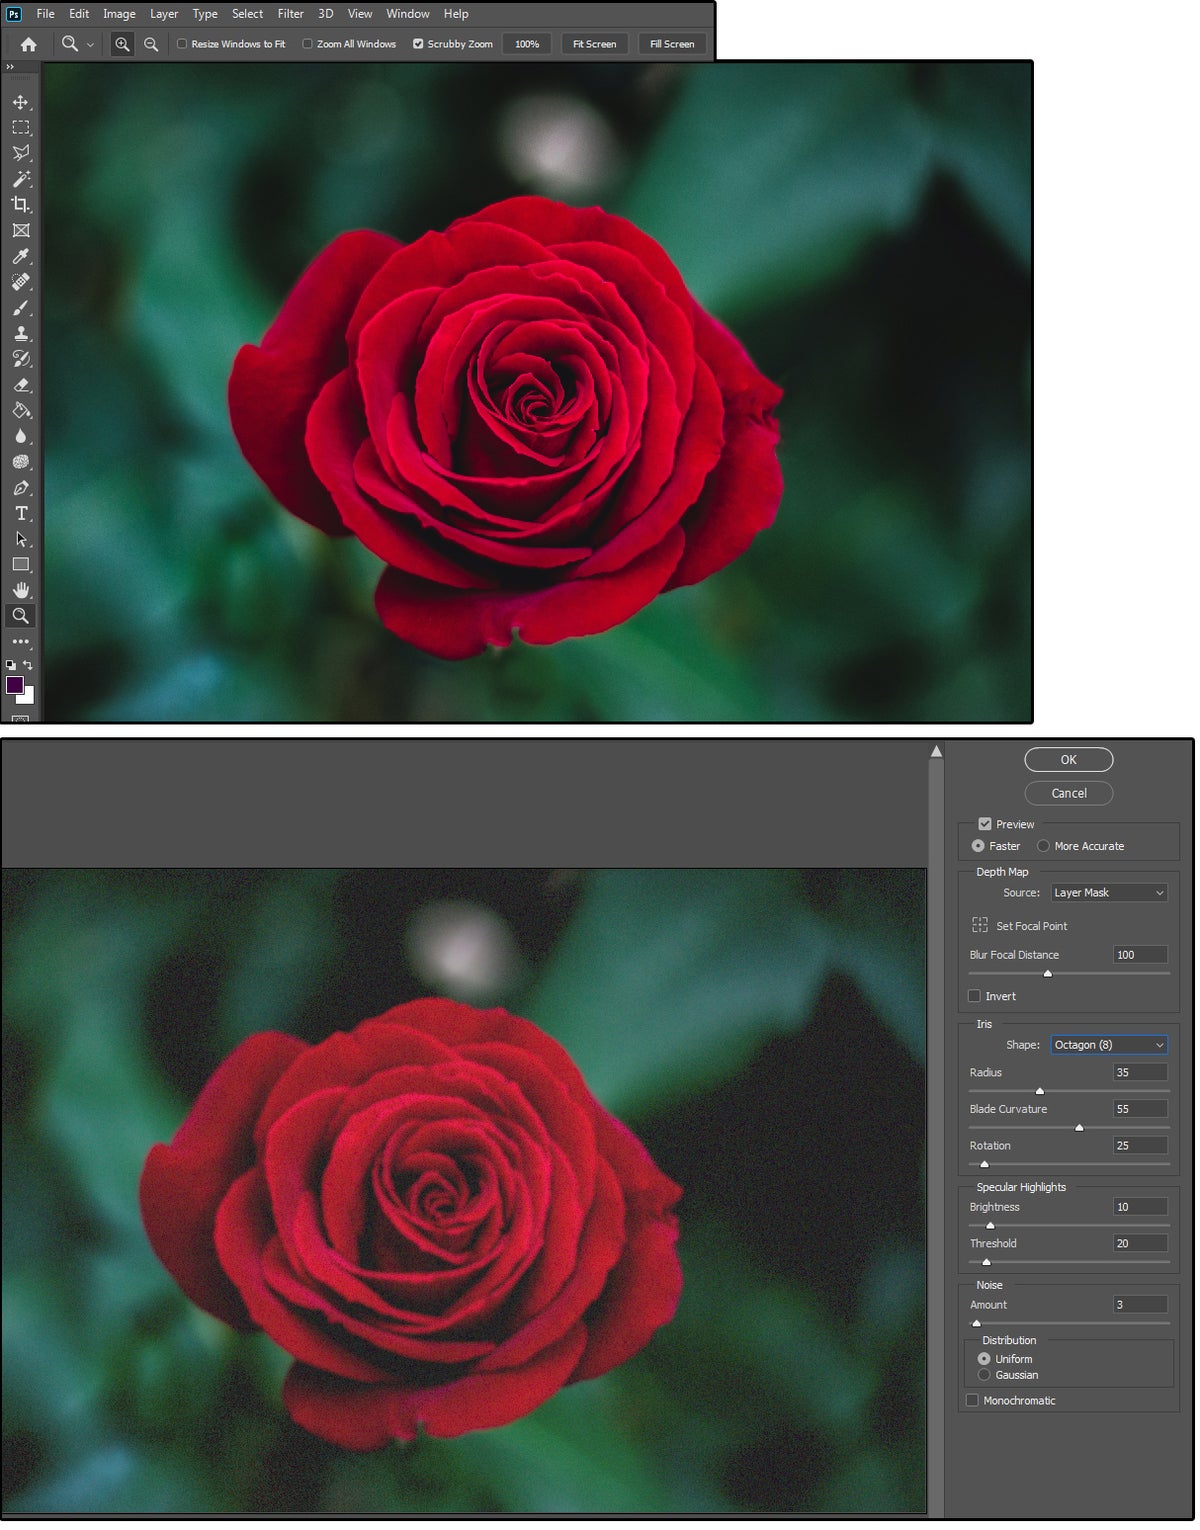
05 Use the Lens Blur to regulate depth of area.
Motion Blur: The Motion Blur does precisely what you’d anticipate—it creates the phantasm of movement. When you {photograph} a shifting goal, you may “stop” the motion with digicam settings or set your shutter velocity to 1/60th of a second (give or take), and shoot the topic “in motion.” With Photoshop, simply use the Motion Blur filter. Settings embrace the angle of the movement (from zero to plus or minus 360 levels) and the space of the spreading pixels—that’s, how far the picture is stretched to emulate the motion.

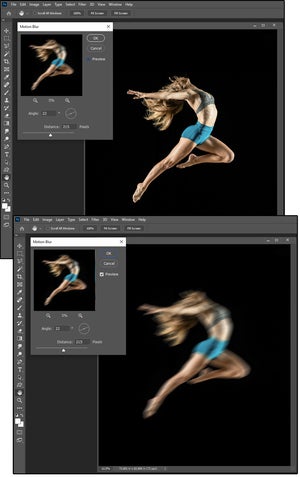
06 Use the Motion Blur to create movement.
For our instance, we used a dancer leaping by means of the air (see determine 06). We selected an angle of 22 levels, so she would look like shifting ahead and up. For the space, we selected 215 pixels, so she can be simply blurred sufficient to copy movement with out decreasing her picture to blurred traces.
Radial Blur & Shape Blur filters
Radial Blur: The Radial Blur is used to create a round distortion round an object, which might be focused or utilized to your entire picture. Visualize the ripples in a pond round a dropped pebble. With this filter, you may modify the Amount (or diploma) of the blurring; the Method (Spin: alongside concentric round traces or Zoom: alongside the radial traces); the Quality (Draft, Better, Best); and the choice to set the Blur Center.
The most blatant use for the Radial Blur is with round objects in movement such because the wheels on a tire. For our instance, we used the elliptical marquee instrument to pick out the tire on this sports activities automotive (determine 07). We selected “20” for the Radial radius, Spin (as an alternative of Zoom) for the Blur Method, and “Good” for the Quality (versus Draft or Best). Now the automotive seems to be shifting quick due to the spinning tires.

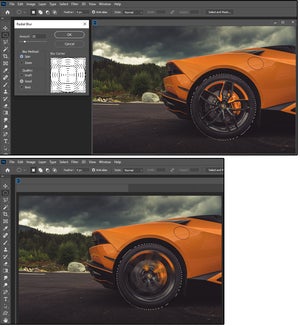
07 The Radial Blur creates “ripples” in a round movement in your photos.
Shape Blur: This impact makes use of one thing known as a picture kernel, which is principally a two-dimensional matrix of pixels, the place every pixel is represented by a quantity. Based on the picture mode (RGB, CMYK, Grayscale, and many others.) and the bits per channel (8, 16, 32, and many others.), the kernel makes use of these values to construct a brand new picture. Choose your kernel from the Shape presets put in in your system, then choose a radius worth (from 5 to 1000) to blur your picture right into a form that loosely matches the preset you chose.
We experimented with a number of Shape presets to see what this Blur impact produced. We began with some crimson chili peppers rising in my backyard. We chosen your entire picture, then selected a music be aware because the Shape preset with a Radius of 50 pixels. The impact confirmed vertical traces echoing the stem of the music be aware all through the picture.
Next, we selected wavy traces with a Radius of 75 pixels. The outcome was like trying by means of a cut-glass vase or a crosshatched floor, just like the crosshatch brush in Photoshop’s Brush Strokes Filter Gallery.
Last, we chosen the hole cloud preset with a Radius of 75 pixels, which produced semi-circular blur patterns just like a beehive throughout the floor of the peppers picture. The outcome was a smooth, dreamy impact that induced a sleepy response.

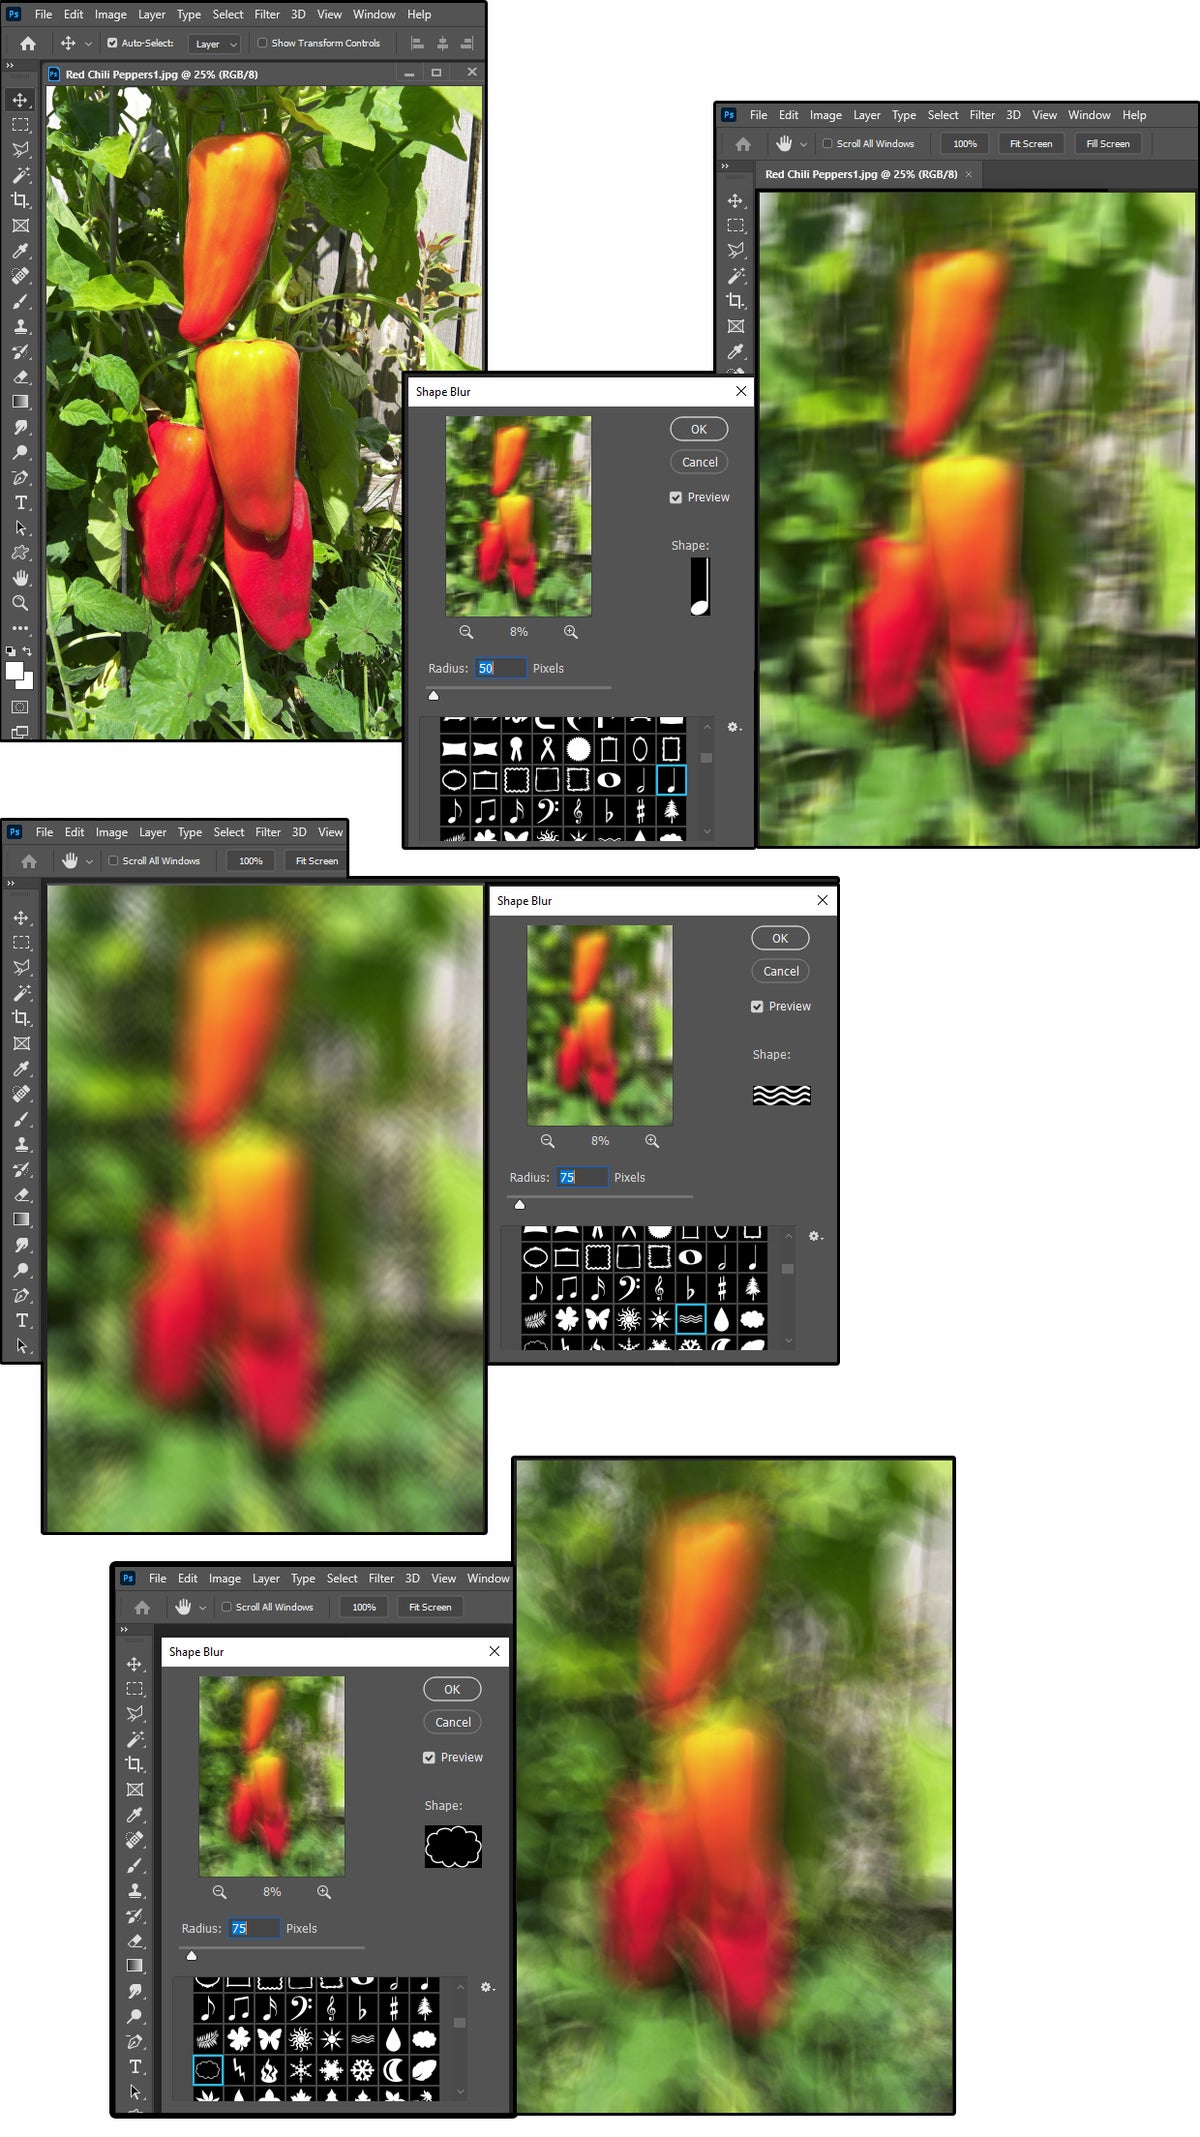
08 Photoshop’s Shape Blur makes use of Shape presets to create cool results.
Smart Blur & Surface Blur filters
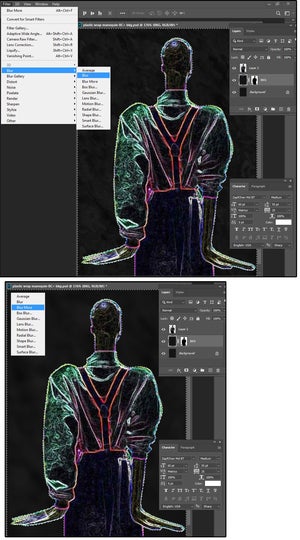
Smart Blur: This filter makes use of meticulous accuracy primarily based on dissimilar pixels, which incorporates specifying a Radius or space measurement (0.1 to 100); selecting a Threshold (0.1 to 100); and choosing blur high quality (low, medium, excessive) or the blur Mode. The modes embrace Normal (for the entire picture), Edge Only and Overlay Edge (for the colour transitions, comparable to black-and-white edges or white solely), respectively, to blur photos.

09 Use the Smart Blur to attain an impact that appears like fading pixels.
For our pattern, we selected a vibrant, virtually fluorescent-colored masks. The problem was to make this picture appear like it was airbrushed by means of a display screen, to offer it that tough, sandpaper look. To obtain this, we chosen a Smart Blur Radius of 75 with a Threshold of 100. Then we selected Medium Quality and an Overlay Edge. The last product yielded a spooky, mysterious masks straight out of the Voodoo Queen’s closet.
Surface Blur: Unlike the Smart Blur, this filter maintains the perimeters whereas decreasing and smoothing out the noise or graininess. The Radius determines the realm measurement (1 to 100). The Threshold regulates the tonal values of the adjoining pixels (2 to 255) and determines how a lot they need to deviate from the middle pixel worth so as to be included within the blur effect–or not, if the tonal values are lower than the Threshold worth.
Our model is manufactured from spray-painted Styrofoam, so the feel is tough and grainy like coarse sandpaper. We had been tasked with smoothing her pores and skin, so she seemed extra like a black porcelain doll. We used the Surface Blur Radius of 20 pixels and a Threshold with 55 ranges to offer her a silkier complexion that seemed extra like pores and skin. The consumer stated we succeeded.

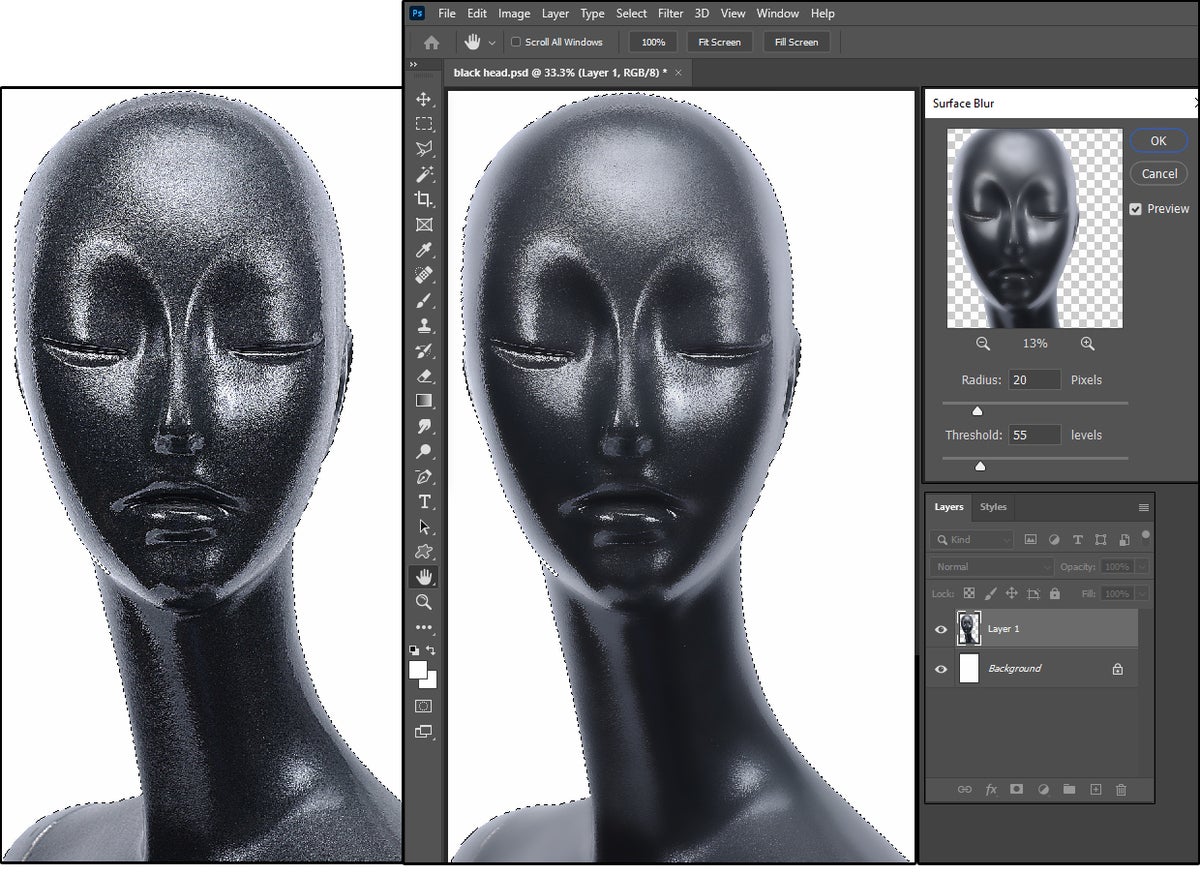
10 The Surface Blur can clean out even the roughest surfaces.
There actually isn’t any proper or mistaken solution to apply blurring results. The greatest recommendation I can supply is to experiment with the 11 totally different types till you discover one which works for you or your consumer.
IMPORTANT NOTE: Use the Text instrument in Photoshop to make notes on the settings you utilized to every Blur filter. Save the information right into a “Filter” folder so you may revisit them later when one other, related task comes up.