
For me, the Steam Deck’s “a-ha” second got here once I found out the right way to play the PC model of Stranglehold and not using a mouse and keyboard.
The John Woo-produced, considerably underappreciated third-person shooter didn’t embrace controller help when it launched on Windows in 2007 and neither did the re-release on GOG just a few years in the past. That and another odd show points saved me from ever giving it a attempt on my gaming PC.
But after sideloading the sport by means of Steam Deck’s desktop mode, Valve’s button remapping device saved the day. This Steam Deck function is so intensive that you would be able to get virtually any recreation to work nicely with the transportable console’s thumbsticks, triggers and buttons, and I’ve since used it to breathe new life into different outdated PC video games as nicely.
Here’s an in-depth information to all the pieces Steam Deck’s button remapping can do:
How to search out the Steam Deck’s button remapper
Jared Newman / Foundry
Once you’ve loaded a recreation on the Steam Deck, hit the Steam button, choose “Controller Settings,” then press the A button once more.
Scroll down from right here and also you’ll discover some fast settings akin to Y-Axis inversion and sensitivity ranges for the mouse and trackpad. Keep in thoughts that these are unbiased of the in-game management settings, so I might solely make changes right here if the sport itself doesn’t supply them.
Still, these fast settings solely trace at what’s attainable. To actually benefit from Steam Deck button mapping, you’ll have to create your personal structure. Pick a PC recreation out of your library with poor or non-existent controller help, then learn on for particulars.
Creating a Steam Deck controller structure: The fundamentals
Jared Newman / Foundry
Before constructing your personal Steam Deck controller structure, you must go to the sport’s management menu first. Using your cellphone, take photos of the sport’s keyboard and mouse assignments so you possibly can reference them alongside the best way. Trust me, this can make the remapping course of a lot much less tedious.
For this tutorial, I’m going to make use of F.E.A.R. for example, because the first-person shooter format does a fantastic job demonstrating all the pieces you are able to do with button remapping. (That, and I’ve been desirous to get the sport off my backlog anyway.)
Here’s an outline of how remapping works:
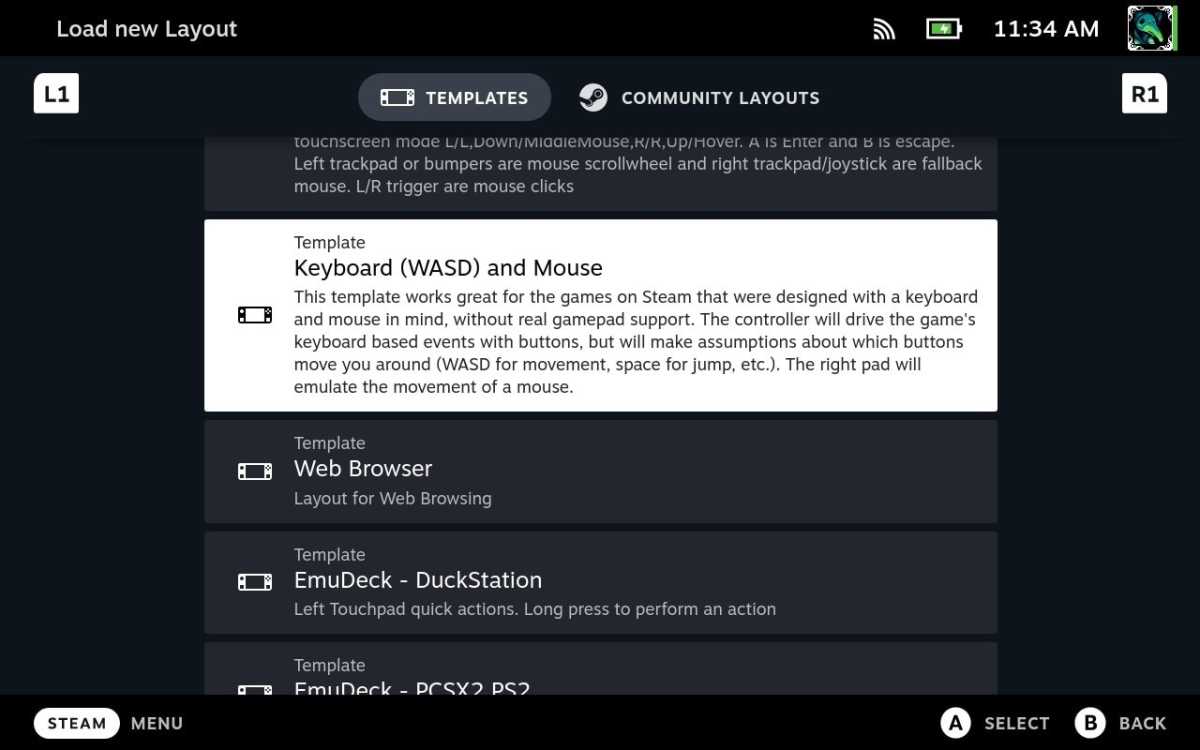
- From the Controller Settings menu, choose the present structure, then choose the Templates menu.
- Scroll down and choose “Keyboard (WASD) and Mouse.” This maps the left keep on with the WASD keys and emulates mouse motion with the fitting stick.
- From the Controller Settings menu, choose Edit Layout.
- Use the left sidebar to decide on between the bodily controls in your Steam Deck.
- Use the right-hand menu to assign instructions to these controls.
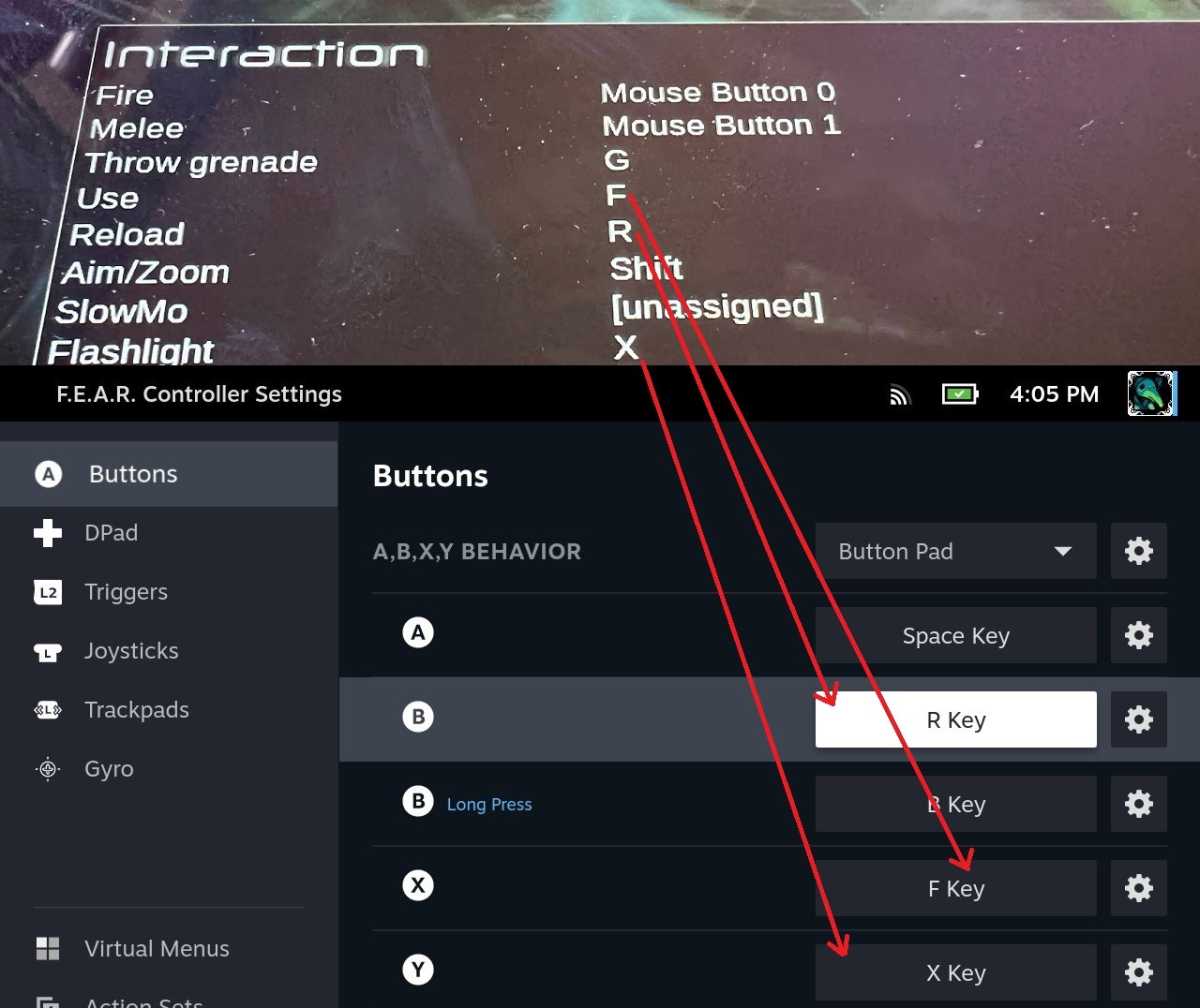
Jared Newman / Foundry
In the picture above, I’ve set the Steam Deck’s face buttons to correspond with keyboard instructions for some widespread actions in F.E.A.R., together with Jump, Use, Flashlight, and Reload. (We’ll get into the long-press conduct later.)
Once you’ve mapped these face buttons, you possibly can transfer on down the left sidebar to map the Steam Deck’s thumbsticks, triggers, D-Pad, trackpads, and rear buttons. You can map these controls to just about something, together with mouse buttons, the scroll wheel, and even system actions just like the screenshot operate.
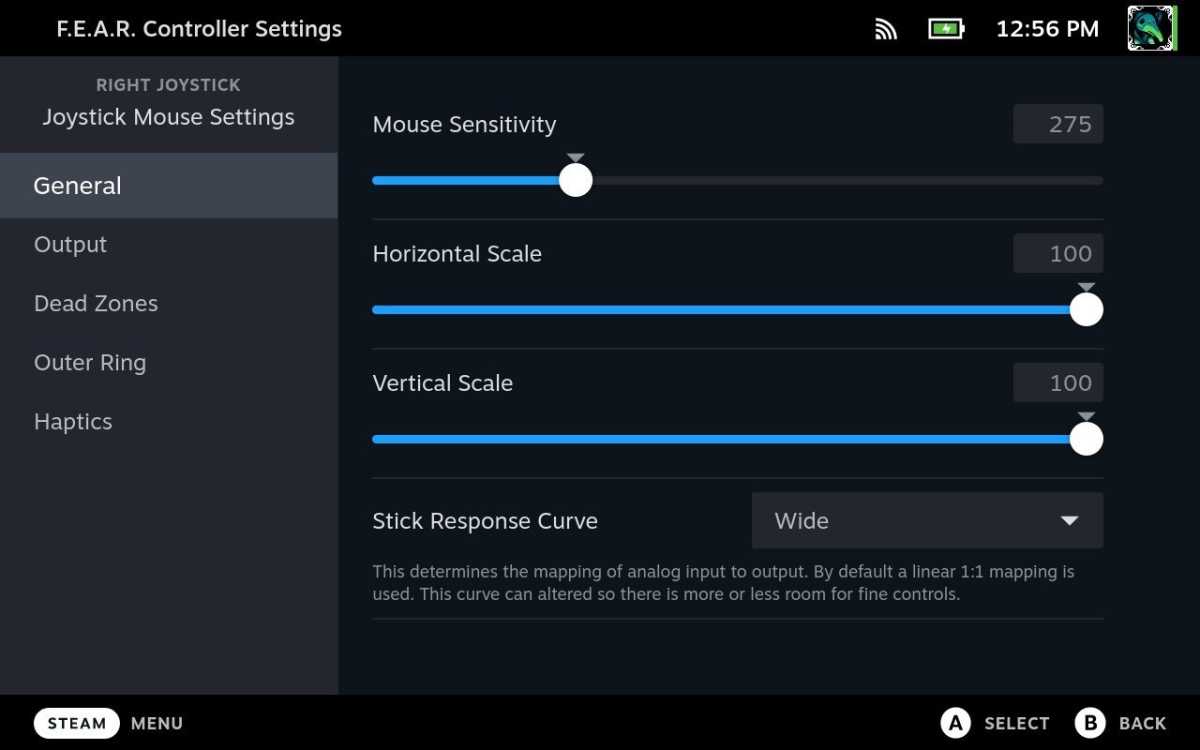
While most of that is fairly simple, pay particular consideration to the Joysticks tab, and specifically the ⚙ gear icon subsequent to “Right Joystick Behavior.” From right here you possibly can regulate the sensitivity, scale, and lifeless zone for mouse emulation, which is particularly helpful when mapping first- and third-person shooters. You’ll seemingly have to fine-tune the delicate as you go, however you are able to do this later by means of the fast settings menu.
Jared Newman / Foundry
Once you’ve configured all the pieces to your liking, return to the Controller Settings menu and the ⚙ gear beneath your structure. From right here you possibly can both select “Export” to avoid wasting the structure in your gadget or “Share” to add it for folks to make use of as nicely. (More on that shortly.)
Jared Newman / Foundry
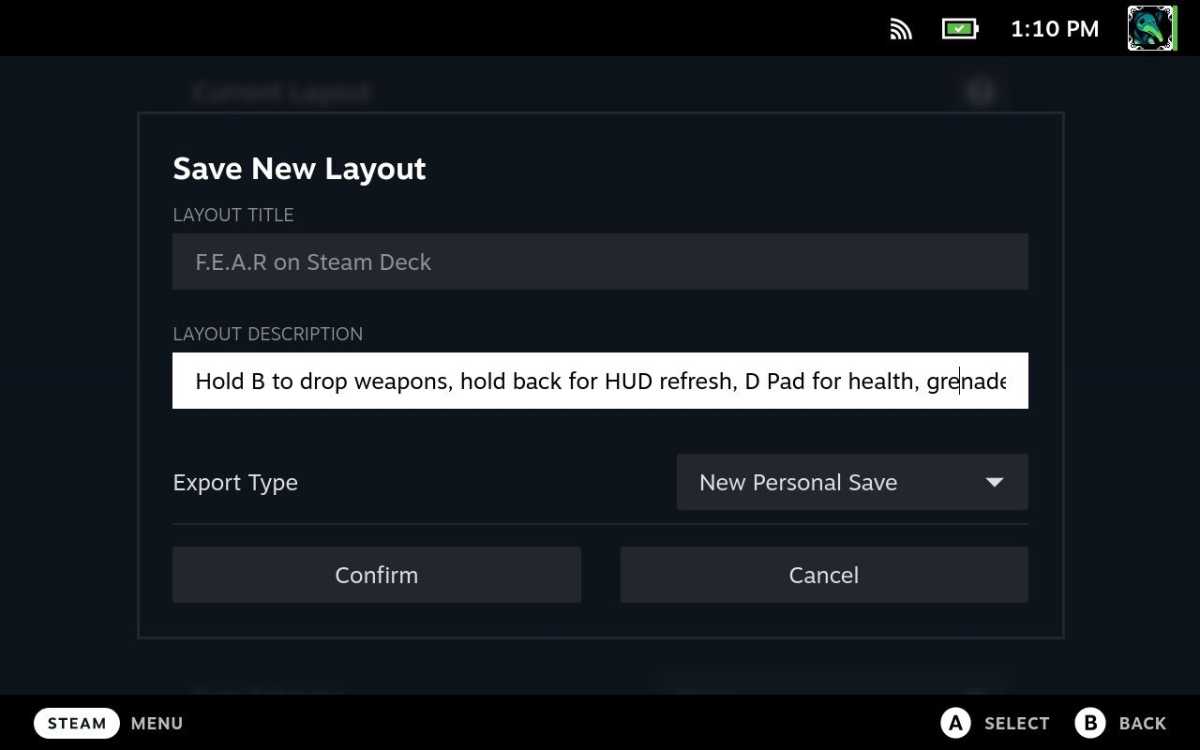
Give your structure a reputation and an outline, then put it aside. It’ll seem within the “Your Layouts” tab on the structure choice display, so you possibly can all the time come again to it even when you fiddle with different management schemes.
Advanced Steam Deck mapping choices
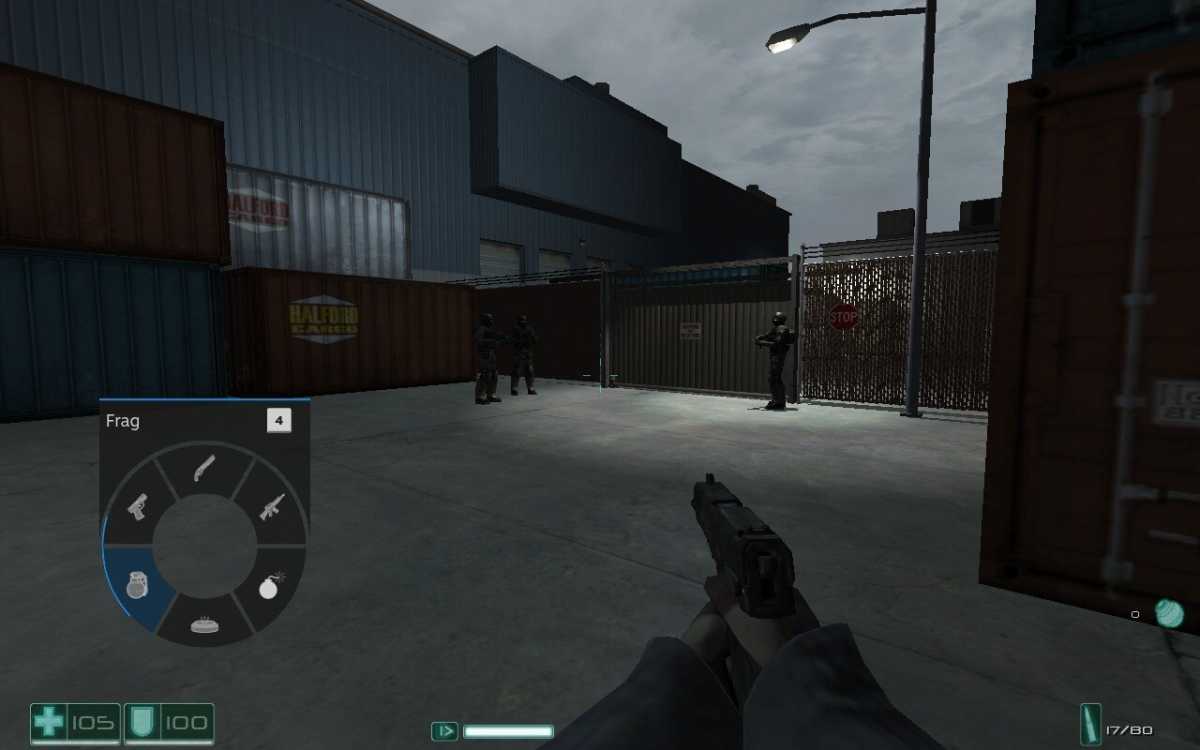
Yes, the Steam Deck enables you to roll your personal radial weapon selector.
Jared Newman / Foundry
The enjoyable doesn’t cease there. Valve additionally gives just a few superior methods to optimize your PC video games for the Steam Deck controller:
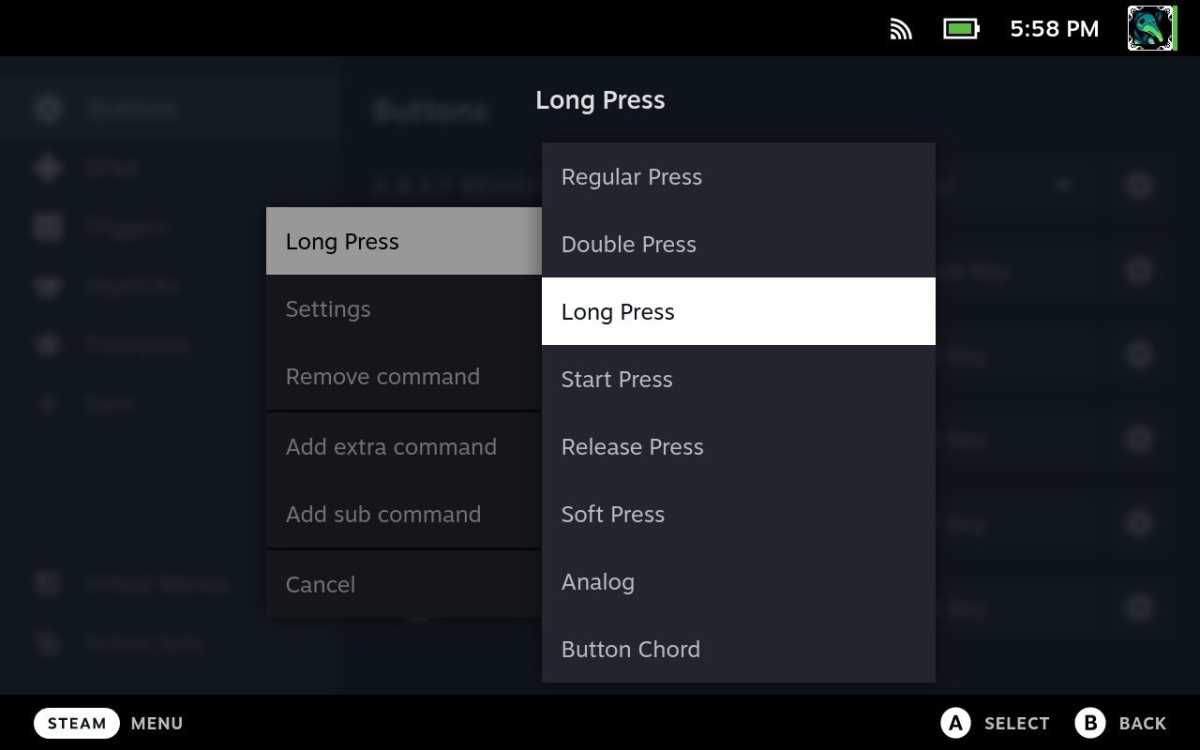
Secondary instructions: For video games the place a easy button press isn’t sufficient, you possibly can map extra key bindings behind a long-press or double-press. You may map separate bindings for while you maintain and launch a button—good for shooters that toggle the ironsights with a set off button while you’d want to carry it down as an alternative.
- Hit the ⚙ gear subsequent to any button and choose “Add Extra Command.”
- Choose which button to map it to, then hit the ⚙ gear subsequent to the brand new command and choose “Regular Press.”
- Choose to map the additional command to a long-press, double-press, maintain, or launch.
Jared Newman / Foundry
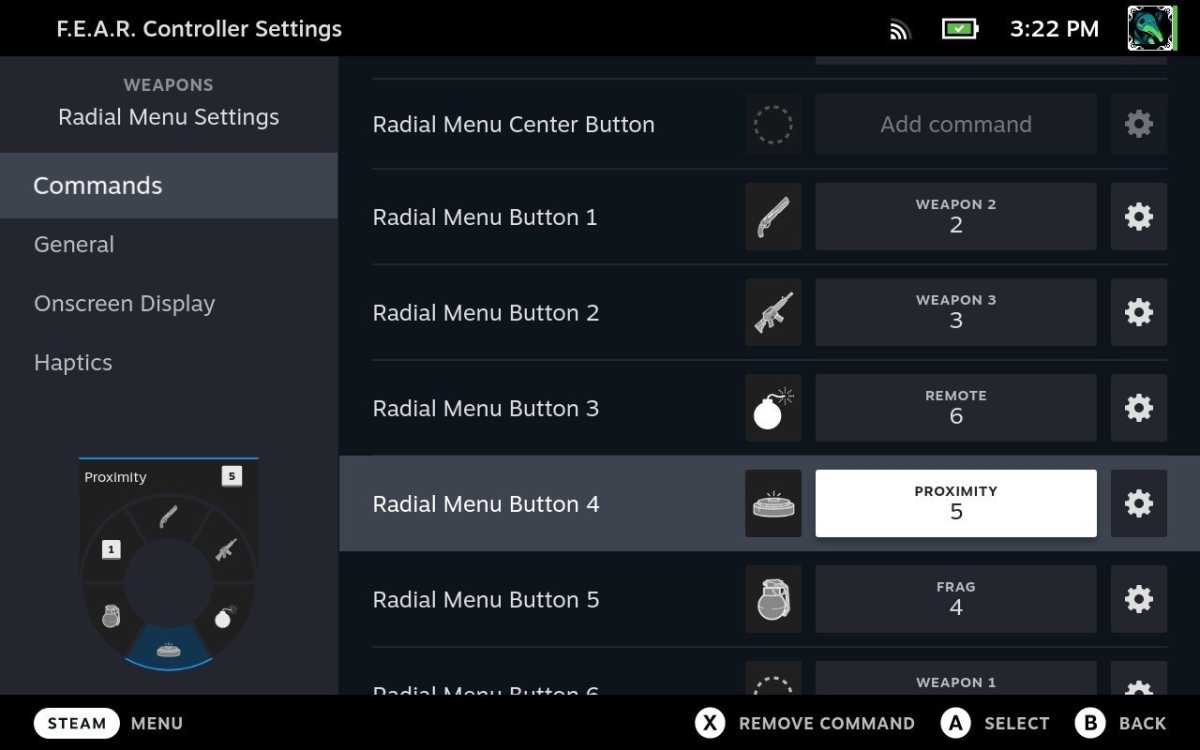
Virtual menus: This extraordinarily neat trick enables you to create your personal radial menus for the touchpad, directional pad, or thumbsticks, full with visible overlays that seem within the recreation. It particularly is useful for shooters or MMORPGs the place you’d usually change between weapons by means of the quantity row.
- From the structure display, head to Virtual Menus, then choose “Add Virtual Menu.”
- Give it a reputation that’ll enable you determine it later, akin to “F.E.A.R. Weapon Selector.”
- Choose the kind of menu you wish to create. Radial works finest with the touchpad or thumbsticks, Touch Menu is only for the touchpad, and Hotbar is especially for biking by means of gadgets with the D-Pad.

Jared Newman / Foundry
- Hit the pencil button subsequent to the newly-created menu.
- Hit “Add Command,” and select the important thing you’d prefer to assign.
- Use “Add Virtual Menu Entry” to create extra gadgets within the menu.
- Use the dotted circle subsequent to every button to pick out an icon for every merchandise. These icons will seem within the overlay through the recreation.
Jared Newman / Foundry
- Optionally use the ⚙ gear subsequent to every button and choose “Rename Command” to offer it a reputation that may seem on display as nicely.
- Finally, return to the primary remapping menu and assign a Steam Deck management technique to the Virtual Menu. For occasion, you possibly can head to Trackpads, faucet the drop-down subsequent to “Left Trackpad Behavior,” and select your newly-created menu from the record.
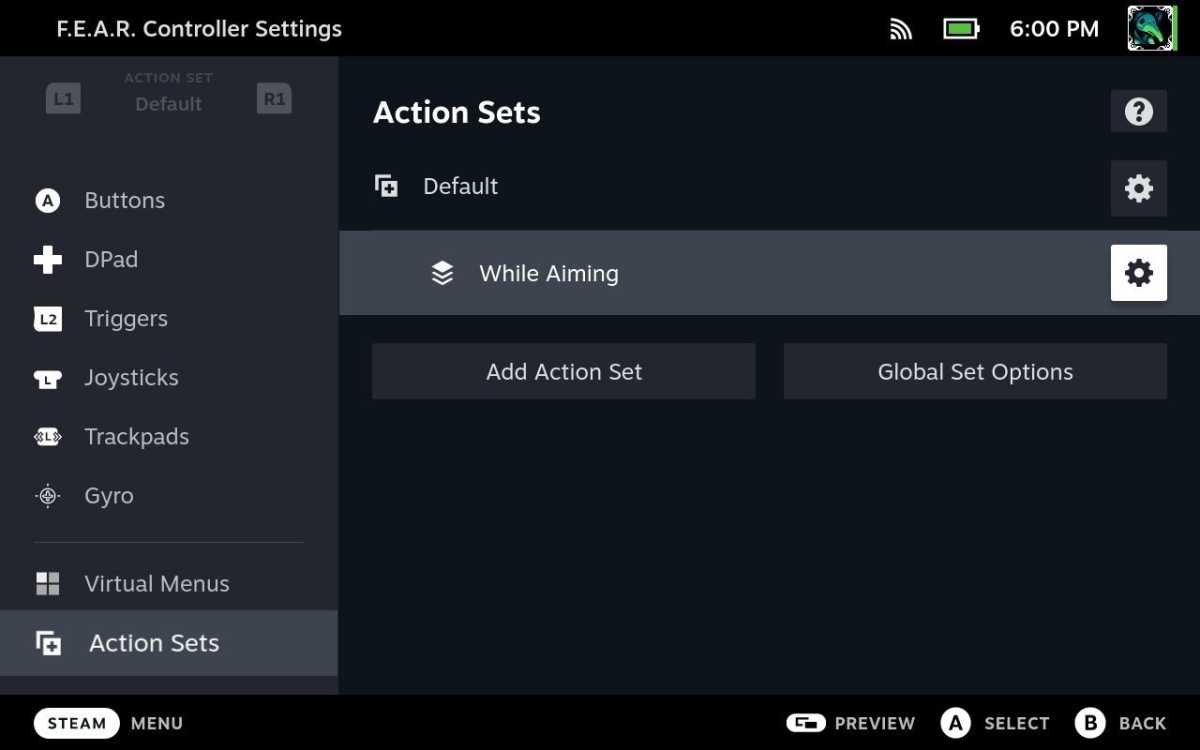
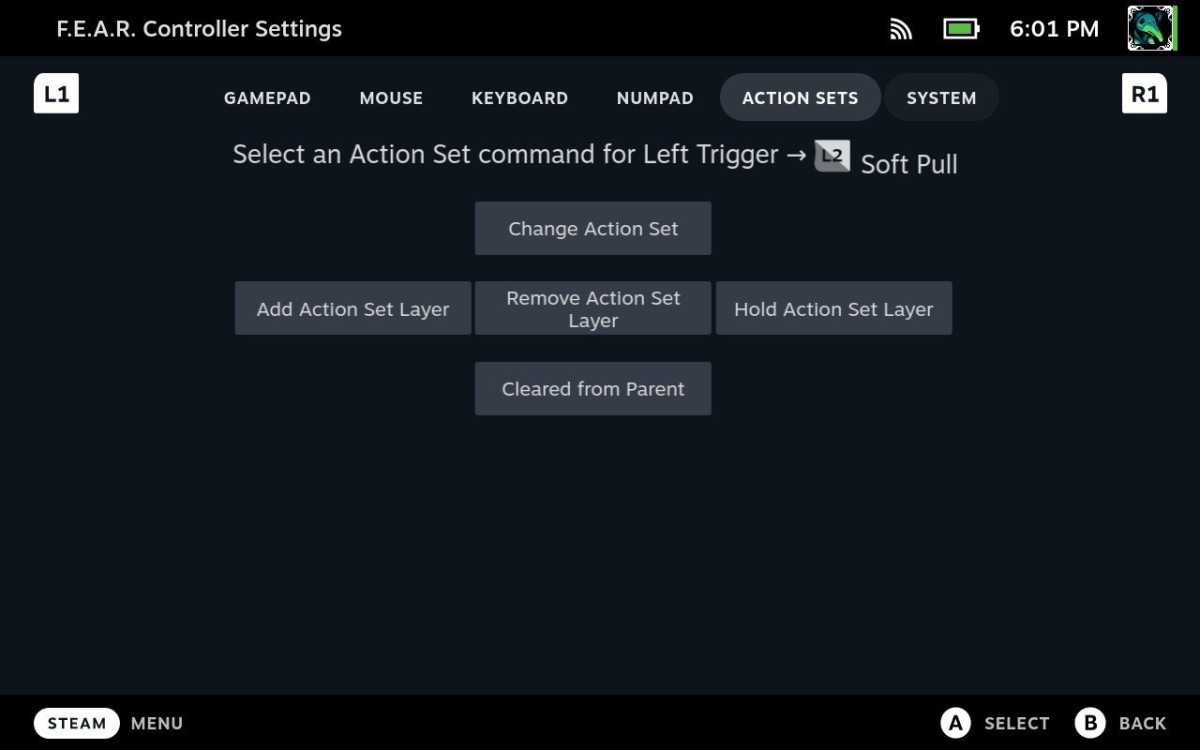
Action units: This enables you to change to a distinct management scheme in response to a button press. A fantastic instance is decreasing the joystick-to-mouse sensitivity when wanting down the sights in a first-person shooter. Here’s the right way to set that up:
- In the remap menu, head to Action Sets.
- Select the ⚙ gear subsequent to “Default” and choose “Add Layer.”
- Give the layer a reputation, akin to “While Aiming.”
Jared Newman / Foundry
- In the Trigger menu, hit the ⚙ gear subsequent to “Soft Pull” and choose “Add sub command.”
- Hit “Add command” to carry up the management choice display.
- Navigate to the “Action Sets” tab and choose “Add Action Set Layer.”
Jared Newman / Foundry
- Select the “While Aiming” Action Set, disable the 2 blue toggles, and hit “Confirm.”
- Return to the remap menu and hit R1 in order that “While Aiming” seems within the top-left of the display.
- In the Trigger menu, hit “Add Command” subsequent to “Soft Pull.”

Jared Newman / Foundry
- Navigate to the “Action Sets” tab and choose “Remove Action Set Layer.”
- Select the “While Aiming” Action Set and hit “Confirm.”
- In the Joysticks menu, hit the ⚙ gear subsequent to “Right Joystick Behavior,” then decrease the mouse sensitivity.
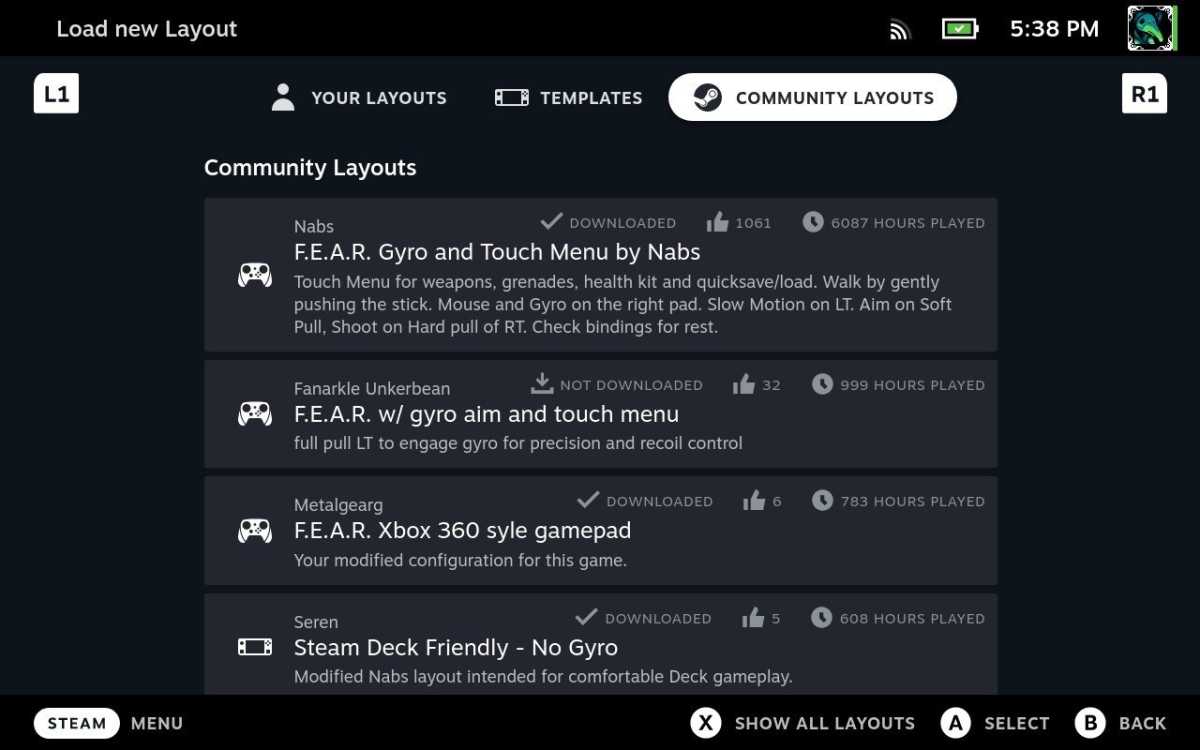
If all that simply seems like an excessive amount of work for the sake of play, there’s a shortcut: Just choose one of many Community Layouts that different gamers have created. You’ll discover this by clicking in your structure within the Controller Settings web page, then heading to the “Community Layouts” tab.
Jared Newman / Foundry
The drawback with group layouts is that you just by no means know what you’re going to get, and I’ve seen some actually horrendous layouts even for video games with simple management schemes. Community layouts could be a good place to begin, however it’s nonetheless price understanding the button remapper so you can also make your personal changes or begin from scratch if want be.
While that is admittedly loads to absorb, a little bit experimentation is all it takes to get hooked. When all the pieces clicks, you’ll notice you possibly can create the right structure for just about any recreation on the Steam Deck, irrespective of how complicated the management scheme.
Now, excuse me whereas I determine the right way to arrange X-Wing.