
There are varied explanation why Windows doesn’t begin. The first assumption is a defect within the boot setting that stops the system from beginning. However, causes can be a faulty file system, faulty system information, or a {hardware} drawback.
Errors manifest themselves in another way relying on the trigger. If the display stays utterly black after you have got switched on the PC or laptop computer, there’s most likely a {hardware} fault.
If a brand or messages from the firmware seem however then nothing occurs, the PC is clearly attempting to begin the system however can’t discover an working system.
If the boot loader or system information are defective, the automated restore will often begin. Windows then makes an attempt to rectify the defect, however this isn’t at all times profitable. However, the issue will be solved with a guide restore.
1. The phases of Windows startup
To discover the error, first decide during which section of the system startup it happens. There are 4 phases in complete:
1. When you turn on the pc, the firmware searches for a bootable drive. On present gadgets, that is the UEFI partition (Unified Extensible Firmware Interface) during which Windows has positioned the boot supervisor throughout set up.
The partition is 100MB in dimension and formatted with the FAT32 file system. Devices from the Windows XP or 7 period have a bootstrap code within the MBR (Master Boot Record) of the exhausting drive. Windows 10 and 11 don’t use a tough drive with an MBR partition by default, which is why we is not going to talk about this additional on this article.
If an error happens on this section, you will notice a message on a black background, for instance “Boot failure,” “No bootable device found,” “Failed to load Windows Boot Manager,” or related.
2. The UEFI firmware masses the Windows boot supervisor from the file “EFIMicrosoftBootbootmgfw.efi” from the UEFI partition. This reads the configuration from the file “EFIMicrosoftBootBCD” (Boot Configuration Data). This comprises data on the Windows set up location (exhausting drive and partition) and a reference to the file “Windowssystem32winload.efi.”
If errors happen on this section, the automated restore will begin or you’ll obtain a message on a blue background with additional data or directions.
3. Winload.efi is the system-loading program. It masses drivers after which the Windows kernel. During this section, you will notice the Windows brand signaling the beginning of the system.
4. The Windows kernel prompts different drivers and companies which might be configured within the Windows registry. The kernel is the precise working system and is accountable for managing {hardware} elements, important reminiscence, and sources. It arms over management to the session supervisor (Smss.exe).
Errors in section 3 or 4 additionally result in computerized restore or show a message on a blue background (“blue screen”).
Windows begins the automated restore perform if there are start-up issues. However, this doesn’t resolve all errors and repairs have to be carried out manually.
Foundry
2. Check the firmware settings earlier than repairs
You ought to first examine whether or not the firmware has acknowledged the drive, whether or not the boot sequence is right, and whether or not the Windows boot supervisor has a boot entry.
Carry out this examine for errors in section 1, however it’s also at the very least informative for errors in different phases.
Depending on the pc, you may entry the BIOS/firmware setup with keys akin to Esc, F1, F2, F10, F12 or ENTF, which you press shortly after switching on. If the automated restore begins however was unsuccessful, you may entry the restore system by clicking on “Advanced options.”
For some errors, Windows additionally provides you to begin the restoration setting through the F1 key. You can even entry the firmware setup through “Troubleshooting > Advanced options > UEFI firmware settings.”
Every pc’s configuration interface seems to be totally different, and laptops often don’t supply many settings. Under a menu akin to “Advanced,” for instance, you can see settings akin to “M.2 SSD Ports” (NVMe) and “SATA Ports.”
Make positive that the ports used are activated (“Enabled”). The firmware often additionally lists the linked drives on the identical web page. If no drives are displayed, proceed studying in level 6.
Check the boot sequence below a menu akin to “Boot.” “Windows Boot Manager” must be within the first place. If this entry doesn’t seem, the firmware has not discovered the EFI partition or the Windows boot supervisor.
The firmware of desktop PCs provides considerably extra settings and is correspondingly complicated. The choices for NVMe and SATA ports, for instance, will be discovered below menus akin to “Settings” or “Advanced.” Boot gadgets and boot choices are often displayed below a menu akin to “Boot.” Make positive that each one vital ports for drives are activated and that “Windows Boot Manager” is within the first place within the boot sequence.
If the firmware shows the system drive and “Windows Boot Manager” is accessible as a boot choice, the necessities for beginning Windows have been met. In the following step (level 3), discover out whether or not entry to the file system is feasible and whether or not the Windows boot information can be found (level 4).
Further studying: Deep clean your Windows PC: 10 professional tricks and tools
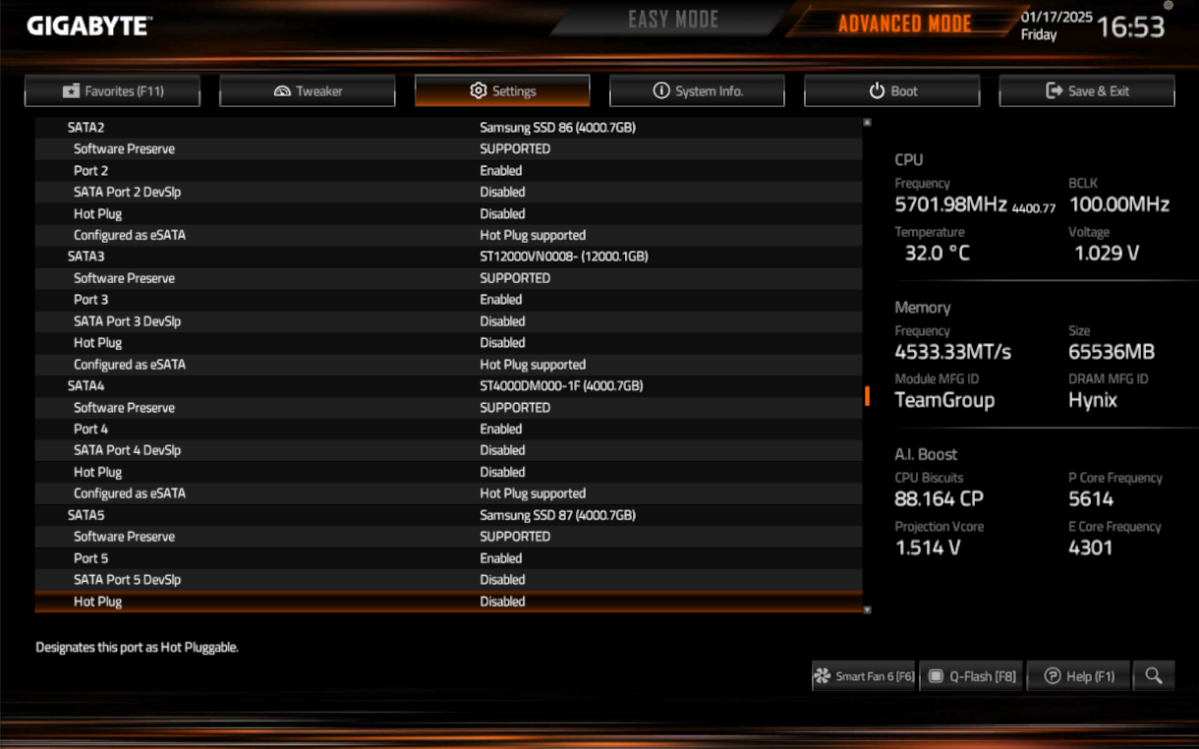
For Windows to have the ability to use a tough disk or SSD, it should first be acknowledged by the PC’s firmware. This will be checked within the firmware setup.
IDG
3. Examine the scenario on the exhausting drive
As Windows not begins, you will have a secondary or restore system that you need to use to entry the exhausting drive. You can use the Windows set up system, which you boot from a USB stick.
It just isn’t solely used to put in Windows, but additionally provides a minimal Windows (WinPE, Preinstallation Environment) that can be utilized for evaluation and repairs. If you wouldn’t have a stick ready on this manner, you will have one other PC to create it.
Download the Microsoft Media Creation Tool for Windows 10 or for Windows 11 or alternatively the ISO file for Windows 11 (below the heading “Download Windows 11 drive image (ISO) for x64 devices”). Then create the USB follow Rufus. The Windows 11 system can be used to restore Windows 10.
Further studying: 9 tweaks that turn off your Windows PC’s most annoying ads
Change the boot sequence within the firmware setup (see level 2) in order that the system boots from the USB stick. When beginning, the message “Press any key to boot from CD or DVD” seems. Press any key to activate the boot from the USB stick.
After beginning, you will notice a window with the title “Windows 11 Setup” or “Windows Setup” for Windows 10. Press the important thing mixture Shift-F10 to open a command immediate. Type
c:after which
dirand ensure every time with the Enter key. Sometimes the system drive is given a special letter. In this case, strive “D:” and “E:” as an alternative of “C:”.
The dir command lists the information and directories. The typical folders “Program Files” and “Windows” must be seen on the system drive. If you obtain an error message as an alternative, entry to the drive just isn’t potential. For additional evaluation, proceed studying in level 6.
Alternatively, enter notepad within the command immediate and ensure with the Enter key. Go to “File > Open” and choose “All files” after “File type.” The “Open” dialog can now be used as a file supervisor and you’ll examine the folders and their contents.
Important word: If you have got encrypted the system partition with Bitlocker, it’s essential to use the restoration key that you simply saved throughout encryption. Without this key, the drive can’t be accessed. This applies thus far, however principally to all entry to the put in system, which we describe within the following factors.
To unlock the drive, use the next command within the command immediate
manage-bde -unlock C: -recoverypassword [recovery key]Replace the placeholder “[recovery key]” with the worth from the file with the saved key.
Further studying: 15 obscure Windows 11 tricks for PC power users
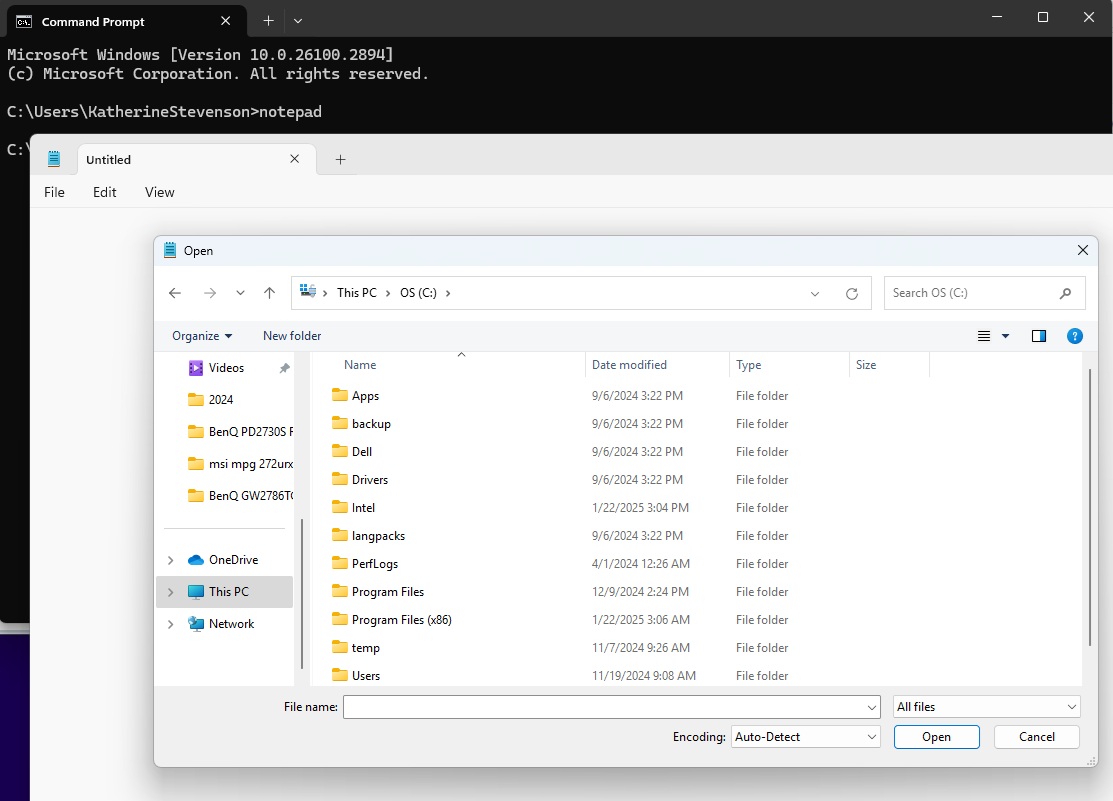
Use the “Open” dialog as a easy graphical interface when accessing the file system
Foundry
4. How to examine the EFI partition
The EFI partition is hidden and Windows doesn’t assign it a drive letter. To change this, enter the next within the command immediate
diskpartwithin the command immediate and ensure with the Enter key.
Use checklist disk to show the drives and choose the system drive with sel disk 0, for instance. Use checklist vol to show the volumes. The EFI partition is formatted with the “FAT32” file system and is roughly 100MB in dimension.
If the EFI partition is named “Volume 2,” for instance, mount it as drive “B:” with the next two instructions:
sel vol 2assign letter=b:
Press exit to depart Diskpart.
Start Notepad through the command immediate and go to “File > Open.” Click on “This PC” and navigate to drive “B:”. Set “All files” behind “File type.” Go to the folder “EfiBoot” during which the file “bootx64.efi” have to be positioned.
Then open the folder “EfiMicrosoftBoot.” Here you can see the “BCD” file with the boot configuration, in addition to the “bootmgfw.efi” and “bootmgr.efi” information of the Windows boot supervisor. If these folders or information usually are not current, Windows can’t begin.
5. To restore the Windows boot setting
Execute the next command line within the command immediate
bcdboot C:Windows /l de-de /s b: /f UEFIReplace the drive letter “C:” with the letter beforehand decided in level 3. Restart the pc. The UEFI boot setting ought to then work once more.
Alternative methodology: Boot the PC from a USB follow the Windows set up system. For Windows 11, choose the language settings and the keyboard settings and click on on “Next.”
Then choose the “Repair my PC” choice, click on “Next” and choose the specified language once more. Windows 10 customers click on on “Next” after which on “Computer repair options.” Go to “Troubleshoot > Startup help” after which to the system you wish to restore.
However, the “Startup help” just isn’t at all times profitable. The methodology described above utilizing the command immediate often works extra reliably.
6. Problem accessing the exhausting drive
If the PC firmware doesn’t show the system drive, there’s a {hardware} drawback. Here is a brief guidelines:
- Are all cables firmly linked to the PC, akin to the ability cable and the cable from the graphics card to the monitor?
- Are the cables contained in the PC firmly plugged into the designated connections? Cables might have come free after transporting the system.
- Are there any uncommon noises coming from the exhausting drive? Clicking noises or loud whirring point out a faulty drive.
- Disconnect all USB gadgets besides the keyboard and mouse from the PC. If there are different exhausting drives within the PC, disconnect them as effectively. If solely the system exhausting drive is linked, different sources of error will be dominated out.
- Switch off the system utterly. Disconnect it from the ability provide for a while earlier than switching it on once more.
If the firmware has acknowledged the drive, strive an unbiased second system. A Windows-based rescue system is right, akin to Win10XPE. It makes use of WinPE just like the Windows set up system, however with a desktop interface and extra instruments. You create Win10XPE on one other PC, however this takes lots of time.
An various is a Linux dwell system that may additionally entry drives formatted with the NTFS or FAT32 file system. Suitable, for instance, is Ubuntu, which you’ll set up with Rufus onto a USB stick after which boot.
However, even a second system can’t entry a destroyed file system or a faulty exhausting drive. But it might nonetheless be potential to get well vital information.
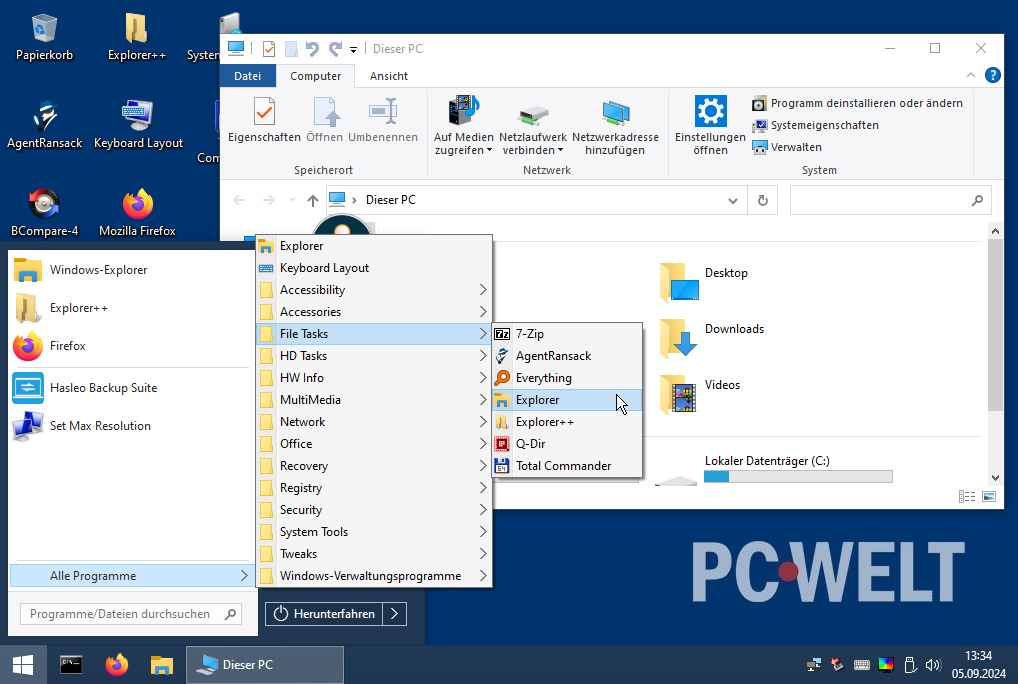
A rescue system akin to Win10XPE provides quite a few instruments for analyzing and repairing a Windows system. However, it’s important to create the rescue system your self.
IDG
7. Repair vital system information
Even if the boot setting is okay, Windows might refuse to begin. Windows will then try to begin, however will abort with an error message on a blue background. In this case, system information or the Windows registry are most likely broken.
The Windows set up system can even assist right here. First strive the beginning assist perform as described in level 5. If this has no impact, go to “Troubleshoot” after which to “Restore system.”
Follow the wizard’s directions to revive the system to a earlier restore level. Windows and a few setup applications mechanically create a restore level earlier than making main modifications to the system.
A system that has been in operation for a while ought to subsequently have a number of restore factors. After the restore, nonetheless, you’ll have to reinstall updates and software program that had been added after the time limit at which the restore level was created.
Carry out a guide restore: The System File Checker (SFC) can be utilized to examine and restore vital system information. This additionally works within the command immediate of the Windows set up system. Use the next command line:
sfc /scannow /offbootdir=C: /offwindir=C:Windows /offlogfile=C:Log.txtThe drive letter might differ. Determine it as described in level 3.
8. Reset Windows or reinstall
If errors happen in phases 2 to 4 (see level 1), the automated restore begins. If this doesn’t resolve the error any greater than the opposite measures on this article, click on on “Advanced options” to entry the WinRE (Windows Recovery Environment) restore system.
Go to “Troubleshooting,” then to “Reset this PC” and click on on “Keep my files.”
You can now select between two choices:
- “Cloud download”: installs the newest model of Windows from the Internet, which takes somewhat longer.
- “Local reinstallation”: Uses information saved on the exhausting drive.
Follow the additional directions of the wizard.
The prerequisite for this perform is that WinRE is appropriately put in and will be began. If not, the one choice is to reinstall Windows utilizing the Windows set up medium. Create backup copies of vital information beforehand utilizing a second system (see level 6).
If the exhausting drive or SSD is flawed, this is not going to assist both. You will want a brand new drive on which to reinstall Windows. Personal information will be restored from a backup whether it is out there.
This article initially appeared on our sister publication PC-WELT and was translated and localized from German.